Of course! Using Python with HBase via the Thrift API is a common pattern, especially in environments where you can't use the native Java HBase client (like many data science or web service stacks).

Here's a comprehensive guide covering everything from the setup to a complete, runnable Python example.
Overview: How it Works
- HBase Server: You have a running HBase cluster.
- HBase Thrift Server: This is a separate process that runs on your HBase cluster (or a gateway machine). It acts as a proxy or gateway, translating Thrift RPC calls into native HBase Java API calls.
- Python Client: Your Python application uses a Thrift library (like
thrift) to make network calls to the HBase Thrift Server. - Thrift IDL (Interface Definition Language): This file (
Hbase.thrift) defines all the possible operations (likeget,put,scan, etc.). The Thrift compiler uses this file to generate Python stub code that makes the network communication easy.
Step 1: Prerequisites
- A Running HBase Cluster: You need an active HBase installation. This can be a standalone setup for development or a full distributed cluster for production.
- Java Development Kit (JDK): The Thrift server runs on the JVM, so you need Java installed.
- Thift: You need the Thrift compiler installed on your machine to generate the Python bindings if you're doing a custom build. However, for HBase, you usually get pre-compiled Thrift libraries.
Step 2: Setting up the HBase Thrift Server
This is the most critical step. If the server isn't running, your Python client will fail to connect.
-
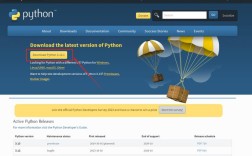
Download HBase: If you haven't already, download the latest stable HBase release from the Apache HBase website.
-
Start the Thrift Server: Navigate to your HBase directory and run the thrift server script.
 (图片来源网络,侵删)
# Go to your HBase installation directory
cd /path/to/hbase
# Start the Thrift server
# The 'nonblocking' option is generally recommended for better performance
bin/hbase-daemon.sh start thrift --infoport 9095 --nonblocking
--infoport 9095: Sets an optional port for JMX monitoring.--nonblocking: Runs the server in a non-blocking mode, which is more efficient under high load.
-
Verify the Server is Running:
- Check the HBase logs for any startup errors.
- Use
jpson the server machine to see the Java processes. You should see aHBaseThriftprocess.
jps
# Output should include:
# 1234 HRegionServer
# 5678 HMaster
# 9012 HBaseThrift
-
Check the Port: The default Thrift port is
9090. You can check if it's listening withnetstatorss.# On Linux sudo netstat -tuln | grep 9090 # Or ss -tuln | grep 9090
Step 3: Setting up the Python Environment
You need to install the Python Thrift library. The thrift-sasl library is highly recommended as it simplifies handling SASL authentication, which is common in secure Hadoop clusters.
pip install thrift
pip install thrift-sasl
Step 4: The Python Client Code
Now for the fun part! Here is a complete, commented Python script that connects to the HBase Thrift server and performs basic CRUD (Create, Read, Update, Delete) operations.

First, make sure you have a table named python_test in HBase with a column family named cf. You can create it with the HBase shell:
# In the HBase shell
create 'python_test', 'cf'
Now, save the following code as hbase_thrift_client.py:
import sys
import struct
from thrift.transport import TSocket, TTransport
from thrift.protocol import TBinaryProtocol
from thrift_sasl import TSaslClientTransport
# The generated Python code from the Hbase.thrift file
# You usually find this in the HBase lib directory.
# If you don't have it, you can generate it with the thrift compiler.
# For simplicity, we'll assume it's in the same directory or PYTHONPATH.
from hbase import THbase
from hbase.ttypes import TTableName, TColumnDescriptor, TColumn, TGet, TPut, TScan
# --- Configuration ---
# Host and port of your HBase Thrift server
HOST = 'localhost'
PORT = 9090
# Name of the table and column family you want to use
TABLE_NAME = 'python_test'
COLUMN_FAMILY = 'cf'
def main():
    """
    Main function to demonstrate HBase Thrift operations from Python.
    """
    # 1. Setup the Thrift transport and protocol
    # The SASL transport is recommended for secure clusters.
    # For non-secure clusters, you can use:
    # transport = TSocket.TSocket(HOST, PORT)
    # transport = TTransport.TBufferedTransport(transport)
    transport = TSaslClientTransport(
        lambda: TSocket.TSocket(HOST, PORT),
        mechanism='PLAIN',
        server_name='hbase' # This should match the service principal in a Kerberos setup
    )
    protocol = TBinaryProtocol.TBinaryProtocol(transport)
    client = THase.Client(protocol)
    # 2. Open the transport
    try:
        transport.open()
        print("Successfully connected to HBase Thrift server.")
    except Exception as e:
        print(f"Error connecting to HBase: {e}")
        sys.exit(1)
    # --- Perform Operations ---
    # 3. Put (Insert/Update) data
    print("\n--- Performing PUT operations ---")
    row_key1 = 'row1'
    # Create a TPut object
    put1 = TPut(row=row_key1, columns={})
    # Add a column value
    put1.columns[f'{COLUMN_FAMILY}:data1'] = b'value1_for_row1'
    put1.columns[f'{COLUMN_FAMILY}:data2'] = b'value2_for_row1'
    client.put(TABLE_NAME, put1)
    print(f"Put data for row '{row_key1}'")
    row_key2 = 'row2'
    put2 = TPut(row=row_key2, columns={})
    put2.columns[f'{COLUMN_FAMILY}:data1'] = b'value1_for_row2'
    client.put(TABLE_NAME, put2)
    print(f"Put data for row '{row_key2}'")
    # 4. Get (Read) a single row
    print("\n--- Performing GET operation ---")
    get = TGet(row=row_key1, columns=[f'{COLUMN_FAMILY}:data1'])
    result = client.get(TABLE_NAME, get)
    if result:
        print(f"Got row '{row_key1}':")
        for column, value in result.columns.items():
            # The column name is a TCell object
            print(f"  Column: {column}, Value: {value.value.decode('utf-8')}")
    else:
        print(f"Row '{row_key1}' not found.")
    # 5. Scan (Read multiple rows)
    print("\n--- Performing SCAN operation ---")
    # Create a TScan object
    scan = TScan(
        startRow=row_key1,  # Optional: start scanning from this row
        stopRow=row_key2,   # Optional: stop scanning before this row
        columns=[f'{COLUMN_FAMILY}:data1'] # Optional: specify which columns to fetch
    )
    scanner = client.scannerOpenWithScan(TABLE_NAME, scan)
    results = []
    try:
        while True:
            # scannerGetNext() returns a list of TResult objects
            batch = client.scannerGetNext(scanner)
            if not batch:
                break
            results.extend(batch)
    except Exception as e:
        print(f"Error during scan: {e}")
    finally:
        # It's important to close the scanner!
        client.scannerClose(scanner)
    print(f"Scan found {len(results)} rows:")
    for result in results:
        print(f"  Row: {result.row}")
        for column, cell in result.columns.items():
            print(f"    {column}: {cell.value.decode('utf-8')}")
    # 6. Delete data
    print("\n--- Performing DELETE operation ---")
    # Delete a specific column
    client.deleteAll(TABLE_NAME, row_key1, f'{COLUMN_FAMILY}:data2')
    print(f"Deleted column 'cf:data2' from row '{row_key1}'")
    # Verify the delete
    get_after_delete = TGet(row=row_key1)
    result_after_delete = client.get(TABLE_NAME, get_after_delete)
    print(f"Row '{row_key1}' after delete:")
    if result_after_delete.columns:
        for column, value in result_after_delete.columns.items():
            print(f"  Column: {column}, Value: {value.value.decode('utf-8')}")
    else:
        print("  No columns found.")
    # 7. Close the transport
    transport.close()
    print("\nConnection closed.")
if __name__ == '__main__':
    main()
How to Run the Code
-
Make sure your HBase Thrift server is running (
localhost:9090by default). -
Make sure you have the
python_testtable created. -
Save the code above as
hbase_thrift_client.py. -
Crucially, you need the generated Python stubs. These are usually located in your HBase installation at
hbase-thrift/target/generated-sources/thrift/. You'll need to copy thehbasedirectory (which containsTHase.py,ttypes.py, etc.) into the same directory as your script or add it to yourPYTHONPATH. -
Run the script from your terminal:
python hbase_thrift_client.py
You should see output showing the connection, the operations being performed, and the data being read.
Troubleshooting Common Issues
-
Thrift.TException: TTransportException: Could not connect to localhost:9090- Cause: The HBase Thrift server is not running, or it's running on a different host/port.
- Solution: Check if the server is running with
jpsandnetstat. Verify theHOSTandPORTvariables in your Python script.
-
ImportError: No module named hbase- Cause: The Python generated stubs (
THase.py,ttypes.py, etc.) are not in your Python's search path. - Solution: Make sure you've copied the
hbasedirectory from the HBase thrift target directory into your project or added its location toPYTHONPATH.
- Cause: The Python generated stubs (
-
TTransportException: TSaslTransport: ... No authentication mechanism specified- Cause: You are trying to connect to a secure (SASL/Kerberos enabled) HBase cluster from a non-secure client.
- Solution: You must use the
TSaslClientTransportas shown in the example. Ensure you have the correctserver_nameand that your environment is set up for Kerberos if required.
-
Performance is slow.
- Cause: Thrift has some overhead. Making many individual
getorputcalls in a loop is very inefficient. - Solution: Use batch operations whenever possible. For bulk inserts, use
client.putMultiple(). For reading, useclient.scannerOpenWithScan()and iterate through the results instead of making individualgetcalls for each row.
- Cause: Thrift has some overhead. Making many individual