Of course! This is a very common and powerful setup for web development on Windows. Using Nginx as a reverse proxy in front of a Python application (like Flask or Django) provides several key benefits:

- Performance: Nginx is excellent at handling static files (CSS, JavaScript, images) and managing incoming connections, freeing up your Python app to focus on dynamic content.
- Security: Nginx can act as a shield, blocking malicious requests and handling SSL/TLS termination (HTTPS) for you.
- Scalability: It's much easier to run multiple Python app instances (workers) behind a single Nginx proxy.
- Simplicity: You can run everything on a single Windows machine without needing a full web server like IIS.
Here is a complete, step-by-step guide to setting up Nginx and a Python application on Windows.
High-Level Architecture
The traffic flow will look like this:
- User makes a request to
http://localhost(orhttps://localhost). - Nginx receives the request on port 80 (or 443 for HTTPS).
- Nginx inspects the request and forwards it to your Python application, which is running on a different port (e.g., 5000).
- Python App (e.g., Flask) processes the request and sends the response back to Nginx.
- Nginx sends the final response back to the User.
Step 1: Install Nginx for Windows
- Download: Go to the official Nginx Windows download page: http://nginx.org/en/download.html
- Get the Latest Version: Download the "mainline version" (e.g.,
nginx-1.25.3.zip). Mainline is the latest and greatest, suitable for development. - Extract: Unzip the downloaded file to a simple location, for example:
C:\nginx. - Run Nginx:
- Open a Command Prompt or PowerShell as an Administrator.
- Navigate to the Nginx directory:
cd C:\nginx - Start Nginx by running the executable:
start nginx.exe
You should now see two new nginx processes in your Task Manager. To check if it's working, open your web browser and go to http://localhost. You should see the "Welcome to nginx!" page.
Basic Nginx Commands (run from C:\nginx directory):

nginx -s stop: Fast shutdownnginx -s quit: Graceful shutdown (waits for workers to finish)nginx -s reload: Reloads the configuration file (gracefully)nginx -s reopen: Reopens log files
Step 2: Create a Simple Python Application
We'll use Flask for this example because it's lightweight and perfect for demonstrating the concept.
-
Install Python: If you don't have it, download and install Python from python.org. Make sure to check the box that says "Add Python to PATH".
-
Install Flask: Open a new Command Prompt (no admin needed for this) and install Flask:
pip install Flask
-
Create the App: Create a new folder for your project, e.g.,
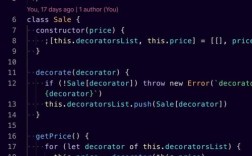
C:\my-python-app. Inside it, create a file namedapp.pyand paste the following code: (图片来源网络,侵删)
# C:\my-python-app\app.py from flask import Flask, jsonify app = Flask(__name__) @app.route('/') def home(): return "<h1>Hello from Python Flask!</h1><p>This is running behind Nginx.</p>" @app.route('/api/info') def info(): return jsonify({ "message": "This is a JSON API endpoint", "status": "success" }) if __name__ == '__main__': # IMPORTANT: Run on 0.0.0.0 to be accessible from outside # Use a port that is not 80 or 443, like 5000 app.run(host='0.0.0.0', port=5000, debug=True) -
Run the Python App: Open a Command Prompt, navigate to your app directory, and run it:
cd C:\my-python-app
python app.py
You should see output indicating the server is running on
http://127.0.0.1:5000. If you visit that URL in your browser, you'll see the Flask welcome page.
Step 3: Configure Nginx as a Reverse Proxy
Now we'll tell Nginx how to forward requests to our Python app.
-
Find the Config File: The Nginx configuration file is located at
C:\nginx\conf\nginx.conf. -
Edit the File: Open
nginx.confin a text editor (like VS Code or Notepad++). You'll see a lot of default settings. We need to modify theserverblock that listens on port 80. -
Add the Proxy Configuration: Find the
serverblock that starts withlisten 80;. We will add alocationblock inside it to handle requests to our app.Here is a complete, commented
nginx.conffile with the necessary changes. You can replace the entire content of yournginx.confwith this.# C:\nginx\conf\nginx.conf worker_processes 1; events { worker_connections 1024; } http { include mime.types; default_type application/octet-stream; sendfile on; keepalive_timeout 65; # This is our main server block for handling HTTP traffic server { listen 80; server_name localhost; # This block handles all requests that come to the root ('/') location / { # This is the magic: proxy the request to our Python app proxy_pass http://127.0.0.1:5000; # These lines are important for passing headers to the Python app proxy_set_header Host $host; proxy_set_header X-Real-IP $remote_addr; proxy_set_header X-Forwarded-For $proxy_add_x_forwarded_for; proxy_set_header X-Forwarded-Proto $scheme; } # You can also create specific location blocks for API routes # location /api { # proxy_pass http://127.0.0.1:5000; # proxy_set_header Host $host; # } # For static files, you can serve them directly from Nginx for better performance # location /static { # alias C:/my-python-app/static; # Path to your static files # } error_page 500 502 503 504 /50x.html; location = /50x.html { root html; } } # You can add another server block here for HTTPS if needed # server { # listen 443 ssl; # server_name localhost; # ssl_certificate cert.pem; # ssl_certificate_key cert.key; # ... # } } -
Reload Nginx: Save the
nginx.conffile. Now, go to your Administrator Command Prompt (the one you used to start Nginx) and reload the configuration:cd C:\nginx nginx -s reload
You don't need to stop and start Nginx;
reloadgracefully applies the changes.
Step 4: Test Everything
- Make sure your Python app is still running on
http://127.0.0.1:5000. - Make sure Nginx is running.
- Open your web browser and go to
http://localhost.
Expected Result: You should now see the "Hello from Python Flask!" message, not the Nginx welcome page. Nginx successfully proxied your request to the Python app.
- Now, try the API endpoint:
http://localhost/api/info.
Expected Result: You should see the JSON response: {"message": "This is a JSON API endpoint", "status": "success"}.
Congratulations! You have successfully set up Nginx as a reverse proxy for your Python application on Windows.
Troubleshooting
-
"Connection Refused" or 502 Bad Gateway:
- Cause: The most common issue. Nginx is trying to forward the request to
http://127.0.0.1:5000, but your Python app is not running or is on a different port. - Solution: Check that your Flask app is running and listening on port 5000. You can verify this by visiting
http://127.0.0.1:5000directly in your browser.
- Cause: The most common issue. Nginx is trying to forward the request to
-
"404 Not Found":
- Cause: You might have a typo in your
locationblock innginx.confor in your Flask route definition. - Solution: Double-check the spelling in both files. For example, ensure
location /api/in Nginx matches@app.route('/api')in Flask.
- Cause: You might have a typo in your
-
Permission Denied Errors:
- Cause: Nginx might not have permission to access your Python app's files or to bind to a port.
- Solution: Always run Nginx from an Administrator command prompt. Ensure your Python app's files are not in a protected location.