Of course! Let's dive deep into androidhelper, a popular Python library for automating Android devices.

What is androidhelper?
androidhelper is a Python library that acts as a high-level wrapper around the Android Debug Bridge (ADB). ADB is a powerful command-line tool that lets you communicate with an Android emulator instance or a connected Android device.
Think of it this way:
- ADB is the engine and wheels of the car (the raw power and control).
androidhelperis the steering wheel, pedals, and dashboard (the easy-to-use interface).
It simplifies complex ADB commands into simple, intuitive Python functions, making it much easier to write scripts for tasks like:
- Automating UI tests.
- Extracting app data.
- Taking screenshots.
- Installing/uninstalling apps.
- Interacting with the device (clicking, typing, swiping).
Key Features
- High-Level Abstraction: You don't need to remember long ADB commands. You just call methods like
helper.install('app.apk')orhelper.click(x, y). - Cross-Platform: As long as you have ADB installed and configured, your Python script can run on Windows, macOS, or Linux.
- Rich Functionality: Covers a wide range of device interactions, from basic shell commands to complex UI automation.
- Event-Driven: Can listen for device connection events, which is useful for automating workflows that trigger when a device is plugged in.
Installation and Setup
Before you can use androidhelper, you need to set up your environment.

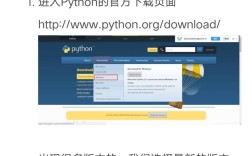
Install Python
If you don't have Python, install it from python.org.
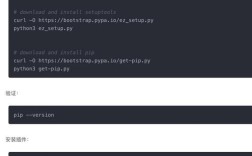
Install ADB
androidhelper relies on the ADB command-line tool being available in your system's PATH.
-
Windows:
- Download the SDK Platform Tools from Google.
- Extract the ZIP file.
- Add the
platform-toolsfolder to your system'sPATHenvironment variable. Here's a guide on how to do that.
-
macOS / Linux:
 (图片来源网络,侵删)
- Install it using Homebrew (easiest):
brew install android-platform-tools
- Or, download it from Google and add it to your
PATHmanually.
- Install it using Homebrew (easiest):
Verify ADB
Open a new terminal/command prompt and run:
adb version
If you see the version information, you're all set!
Install the androidhelper Library
Now, install the Python library using pip:
pip install androidhelper
Connect Your Android Device
- Enable Developer Options: On your Android device, go to
Settings > About Phoneand tap "Build Number" 7 times. - Enable USB Debugging: Go to
Settings > Developer Optionsand toggle "USB Debugging" on. - Connect via USB: Plug your phone into your computer.
- Grant Permission: A prompt will appear on your phone asking if you want to allow USB debugging from this computer. Check "Always allow from this computer" and tap "OK".
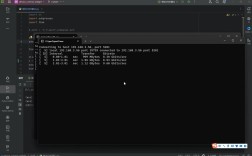
You can verify the connection in your terminal:
adb devices
You should see your device listed with device next to it.
A Simple Code Example
Let's write a script that unlocks the device, opens the Google search app, and takes a screenshot.
import time
from androidhelper import Android
# Create an instance of the Android helper
# It will automatically connect to the first available device
d = Android()
print("Device connected. Let's begin...")
# 1. Unlock the device (simulates swiping up from the bottom)
# This might need adjustment depending on your lock screen.
# A more robust way is to enter a PIN/Password.
print("Unlocking device...")
d.shell("input keyevent KEYCODE_MENU") # A common way to wake up
time.sleep(1) # Wait for the screen to turn on
# 2. Open the Google Search app by its package name
print("Opening Google Search app...")
d.startActivity('com.google.android.googlequicksearchbox')
# 3. Wait for the app to load
print("Waiting for app to load...")
time.sleep(3)
# 4. Take a screenshot
print("Taking screenshot...")
d.screenshot("google_search_screenshot.png")
print("Done! Check the current directory for 'google_search_screenshot.png'.")
# 5. Print some device information
print("\n--- Device Info ---")
print(f"Model: {d.getProperty('ro.product.model')}")
print(f"Android Version: {d.getProperty('ro.build.version.release')}")
Core Methods and Common Use Cases
Here’s a breakdown of what you can do with androidhelper.
App Management
# Install an APK from your computer
d.install('path/to/your/app.apk')
# Uninstall an app by its package name
d.uninstall('com.example.someapp')
# Launch an app by its package name
d.startActivity('com.instagram.android')
# Force stop an app
d.forceStop('com.example.someapp')
UI Interaction (The most powerful feature)
# Click at a specific screen coordinate (x, y)
d.click(500, 1200)
# Swipe from (x1, y1) to (x2, y2) in 200ms
d.swipe(100, 1000, 500, 1000, 200)
# Type text into a text field
d.type("Hello, Android!")
# Press a hardware key (see KeyEvent constants)
d.shell("input keyevent KEYCODE_HOME")
d.shell("input keyevent KEYCODE_BACK")
Device Information & System
# Get a system property (e.g., device model)
model = d.getProperty('ro.product.model')
print(f"Device Model: {model}")
# Get the current device IP address
ip = d.getIp()
print(f"Device IP: {ip}")
# Check if the device is rooted
is_rooted = d.isRooted()
print(f"Is Rooted: {is_rooted}")
File System & Shell Commands
# Pull a file from the device to your computer
d.pull('/sdcard/DCIM/Camera/photo.jpg', './downloaded_photo.jpg')
# Push a file from your computer to the device
d.push('./my_file.txt', '/sdcard/my_file.txt')
# Execute a shell command and get the output
# Note: Use shell() for commands that don't return output directly
output = d.shell("ls /sdcard/Download/")
print("Contents of Download folder:")
print(output.out) # .out contains the stdout
Notifications
# Get a list of all active notifications
notifications = d.notifications()
for notification in notifications:
    print(f"App: {notification['packageName']}, Text: {notification['tickerText']}")
# Clear all notifications
d.clearNotifications()
androidhelper vs. uiautomator2
While androidhelper is great, for modern, complex UI testing, you might consider uiautomator2.
| Feature | androidhelper |
uiautomator2 |
|---|---|---|
| Abstraction Level | High-level wrapper over ADB. | High-level framework that uses ADB and UIAutomator. |
| UI Interaction | Coordinate-based (click(x, y)). This is brittle and breaks on different screen sizes or UI changes. |
Element-based (d(resourceId="com.example:id/submit_button").click()). This is robust and resilient. |
| Setup | Simpler. Just ADB and the library. | More complex. Requires a "HTTP server" to be installed on the device. |
| Best For | Quick scripts, simple automation, interacting with known coordinates. | Robust UI testing, complex workflows, apps with dynamic layouts. |
| Dependencies | adb (external). |
adb (external), requests, pillow (for screenshots). |
Recommendation:
- Use
androidhelperfor simple, quick tasks where you know the screen layout or for non-UI tasks like installing apps or pulling files. - Use
uiautomator2for serious, reliable UI automation and testing where stability across different devices is crucial.
Conclusion
androidhelper is an excellent tool for anyone looking to get started with Android automation using Python. It lowers the barrier to entry by hiding the complexity of ADB. For more advanced and reliable UI testing, be prepared to graduate to a more powerful library like uiautomator2, but androidhelper is the perfect first step.