Of course! Using Python in PyCharm 2025 is a classic setup. While it's an older version, the core principles of using the IDE are still very relevant.

Here’s a comprehensive guide covering everything from installation and setup to best practices for that specific version.
Important Note: PyCharm 2025 is Outdated and Unsupported
Before we dive in, it's crucial to understand the context:
- End of Life (EOL): PyCharm 2025 reached its End of Life in August 2025.
- No Security Updates: It no longer receives any security patches, bug fixes, or compatibility updates.
- Python Compatibility: It will not support modern Python versions (3.8+). It's best suited for Python 3.6 and 3.7.
- Recommendation: For any new project, you should use the latest version of PyCharm. It's free, more powerful, secure, and compatible with modern tools.
However, if you have a specific reason to use 2025 (e.g., maintaining a legacy project, running on an old OS), here's how to make it work.
Part 1: Installation and Initial Setup
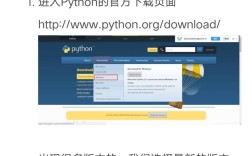
Downloading PyCharm 2025
You can no longer download PyCharm 2025 from the official JetBrains website. You'll need to find it from a reputable source that archives old software.

- A common source is the JetBrains Archive. A quick search for "JetBrains Archive" will lead you to a page where you can find older versions.
- You will need to choose between PyCharm Community Edition (free) and Professional Edition (paid). The setup is nearly identical.
Installing PyCharm
- Run the installer you downloaded.
- Follow the on-screen instructions. The defaults are usually fine.
- On the final step, you'll be asked if you want to "Create Associations." Check the boxes for
.pyfiles to make them open with PyCharm by default.
First-Time Wizard (Creating Your First Project)
When you first launch PyCharm, it will open the "New Project" window. This is the most important step for setting up your environment correctly.
-
Name: Give your project a name (e.g.,
MyLegacyProject). -
Location: Choose where to save your project.
-
New environment using: This is the key setting.
 (图片来源网络,侵删)
- Virtualenv (Recommended): This is the standard and best practice. It creates an isolated environment for your project, preventing dependency conflicts.
- Base interpreter: This is the Python executable you want to use. Click the "..." button to browse for your Python installation. If you don't have Python installed, you can download it from the official Python 3.7 archive.
- System Interpreter: This uses the Python installation already present on your system. This is generally not recommended as it can lead to dependency conflicts if you work on multiple projects.
- Conda: If you use Anaconda, this is a good option.
- Virtualenv (Recommended): This is the standard and best practice. It creates an isolated environment for your project, preventing dependency conflicts.
-
Click Create. PyCharm will now set up your project and virtual environment. This may take a minute.
Part 2: The PyCharm Interface (2025 Layout)
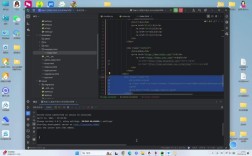
Once your project is created, you'll see the main IDE window with several key areas:
- Editor Window: The large, central area where you write your code.
- Project Tool Window (Left Side): Shows the files and folders of your project. You can expand/collapse directories here.
- Run Tool Window (Bottom): Appears when you run your code. It shows the output of your script (print statements, errors, etc.).
- Python Console (Bottom): An interactive Python shell you can use to run code snippets on the fly.
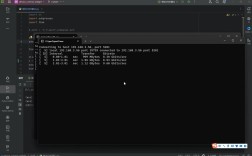
- Terminal (Bottom): A command-line interface that opens inside PyCharm. It's automatically activated within your project's virtual environment.
Part 3: Core Tasks in PyCharm 2025
Running a Python Script
- Create a new file in your project: Right-click the project folder in the "Project" tool window -> New -> Python File. Name it
hello.py. - Write some code:
# hello.py print("Hello from PyCharm 2025!") name = input("What is your name? ") print(f"Nice to meet you, {name}!") - Run the script:
- Method A (Toolbar): Click the green "Play" button (▶) in the top-right corner of the editor window.
- Method B (Menu): Go to Run -> Run... -> Select
hello.pyfrom the list. - Method C (Keyboard Shortcut):
Shift + F10.
The output will appear in the Run tool window at the bottom.
Managing Dependencies (Using Pip)
Since you're using a virtual environment, you can install packages without affecting your system's Python.
- Open the Terminal tool window at the bottom of PyCharm.
- You'll notice the command prompt shows the name of your virtual environment (e.g.,
(venv) C:\...\MyLegacyProject>). This confirms you're in the right environment. - To install a package, use
pip:# Example: Install the 'requests' library pip install requests
- To see installed packages:
pip list
Using the Debugger (Essential Skill)
The debugger lets you step through your code line by line to find bugs.
-
Set a Breakpoint: Click in the gutter (the gray strip to the left of the line numbers) next to the line where you want the code to pause. A red dot will appear.
# debugger_example.py def add_numbers(a, b): print("Inside add_numbers function") result = a + b # <-- Set a breakpoint here return result x = 10 y = 20 my_sum = add_numbers(x, y) print(f"The sum is: {my_sum}") -
Debug the Code:
- Click the bug icon (🐞) in the top-right corner, or go to Run -> Debug....
- The program will start and pause at your breakpoint.
-
Use the Debugging Tool Window (Bottom Left):
- Frames: Shows the current function call stack.
- Variables: Shows the current values of all variables in the current scope (
x=10,y=20,a=10,b=20). You can even change their values here. - Watches: You can add expressions to watch (e.g.,
a + b) to see their value change.
-
Stepping Through Code: Use the buttons in the debug window to control execution:
- F8 (Step Over): Executes the current line and moves to the next one.
- F7 (Step Into): If the current line is a function call, it jumps into that function.
- F9 (Resume Program): Continues running the program normally until the next breakpoint or the end.
Code Analysis and Refactoring
PyCharm is famous for its intelligent code analysis.
- Code Inspection (Code -> Inspect Code): Analyzes your entire file or project for potential bugs, style issues, and "code smells."
- Light Bulb/Intentions: When you see a yellow or orange light bulb in the gutter, PyCharm is suggesting a fix or improvement (e.g., "Add import," "Convert to f-string," "Extract method").
- Refactoring: Right-click on code to access powerful refactoring tools like:
- Rename: Safely rename a variable or function across your entire project.
- Extract Method: Turn a block of code into its own new function.
Part 4: Best Practices for PyCharm 2025
- Always Use a Virtual Environment: This is non-negotiable for avoiding dependency hell.
- Learn the Keyboard Shortcuts: They will dramatically speed up your workflow.
Ctrl + /(Windows/Linux) orCmd + /(macOS): Comment/uncomment code.Ctrl + D: Duplicate the current line.Ctrl + Alt + L: Reformat code according to PEP 8 style guidelines.Ctrl + Shift + F10: Run the current configuration.Ctrl + Shift + F9: Debug the current configuration.
- Commit to Version Control (Git): PyCharm has excellent Git integration. Use the Version Control tool window on the left to stage, commit, and push your changes. This is crucial for any real project.
- Read the Documentation: Use
Ctrl + Q(Windows/Linux) orF1(macOS) to quickly view documentation for any function or class you've typed.