Of course! This is a very common and powerful combination for building desktop applications in Python. Here’s a comprehensive guide covering everything from the basics to a complete, practical example.

What is wxFormBuilder?
wxFormBuilder is a free, open-source, visual GUI designer for the wxWidgets toolkit. It allows you to create user interfaces by dragging and dropping controls (buttons, text boxes, menus, etc.) onto a form, just like you would in Visual Studio for .NET or Qt Designer.
- What it does: It generates the necessary code (in C++, Python, XRC, etc.) to create and lay out your GUI.
- What it doesn't do: It does not generate your entire application's logic. You write the Python code to handle what happens when a button is clicked, a menu is selected, or data is entered.
The Core Workflow
The process of using wxFormBuilder with Python follows these steps:
- Design: Use the wxFormBuilder application to visually design your window.
- Generate Code: Export the design as a Python file.
- Integrate: In your main Python script, import the generated code and "wire it up" with your application's logic.
- Run: Execute your Python script to see your GUI in action.
Step-by-Step Guide with a Practical Example
Let's build a simple application that has a text box, a button, and a label. When you type a name in the text box and click the button, the label will display "Hello, [Name]!".
Step 1: Install wxFormBuilder
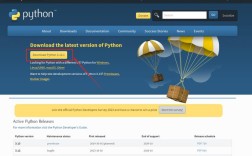
First, you need to download and install wxFormBuilder. It's available for Windows, macOS, and Linux.

- Download Link: https://github.com/wxFormBuilder/wxFormBuilder/releases
Install it like any other desktop application.
Step 2: Install the Python wxPython Library
wxFormBuilder generates code for the wxPython library. You need to have it installed in your Python environment.
Open your terminal or command prompt and run:
pip install wxPython
Step 3: Design the GUI in wxFormBuilder
-
Launch wxFormBuilder.
 (图片来源网络,侵删)
 -
Create a New Project:
- Go to
File -> New. - On the left, under "Projects", select
wxFrame(orwxDialogif you prefer). - Give your project a name, like
MyApp.
- Go to
-
Add Controls (Widgets):
- On the left, find the "Controls" panel.
- Drag and drop the following controls onto your main frame:
- A
wxStaticText(this will be our label). Change itsLabelproperty to "Enter your name:". - A
wxTextCtrl(this will be our text box). - A
wxButton. Change itsLabelproperty to "Say Hello". - Another
wxStaticText(this will be the output label). You can leave its label blank for now.
- A
-
Arrange the Layout:
- Select the main frame object in the "Hierarchy" panel.
- In the "Properties" panel on the right, find the
sizerproperty. Click the dropdown and selectwxBoxSizer (Vertical). - Now, select each control in the hierarchy and click the "Add to sizer" button (a green plus icon) to add them to the vertical sizer. This ensures they will resize nicely.
- Crucially, give your controls meaningful IDs! This is how you'll reference them in your Python code.
- Select the
wxTextCtrl. In the Properties panel, find theidfield. Change it fromID_ANYto something likeID_TEXT_INPUT. - Select the
wxButton. Change itsidtoID_BUTTON_CLICK. - Select the output
wxStaticText. Change itsidtoID_OUTPUT_LABEL.
- Select the
-
Generate the Python Code:
- Go to
File -> Generate Code. - In the dialog that appears, make sure "Language" is set to Python.
- Click "Generate". This will save a Python file. Let's save it as
myapp_gui.pyin your project folder.
- Go to
Step 4: Write the Python Logic
Now, create a new Python file in the same folder, named main.py. This is where you'll write the code that brings the GUI to life.
The generated myapp_gui.py file contains the visual structure. Your main.py will:
- Import the generated file.
- Create a class that inherits from the generated frame class.
- Add an "event binder" to connect the button's click event to a function.
- Define the function that executes when the button is clicked.
Here is the complete code for main.py:
# main.py
import wx
import myapp_gui  # Import the GUI file generated by wxFormBuilder
class MyFrame(myapp_gui.MyFrame):
    def __init__(self, parent):
        # Call the __init__ method from the generated class
        super(MyFrame, self).__init__(parent)
        # Bind the button click event to our custom method
        # The ID must match the one you set in wxFormBuilder!
        self.Bind(wx.EVT_BUTTON, self.on_button_click, self.m_button1)
    def on_button_click(self, event):
        """
        This method is called when the button is clicked.
        """
        # 1. Get the text from the text input control
        # The ID must match the one you set in wxFormBuilder!
        name = self.m_textCtrl1.GetValue()
        # 2. Update the label with the greeting
        # The ID must match the one you set in wxFormBuilder!
        self.m_staticText2.SetLabel(f"Hello, {name}!")
        # You can also programmatically enable/disable controls, show dialogs, etc.
        # For example, to show a message box:
        # wx.MessageBox(f"Greeting sent to {name}!", "Success", wx.OK | wx.ICON_INFORMATION)
class MyApp(wx.App):
    def OnInit(self):
        self.frame = MyFrame(None)
        self.frame.Show()
        return True
# Main execution
if __name__ == "__main__":
    app = MyApp()
    app.MainLoop()
Step 5: Run the Application
Open your terminal or command prompt, navigate to the folder where you saved main.py and myapp_gui.py, and run:
python main.py
You should see your window appear. Type a name into the text box, click the "Say Hello" button, and watch the label update!
Advanced: Using XRC (XML Resource) Files
Instead of generating Python code, you can generate an XRC (XML Resource) file. This is often considered a better practice because it completely separates your UI design from your application logic.
Why use XRC?
- True Separation: Designers can work on the
.xrcfile without needing to touch the Python code. - Internationalization: It's easier to manage translations for different languages.
- Dynamic Loading: You can load different UIs at runtime without restarting the application.
How to Use XRC:
-
Generate XRC in wxFormBuilder:
- In wxFormBuilder, go to
File -> Generate Code. - Change the "Language" to XRC and save it as
myapp.xrc.
- In wxFormBuilder, go to
-
Modify your Python code (
main.py):Instead of importing a Python file, you will load the XRC file and load the objects from it.
# main_xrc.py
import wx
import wx.xrc as xrc  # Import the XRC module
class MyFrame(wx.Frame):
    def __init__(self, parent):
        # Load the XRC file
        self.res = xrc.XmlResource("myapp.xrc")
        # Load the frame object from the XRC file
        # The name "MyFrame1" must match the name in the XRC file (check wxFormBuilder hierarchy)
        pre = self.res.LoadFrame(parent, "MyFrame1")
        self.PostCreate(pre)
        # Now, get references to the controls using their IDs
        self.m_textCtrl1 = xrc.XRCCTRL(self, "ID_TEXT_INPUT")
        self.m_button1 = xrc.XRCCTRL(self, "ID_BUTTON_CLICK")
        self.m_staticText2 = xrc.XRCCTRL(self, "ID_OUTPUT_LABEL")
        # Bind the event
        self.Bind(wx.EVT_BUTTON, self.on_button_click, self.m_button1)
    def on_button_click(self, event):
        name = self.m_textCtrl1.GetValue()
        self.m_staticText2.SetLabel(f"Hello, {name} from XRC!")
class MyApp(wx.App):
    def OnInit(self):
        self.frame = MyFrame(None)
        self.frame.Show()
        return True
if __name__ == "__main__":
    app = MyApp()
    app.MainLoop()