Of course! The import statement is a fundamental concept in Python. It allows you to use code from other files (called modules) or built-in libraries in your own scripts. This promotes code reuse and organization.

Let's break down how to use import in a Linux environment, from the basics to more advanced scenarios.
The Basics of import
There are a few common ways to import modules.
a) Importing an Entire Module
This is the most straightforward way. You import the whole module and then access its functions and classes using the module_name. prefix.
# Import the entire 'math' module
import math
# Now you can use functions from the math module
result = math.sqrt(25)
print(f"The square root of 25 is: {result}")  # Output: The square root of 25 is: 5.0
pi_value = math.pi
print(f"The value of Pi is: {pi_value}")     # Output: The value of Pi is: 3.141592653589793
b) Importing Specific Items
If you only need a few specific functions or classes from a module, you can import them directly. This saves memory and lets you use them without the module prefix.

# Import only the 'sqrt' function and 'pi' constant from the 'math' module
from math import sqrt, pi
# You can now use 'sqrt' and 'pi' directly
result = sqrt(25)
print(f"The square root of 25 is: {result}")  # Output: The square root of 25 is: 5.0
print(f"The value of Pi is: {pi}")           # Output: The value of Pi is: 3.141592653589793
c) Importing with an Alias (for readability or convenience)
Some module names are long or commonly used with a shorter name (like numpy as np). You can create an alias using the as keyword.
# Import the 'numpy' module and give it the alias 'np'
import numpy as np
# Now you can use 'np' to refer to the numpy module
arr = np.array([1, 2, 3, 4])
print(f"Numpy array: {arr}") # Output: Numpy array: [1 2 3 4]
How Python Finds Modules (The PYTHONPATH)
When you write import my_module, Python needs to know where to find my_module.py. It searches a specific list of directories. This list is called sys.path.
You can see the search path in your Python script:
import sys
print(sys.path)
Typical Search Order:

- The directory containing the script: If you run
python my_script.py, Python will first look for modules in the same directory asmy_script.py. - Directories listed in the
PYTHONPATHenvironment variable:PYTHONPATHis an environment variable that works like thePATHvariable for executables. It's a list of directories where Python should look for modules. - Standard library directories: These are the directories where Python's built-in modules are installed.
- Site-packages directory: This is where third-party packages (installed with
pip) are placed.
Managing PYTHONPATH in Linux
You can set the PYTHONPATH environment variable in your shell's configuration file (e.g., ~/.bashrc, ~/.zshrc).
Example:
Let's say you have a custom module in /home/user/my_python_libs. You want Python to always look there.
-
Edit your shell config file:
nano ~/.bashrc
-
Add the following line to the end of the file:
export PYTHONPATH="/home/user/my_python_libs:$PYTHONPATH"
$PYTHONPATHis important! It appends your new directory to the existingPYTHONPATH, rather than overwriting it.
-
Apply the changes to your current terminal session:
source ~/.bashrc
Now, Python will automatically look in /home/user/my_python_libs for modules.
Working with Third-Party Packages
Python's standard library is powerful, but for most complex tasks, you'll need third-party packages. These are managed using pip, the Python Package Installer.
a) Installing a Package
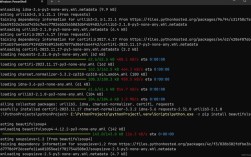
Open your terminal and use pip to install packages from the Python Package Index (PyPI).
# Install a single package
pip install requests
# Install a specific version
pip install numpy==1.21.0
# Install a package for the current user only (good for system-wide Python)
pip install --user matplotlib
# Install from a requirements.txt file
pip install -r requirements.txt
Note: On some Linux systems, you might use
pip3to ensure you're using the pip associated with Python 3, especially if both Python 2 and 3 are installed.
b) Verifying Installation
After installing, you can verify it by trying to import it in a Python shell or script.
python3
>>> import requests
>>> print(requests.__version__)
2.28.1  # (or whatever version you installed)
>>> exit()
Common Scenarios and Best Practices
a) Creating Your Own Modules
You can easily create your own modules by saving Python code in a .py file.
Project Structure:
my_project/
├── my_module.py
└── main_script.py
my_module.py
# This is our custom module
def greet(name):
    """A simple greeting function."""
    return f"Hello, {name}!"
def add(a, b):
    """A simple addition function."""
    return a + b
main_script.py
# Import the custom module from the same directory
import my_module
# Use the functions from the module
message = my_module.greet("Linux User")
print(message) # Output: Hello, Linux User!
sum_result = my_module.add(5, 3)
print(f"The sum is: {sum_result}") # Output: The sum is: 8
To run this, navigate to the my_project directory in your terminal and execute:
python3 main_script.py
b) The __init__.py File (Making a Package)
When you have a directory of .py files, you can turn that directory into a "package" by adding an __init__.py file. This can be empty.
Project Structure:
my_package/
├── __init__.py  # Can be empty
├── module1.py
└── module2.py
Now you can import from the package:
from my_package import module1
c) Virtual Environments (Crucial for Projects!)
This is one of the most important best practices. A virtual environment is an isolated space for a Python project. It prevents conflicts between package versions (e.g., Project A needs requests==2.25, but Project B needs requests==2.28).
How to use venv (Python's built-in virtual environment tool):
-
Create a virtual environment:
# Create a folder for your project
mkdir my_project
cd my_project
# Create a virtual environment named 'venv'
python3 -m venv venv
This will create a
venv/directory containing a separate Python interpreter andpip. -
Activate the virtual environment:
source venv/bin/activate
Your terminal prompt will change to show
(venv), indicating the environment is active. -
Work inside the environment: Now, when you install packages, they will be installed only in this
venv.(venv) $ pip install pandas
-
Deactivate the environment when you're done:
(venv) $ deactivate
Your prompt will return to normal. Packages installed in
venvwill no longer be available.