Of course! Using Python with Zabbix and Syslog is a common and powerful integration. It allows you to send custom logs, application metrics, or alerts from your Python applications directly into Zabbix, where you can then trigger alerts, create graphs, and maintain a history.

Here’s a comprehensive guide covering the most common methods, from the simplest to the most robust.
Core Concepts
- Zabbix Server: The central monitoring server that collects data.
- Zabbix Sender: A high-performance command-line utility that comes with the Zabbix server. It's the recommended tool for sending data from scripts. It sends data in batches, which is much more efficient than sending one item at a time.
- Syslog: A standard for message logging. It's not a single tool but a protocol and a set of standards for logging messages in Unix-like systems.
- Python's Role: Your Python script will act as the "agent" that generates data and prepares it for the Zabbix Sender.
Method 1: Using the zabbix_sender Command-Line Tool (Recommended)
This is the most common, efficient, and reliable method. Your Python script will generate a temporary data file in the Zabbix Sender format, and then it will execute the zabbix_sender command to send that file.
Step 1: Install zabbix_sender
The zabbix_sender tool is included with the Zabbix server or Zabbix agent packages.
- On Debian/Ubuntu:
sudo apt-get update
sudo apt-get install zabbix-sender
- On RHEL/CentOS/Fedora:
sudo yum install zabbix-sender
- On Windows: It's included in the Zabbix Agent installation directory (e.g.,
C:\Program Files\Zabbix Agent\bin\zabbix_sender.exe).
Step 2: Configure Zabbix for Incoming Data
- Create a Host: In your Zabbix frontend, go to Configuration -> Hosts and create or edit the host that will receive the data from your Python script. Note its Host name (e.g.,
my-python-app). - Create an Application: Go to the Applications tab for that host and create a new application (e.g.,
Python App). - Create an Item: This is where you define the data you want to receive.
- Go to the Items tab and click Create item.
- Name:
syslog.message.count(or something descriptive). - Type: Select
Zabbix trapper. - Key: A unique key for this item (e.g.,
syslog.msg.count). - Type of information:
Numeric (unsigned)orCharacterdepending on your data. - Application: Select the
Python Appyou created. - Save the item.
Step 3: The Python Script
This script will simulate counting log messages and send the count to Zabbix.

import subprocess
import time
import os
import random
# --- Configuration ---
# IMPORTANT: This must match the "Host name" in your Zabbix configuration.
ZABBIX_HOST = "my-python-app"
# The key of the item you created in Zabbix.
ZABBIX_KEY = "syslog.msg.count"
# The Zabbix server's IP address or hostname.
ZABBIX_SERVER = "192.168.1.100"
# Path to the zabbix_sender executable.
# On Linux, it's usually in /usr/bin/zabbix_sender
# On Windows, it might be 'C:\\Program Files\\Zabbix Agent\\bin\\zabbix_sender.exe'
ZABBIX_SENDER_PATH = "/usr/bin/zabbix_sender"
# A temporary file to store the data for zabbix_sender.
# It will be created and deleted automatically.
TEMP_DATA_FILE = "/tmp/zabbix_data.tmp"
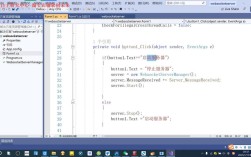
def send_to_zabbix(value):
"""
Sends a single value to Zabbix using zabbix_sender.
"""
# The data format for zabbix_sender is:
# <host> <key> <value> [<timestamp>]
# Timestamp is optional; if omitted, the server time is used.
data_line = f"{ZABBIX_HOST} {ZABBIX_KEY} {value}\n"
try:
# Write the data to the temporary file
with open(TEMP_DATA_FILE, 'w') as f:
f.write(data_line)
# Construct the zabbix_sender command
command = [
ZABBIX_SENDER_PATH,
"-z", ZABBIX_SERVER, # Zabbix server address
"-i", TEMP_DATA_FILE, # Input file with data
"-s", ZABBIX_HOST # Host name to send data for
]
# Execute the command
# capture_output=True and text=True make it easier to handle errors
result = subprocess.run(command, capture_output=True, text=True, check=True)
print(f"Successfully sent data: {data_line.strip()}")
# print("Zabbix Sender Output:", result.stdout)
except FileNotFoundError:
print(f"Error: zabbix_sender not found at {ZABBIX_SENDER_PATH}")
except subprocess.CalledProcessError as e:
print(f"Error sending data to Zabbix: {e}")
print(f"Zabbix Sender Error Output: {e.stderr}")
finally:
# Clean up the temporary file
if os.path.exists(TEMP_DATA_FILE):
os.remove(TEMP_DATA_FILE)
# --- Main execution loop ---
if __name__ == "__main__":
print("Starting Python Zabbix sender...")
try:
while True:
# Simulate getting a count from a log file
# In a real scenario, you might parse a log file here.
log_count = random.randint(10, 100)
print(f"Simulated log count: {log_count}")
send_to_zabbix(log_count)
# Wait for 30 seconds before sending the next value
time.sleep(30)
except KeyboardInterrupt:
print("\nScript stopped by user.")
To run this script:
- Save it as
zabbix_syslog_sender.py. - Make sure you have the correct configuration values for
ZABBIX_HOST,ZABBIX_KEY, andZABBIX_SERVER. - Run it with Python:
python3 zabbix_syslog_sender.py.
You should see the value appear in the "Latest data" tab for your host in the Zabbix frontend.
Method 2: Using a Python Library (Zabbix API)
This method is useful if you want to manage Zabbix (create hosts, items, etc.) directly from Python, or if you need to send data in environments where you cannot install zabbix_sender. It's generally less performant for high-frequency data sending.
Step 1: Install the Library
pip install pyzabbix
Step 2: Configure Zabbix API
- In your Zabbix frontend, go to User settings -> API tokens and create a new API token with at least "Host" read/write permissions.
- Note the Token and your Zabbix URL.
Step 3: The Python Script (Using the API)
This script does the same thing as the first one but uses the API.

import time
import random
from pyzabbix import ZabbixAPI, ZabbixAPIException
# --- Configuration ---
ZABBIX_SERVER_URL = "https://your-zabbix-server-url"
ZABBIX_API_TOKEN = "your_api_token_here"
ZABBIX_HOST = "my-python-app"
ZABBIX_KEY = "syslog.msg.count.api" # Use a different key to avoid conflict
def send_data_via_api(value):
    """
    Sends a value to Zabbix using the Zabbix API.
    """
    try:
        # Initialize the ZabbixAPI
        zapi = ZabbixAPI(ZABBIX_SERVER_URL)
        zapi.login(apiid=ZABBIX_API_TOKEN)
        print("Connected to Zabbix API. Version: %s" % zapi.api_version())
        # Send the data using the 'item.send' method
        # The key must match the key of a 'Zabbix trapper' item on the host.
        zapi.item.send(
            host=ZABBIX_HOST,
            key=ZABBIX_KEY,
            value=value
        )
        print(f"Successfully sent data via API: {value}")
    except ZabbixAPIException as e:
        print(f"Zabbix API Error: {e}")
    except Exception as e:
        print(f"An unexpected error occurred: {e}")
    finally:
        # It's good practice to log out, though it's not strictly necessary
        if 'zapi' in locals():
            zapi.user.logout()
            print("Logged out from Zabbix API.")
# --- Main execution loop ---
if __name__ == "__main__":
    print("Starting Python Zabbix API sender...")
    try:
        while True:
            log_count = random.randint(10, 100)
            print(f"Simulated log count: {log_count}")
            send_data_via_api(log_count)
            time.sleep(30)
    except KeyboardInterrupt:
        print("\nScript stopped by user.")