Of course! In Python, you can set the cursor position using the pyautogui library. This is a powerful library for programmatically controlling the mouse and keyboard.

Here’s a complete guide on how to use it, from installation to practical examples.
Installation
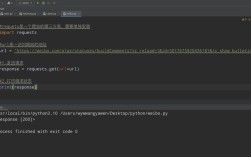
First, you need to install the pyautogui library. You can do this using pip:
pip install pyautogui
Basic Usage: pyautogui.moveTo()
The primary function for moving the cursor is pyautogui.moveTo(). It takes two main arguments: the x and y coordinates.
Syntax:
pyautogui.moveTo(x, y, duration=seconds)
x: The horizontal coordinate (distance from the left edge of the primary screen).y: The vertical coordinate (distance from the top edge of the primary screen).duration(optional): The number of seconds it should take to move the cursor to the new position. If omitted, the move is instantaneous.
Finding the Cursor Position
Before you can move the cursor to a specific spot, you need to know its coordinates. The easiest way to do this is by using the pyautogui.position() function.

A common technique is to create a small script that prints the current cursor position whenever you click the mouse. This allows you to "record" the coordinates of the buttons or areas you want to automate.
Example Script to Find Coordinates:
import pyautogui
import time
print("Cursor Position Finder")
print("Move your mouse to the desired location and press the Ctrl-C key in the terminal to exit.")
print("-" * 40)
try:
    while True:
        # Get the current x, y position of the mouse
        x, y = pyautogui.position()
        # Print the position in a readable format
        position_str = f'X: {x} Y: {y}'
        print(position_str, end='')
        print('\r', end='') # \r moves the cursor to the beginning of the line
        # Add a small delay to prevent the script from using too much CPU
        time.sleep(0.1)
except KeyboardInterrupt:
    print("\nProgram terminated.")
How to use this script:
- Run the script from your terminal.
- Move your mouse to the button or area you want to target.
- Look at the terminal output to see the
(X, Y)coordinates. - Press
Ctrl + Cin the terminal to stop the script.
Complete Example: Automating a Click
Now that you know how to find coordinates, let's create a simple script that moves the cursor to a specific position and clicks.
Warning: Be careful with automation scripts! If you lose focus of the window the script is controlling, it might start clicking on things you don't want. A good practice is to add a failsafe.

PyAutoGUI's Fail-Safe:
If you ever need to stop a pyautogui script in an emergency, quickly move the mouse cursor to the upper-left corner of the screen. This will raise an exception and stop the script.
Example Script: Move and Click
import pyautogui
import time
# It's good practice to add a confirmation before running automation
print("Starting cursor movement in 5 seconds. Move your mouse to the top-left corner to abort.")
time.sleep(5)
# Define the target coordinates (you should get these from the finder script above)
target_x = 500
target_y = 300
# Move the cursor to the target coordinates over a duration of 1 second
print(f"Moving cursor to ({target_x}, {target_y})...")
pyautogui.moveTo(target_x, target_y, duration=1.0)
# Wait a moment to see the result
time.sleep(1)
# Perform a left click
print("Performing left click...")
pyautogui.click()
# You can also perform right-clicks or double-clicks
# pyautogui.rightClick()
# pyautogui.doubleClick()
print("Script finished.")
Moving the Cursor Relative to its Current Position
Sometimes, you don't want to move to an absolute (x, y) coordinate, but rather move a certain distance from where the cursor currently is. For this, you can use pyautogui.move().
Syntax:
pyautogui.move(xOffset, yOffset, duration=seconds)
xOffset: The number of pixels to move horizontally. Positive values move right, negative values move left.yOffset: The number of pixels to move vertically. Positive values move down, negative values move up.
Example:
import pyautogui
import time
print("Moving cursor relative to its current position...")
time.sleep(3)
# Move the cursor 100 pixels to the right and 50 pixels down
pyautogui.move(100, 50, duration=0.5)
# Move the cursor 200 pixels to the left
pyautogui.move(-200, 0, duration=0.5)
print("Relative movement complete.")
Key Takeaways
| Function | Description | Example |
|---|---|---|
pyautogui.moveTo(x, y) |
Moves the cursor to an absolute screen position. | pyautogui.moveTo(300, 400) |
pyautogui.move(xOffset, yOffset) |
Moves the cursor relative to its current position. | pyautogui.move(-50, 20) |
pyautogui.position() |
Returns the current (x, y) coordinates of the cursor. |
x, y = pyautogui.position() |
pyautogui.click() |
Performs a left-click at the current cursor position. | pyautogui.click() |
pyautogui.FAILSAFE |
A built-in safety feature (enabled by default). Move the mouse to the top-left corner to abort a script. | pyautogui.FAILSAFE = True (default) |