Of course! Here is a comprehensive guide to using Cucumber with Python, covering the core concepts, setup, a practical example, and best practices.

What is Cucumber and Why Use It with Python?
Cucumber is a tool that supports Behavior-Driven Development (BDD). BDD is a software development approach that encourages collaboration between developers, QA engineers, and non-technical participants (like product owners or business analysts) by writing tests in a natural, human-readable language.
The core idea is to describe an application's behavior from the user's perspective using a special language called Gherkin.
Why use it?
- Improved Communication: Gherkin (
Given/When/Then) bridges the gap between technical and non-technical teams. Everyone can read, understand, and agree on the application's behavior. - Living Documentation: Your feature files serve as both tests and documentation that always stays up-to-date with the code.
- Focus on Behavior: It forces you to think about the "what" (the behavior) before the "how" (the implementation).
- Supports Test Automation: The plain text descriptions are automatically linked to Python code that executes the tests.
Core Concepts
-
Gherkin: A domain-specific language for describing a software's behavior. It uses a structured format with keywords.
 (图片来源网络,侵删)
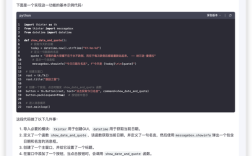
Feature: Describes a software feature.Scenario: A specific example or test case for a feature.Given: Sets up the initial context or state (the "arrange" part).When: Describes an action or event (the "act" part).Then: Describes the expected outcome or result (the "assert" part).And,But: Can be used to add more steps to aGiven,When, orThenblock.
-
Step Definitions: These are the Python functions that "glue" the Gherkin steps to your application's code. Each step in a feature file is mapped to a function in a Python file using regular expressions.
-
Test Runner: A tool that executes the tests. We'll use
behave, which is the most popular and mature BDD framework for Python.
Step-by-Step Guide: A Simple Login Feature
Let's build a test for a simple login feature.
Step 1: Project Setup
First, create a project directory and a virtual environment. It's always a good practice to isolate your project dependencies.

mkdir python-cucumber-demo
cd python-cucumber-demo
python -m venv venv
source venv/bin/activate  # On Windows: venv\Scripts\activate
Step 2: Install behave
The behave library is the engine that runs our Cucumber-style tests.
pip install behave
Step 3: Create the Project Structure
A standard behave project structure looks like this:
python-cucumber-demo/
├── features/
│   ├── steps/
│   │   └── login_steps.py
│   └── login.feature
├── app/
│   └── __init__.py
└── venv/
Create these directories and files.
mkdir -p features/steps
touch features/login.feature features/steps/login_steps.py app/__init__.py
Step 4: Write the Feature File (Gherkin)
This file describes the login behavior in plain English. Create features/login.feature:
# features/login.feature
Feature: User Login
  As a user, I want to log in to my account
  so that I can access my personal information.
  Scenario: Successful login with valid credentials
    Given the user is on the login page
    When the user enters "standard_user" and "secret_sauce"
    And the user clicks the login button
    Then the user should be redirected to the dashboard
  Scenario: Failed login with invalid password
    Given the user is on the login page
    When the user enters "standard_user" and "wrong_password"
    And the user clicks the login button
    Then an error message "Epic sadface: Username and password do not match any user in this service" should be displayed
Step 5: Write the Step Definitions (Python Code)
Now, we write the Python code that implements each step from the feature file. This is where you'll interact with your application (or a mock of it).
Create features/steps/login_steps.py:
# features/steps/login_steps.py
from behave import given, when, then
from app.login import LoginPage # We'll create this module next
# A simple in-memory "database" for our test app
USERS = {
    "standard_user": "secret_sauce",
    "locked_out_user": "secret_sauce"
}
@given('the user is on the login page')
def step_impl(context):
    context.login_page = LoginPage()
    context.login_page.navigate()
@when('the user enters "{username}" and "{password}"')
def step_impl(context, username, password):
    context.login_page.enter_credentials(username, password)
@when('the user clicks the login button')
def step_impl(context):
    context.login_page.click_login()
@then('the user should be redirected to the dashboard')
def step_impl(context):
    assert context.login_page.is_on_dashboard(), "User was not redirected to the dashboard"
@then('an error message "{error_message}" should be displayed')
def step_impl(context, error_message):
    displayed_error = context.login_page.get_error_message()
    assert displayed_error == error_message, f"Expected error '{error_message}', but got '{displayed_error}'"
Step 6: Implement the Application Logic (The "SUT" - System Under Test)
This is the code for your actual application. For this example, we'll create a mock version. Create app/login.py:
# app/login.py
class LoginPage:
    def __init__(self):
        # In a real app, this would initialize a Selenium WebDriver or similar
        self.on_dashboard = False
        self.error_message = ""
        print("[APP] Login page initialized.")
    def navigate(self):
        print("[APP] Navigated to login page.")
        self.on_dashboard = False
        self.error_message = ""
    def enter_credentials(self, username, password):
        print(f"[APP] Credentials entered: {username} / {password}")
        self.username = username
        self.password = password
    def click_login(self):
        print("[APP] Login button clicked.")
        # Simple logic to simulate login
        from app.login import USERS # Import the "database"
        if USERS.get(self.username) == self.password:
            self.on_dashboard = True
            self.error_message = ""
        else:
            self.on_dashboard = False
            self.error_message = "Epic sadface: Username and password do not match any user in this service"
    def is_on_dashboard(self):
        print(f"[APP] Checking if on dashboard: {self.on_dashboard}")
        return self.on_dashboard
    def get_error_message(self):
        print(f"[APP] Getting error message: {self.error_message}")
        return self.error_message
Step 7: Run the Tests!
Now, go to the root of your project (python-cucumber-demo/) and run behave.
behave
You will see output similar to this:
Feature: User Login                                          # features/login.feature:1
  As a user, I want to log in to my account
  so that I can access my personal information.
  Scenario: Successful login with valid credentials       # features/login.feature:6
    Given the user is on the login page                   # features/steps/login_steps.py:16
[APP] Login page initialized.
[APP] Navigated to login page.
    When the user enters "standard_user" and "secret_sauce" # features/steps/login_steps.py:20
[APP] Credentials entered: standard_user / secret_sauce
    And the user clicks the login button                  # features/steps/login_steps.py:26
[APP] Login button clicked.
    Then the user should be redirected to the dashboard   # features/steps/login_steps.py:32
[APP] Checking if on dashboard: True
.
  Scenario: Failed login with invalid password            # features/login.feature:12
    Given the user is on the login page                   # features/steps/login_steps.py:16
[APP] Login page initialized.
[APP] Navigated to login page.
    When the user enters "standard_user" and "wrong_password" # features/steps/login_steps.py:20
[APP] Credentials entered: standard_user / wrong_password
    And the user clicks the login button                  # features/steps/login_steps.py:26
[APP] Login button clicked.
    Then an error message "Epic sadface: Username and password do not match any user in this service" should be displayed # features/steps/login_steps.py:39
[APP] Getting error message: Epic sadface: Username and password do not match any user in this service
.
1 feature passed, 2 scenarios passed, 6 steps passed
Congratulations! You've successfully run your first Cucumber-style test suite in Python.
Advanced Concepts & Best Practices
Using behave with Selenium for Web UI Testing
The app/login.py in our example was a mock. In a real-world scenario, you would use a browser automation tool like Selenium.
Your LoginPage class would look something like this:
# app/selenium_login_page.py
from selenium import webdriver
from selenium.webdriver.common.by import By
class SeleniumLoginPage:
    def __init__(self, driver):
        self.driver = driver
        self.url = "https://www.saucedemo.com/"
        self.username_input = (By.ID, "user-name")
        self.password_input = (By.ID, "password")
        self.login_button = (By.ID, "login-button")
        self.error_label = (By.CSS_SELECTOR, "[data-test='error']")
    def navigate(self):
        self.driver.get(self.url)
    def enter_credentials(self, username, password):
        self.driver.find_element(*self.username_input).send_keys(username)
        self.driver.find_element(*self.password_input).send_keys(password)
    def click_login(self):
        self.driver.find_element(*self.login_button).click()
    def is_on_dashboard(self):
        # Check for an element that only exists on the dashboard page
        return "inventory.html" in self.driver.current_url
    def get_error_message(self):
        return self.driver.find_element(*self.error_label).text
Your step definition would then instantiate a WebDriver and pass it to the page object.
Using Fixtures for Setup and Teardown
behave supports hooks (similar to pytest fixtures) for setup and teardown. These are defined in a environment.py file in your features directory.
Create features/environment.py:
# features/environment.py
from selenium import webdriver
def before_all(context):
    """This hook is executed once before all features."""
    print("-> Starting browser...")
    context.driver = webdriver.Chrome() # Or Firefox(), etc.
    context.driver.implicitly_wait(10)
def after_all(context):
    """This hook is executed once after all features."""
    print("<- Closing browser.")
    context.driver.quit()
def before_feature(context, feature):
    """This hook is executed before each feature."""
    print(f"\n--- Running feature: {feature.name} ---")
Now, your step definitions can access context.driver to control the browser.
Parameterizing Tables
Gherkin allows you to pass tables of data to a single step, which is great for testing multiple scenarios.
Example in .feature file:
Scenario Outline: Login with various credentials
  Given the user is on the login page
  When the user enters "<username>" and "<password>"
  And the user clicks the login button
  Then the user should see "<outcome>"
  Examples:
    | username      | password       | outcome                                     |
    | standard_user | secret_sauce   | redirected to the dashboard                 |
    | locked_out_user  | secret_sauce   | error message "Epic sadface: Sorry, this user has been locked out." |
    | performance_glitch_user | secret_sauce | redirected to the dashboard                 |
Your step definition would need to handle the table:
@then('the user should see "{expected_outcome}"')
def step_impl(context, expected_outcome):
    # This step is now more generic and might need more logic
    # to handle different outcomes (dashboard vs. error message)
    if "redirected" in expected_outcome:
        assert context.login_page.is_on_dashboard()
    else:
        # This part needs refinement to match the exact error message from the table
        assert "error" in expected_outcome.lower()
        # You might want to make the error message check more specific
Summary: Cucumber (behave) vs. Pytest
| Feature | Cucumber (behave) |
Pytest |
|---|---|---|
| Syntax | Gherkin (Given/When/Then) |
Python code (assert, custom functions) |
| Primary Goal | BDD, Collaboration, Living Documentation | General-purpose testing, unit, integration, API |
| Readability | Extremely high for non-technical people | High for developers, but not for non-tech |
| Setup | Requires features/ and steps/ structure |
More flexible, just tests/ or test_*.py |
| Plugins | Good, but smaller ecosystem | Massive ecosystem (pytest-django, pytest-selenium, etc.) |
| Best For | End-to-end (E2E) testing, acceptance criteria, teams needing strong collaboration. | Unit tests, integration tests, API tests, developers who prefer code. |
You can even use both! Use pytest for your unit and integration tests, and behave for your high-level, user-facing acceptance tests.