Of course! Setting up Caffe with Python on Ubuntu is a classic, but sometimes challenging, task. The process has evolved, and the modern approach is highly recommended.

This guide will cover two main paths:
- The Modern & Recommended Path: Using Docker. This is the easiest, most reliable, and most reproducible way to run Caffe.
- The Traditional Path: Installing Caffe from source on your host machine. This is more complex and is provided for those who need a native installation or want to understand the build process.
Quick Summary: Which Path to Choose?
| Feature | Docker (Recommended) | Native Installation |
|---|---|---|
| Ease of Use | Excellent. Just pull and run. | Difficult. Many manual steps, dependency conflicts. |
| Reproducibility | Perfect. Same environment everywhere. | Poor. Prone to system dependency changes. |
| System Impact | None. Runs in a self-contained container. | High. Installs system-wide packages, can conflict with others. |
| Performance | Near-native. Minimal overhead. | Native. No container overhead. |
| Best For | Everyone, especially beginners, developers, and researchers who just want to run Caffe. | Advanced users, system integrators, or those needing to modify Caffe at a very low level. |
Path 1: The Modern & Recommended Path (Using Docker)
This method avoids all the hassles of installing dependencies on your host system. You'll run Caffe inside a container where everything is already perfectly configured.
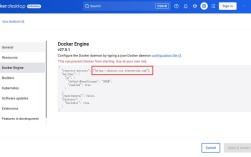
Step 1: Install Docker
If you don't have Docker installed, open a terminal and install it.
# Update your package list
sudo apt update
# Install prerequisites
sudo apt install -y apt-transport-https ca-certificates curl software-properties-common
# Add Docker's official GPG key
curl -fsSL https://download.docker.com/linux/ubuntu/gpg | sudo gpg --dearmor -o /usr/share/keyrings/docker-archive-keyring.gpg
# Set up the stable repository
echo "deb [arch=$(dpkg --print-architecture) signed-by=/usr/share/keyrings/docker-archive-keyring.gpg] https://download.docker.com/linux/ubuntu $(lsb_release -cs) stable" | sudo tee /etc/apt/sources.list.d/docker.list > /dev/null
# Install Docker Engine
sudo apt update
sudo apt install -y docker-ce docker-ce-cli containerd.io
# Add your user to the docker group to run commands without sudo
sudo usermod -aG docker ${USER}
# IMPORTANT: Log out and log back in for the group change to take effect
Step 2: Pull and Run the Caffe Docker Image
The official bvlc/caffe images are maintained by the Berkeley Vision and Learning Center (BVLC). We'll use the cpu version for simplicity, as setting up GPU support in Docker adds another layer of complexity (requiring nvidia-docker).

# Pull the latest Caffe CPU image
docker pull bvlc/caffe:cpu
# Run the Caffe container in interactive mode
# This will drop you into a bash shell inside the container
docker run -it --rm bvlc/caffe:cpu bash
You are now inside the Caffe environment!
Step 3: Verify the Installation
From inside the Docker container, you can run Python and test the Caffe import.
# Start a Python interpreter
python
# In the Python interpreter:
>>> import caffe
>>> print(caffe.__version__)
# You should see the Caffe version number printed.
# You can also run the Caffe test
>>> import caffe
>>> caffe.test()
# This should run successfully without errors.
# Exit Python and the container
>>> exit
exit
Congratulations! You have a working Caffe environment. To run it again, just use the docker run -it --rm bvlc/caffe:cpu bash command.
Path 2: The Traditional Path (Native Installation from Source)
This is the "old-school" way. It requires installing many dependencies manually and compiling Caffe from its source code. This process is prone to errors, especially with library version mismatches.

Step 1: Install Dependencies
Open a terminal and run the following commands to install all the necessary libraries.
# Update package lists
sudo apt update
# Install essential build tools and libraries
sudo apt install -y build-essential cmake git pkg-config
# Install image I/O libraries
sudo apt install -y libprotobuf-dev libopencv-dev
# Install BLAS (Basic Linear Algebra Subprograms) - OpenBLAS is a good choice
sudo apt install -y libatlas-base-dev
# Install Python and its development files
sudo apt install -y python3-dev python3-pip
# Install Boost and HDF5 (often needed for Python layers)
sudo apt install -y libboost-all-dev libhdf5-dev protobuf-compiler
Step 2: Install Python Dependencies
It's highly recommended to use a Python virtual environment to avoid conflicts with system packages.
# Install virtualenv and virtualenvwrapper
sudo pip3 install virtualenv virtualenvwrapper
# Add virtualenvwrapper to your shell profile
echo -e "\n# Virtual Environment Wrapper\nexport WORKON_HOME=$HOME/.virtualenvs\nexport VIRTUALENVWRAPPER_PYTHON=/usr/bin/python3\nsource /usr/local/bin/virtualenvwrapper.sh" >> ~/.bashrc
# Source the profile to apply changes
source ~/.bashrc
# Create and activate a new virtual environment for Caffe
mkvirtualenv caffe -p python3
workon caffe
Now, inside the caffe virtual environment, install the Python requirements.
# Install core Python libraries for Caffe
pip install numpy protobuf scipy
# Install other useful libraries
pip install matplotlib pandas scikit-image ipython h5py pyyaml
Step 3: Clone and Compile Caffe
Now we get the Caffe source code and compile it.
# Navigate to your home directory or a projects folder
cd ~
# Clone the Caffe repository (the 'pycaffe' branch is for Python 3)
git clone https://github.com/BVLC/caffe.git
cd caffe
# Create a copy of the configuration file to customize
cp Makefile.config.example Makefile.config
# Edit the Makefile.config to enable Python and other features
# Use your favorite editor, like nano or vim
nano Makefile.config
In the Makefile.config file, you must uncomment the following lines to enable Python 3 support:
# Uncomment to build the python 3 layer
# WITH_PYTHON_LAYER := 1
# Uncomment to use Python 3 (instead of Python 2)
# ANACONDA_HOME := # path to anaconda (optional)
# PYTHON_INCLUDE := /usr/include/python3.8 \ # Anaconda Python is in /usr/include/
#                 /usr/lib/python3.8/dist-packages/numpy/core/include \
#                 /usr/local/lib/python3.8/dist-packages/numpy/core/include
# PYTHON_LIB := /usr/lib/python3.8/config-3.8-x86_64-linux-gnu/
# PYTHON_LIB := /usr/local/lib/
Important: The paths for PYTHON_INCLUDE and PYTHON_LIB might be slightly different depending on your Ubuntu version and Python installation. You can find the correct paths by running:
python3 -c "from distutils.sysconfig import get_python_inc; print(get_python_inc())"
and
python3 -c "from distutils.sysconfig import get_config_var; print(get_config_var('LIBDIR'))"
Now, save the file and exit the editor. Finally, compile Caffe.
# Make sure you are still in the caffe directory and your virtualenv is active
(workon caffe)
# Compile Caffe (this will take a while)
make all -j$(nproc)
make test -j$(nproc)
make runtest -j$(nproc) # Optional, but good for checking the build
If all the commands complete without errors, your Caffe installation is successful.
Step 4: Verify the Installation
# Activate your virtual environment if you're not already in it
workon caffe
# Run Python
python
# In the Python interpreter:
>>> import sys
# Make sure the correct python environment is being used
>>> print(sys.executable)
# Should point to your virtualenv's python
>>> import caffe
>>> print(caffe.__version__)
# You should see the Caffe version number.
# Exit Python
>>> exit
Common Problems and Troubleshooting
-
ImportError: No module named caffe: This is the most common error.- Docker: You are running Python on your host machine, not inside the container. Make sure you are inside the
docker runsession. - Native: Your
PYTHONPATHis not set correctly. Add Caffe'spythondirectory to it:export PYTHONPATH=/path/to/caffe/python:$PYTHONPATH # Add this line to your ~/.bashrc to make it permanent
- Docker: You are running Python on your host machine, not inside the container. Make sure you are inside the
-
BLAS/LAPACK Mismatch Errors: If you get errors related to BLAS, it's often a conflict between
libatlasandlibopenblas. The Docker image avoids this. For a native install, you can try to force a specific BLAS by settingBLASandLAPACKflags in theMakefile. -
CUDA/cuDNN Issues (for GPU): If you want to use a GPU, you must install the correct NVIDIA drivers, CUDA Toolkit, and cuDNN. This is a complex process in itself. The Docker path is much simpler for GPU setups, as you would use
nvidia-dockerand abvlc/caffe:gpuimage. -
Protocol Buffer Version Mismatch: If you get errors related to protobuf, it's likely a version conflict between the system-installed
libprotobufand the Pythonprotobufpackage. Using a Python virtual environment helps isolate this, but sometimes you need to explicitly specify versions.