Of course! This is a very common and powerful combination for software development. Here’s a comprehensive guide covering everything from installation to best practices for using the Eclipse IDE for Java development on Linux.

The Big Picture: Why This Combination?
- Linux: A robust, flexible, and free operating system. It's the standard for server environments and a favorite among developers for its power and control.
- Java: A "write once, run anywhere" programming language. It's platform-independent, meaning your compiled code (
.jarfiles) can run on any system with a Java Virtual Machine (JVM). - Eclipse: A powerful, open-source, and highly extensible Integrated Development Environment (IDE). It's the de facto standard for Java development and provides tools for coding, debugging, building, and managing projects.
Together, they form a complete, professional, and cost-free development environment.
Prerequisites: Installing Java
Eclipse is an application written in Java. To run Eclipse, you must first have a Java Runtime Environment (JRE) installed. For Java development, you need the Java Development Kit (JDK), which includes the JRE plus the tools to compile and run code (like javac and java).
The best way to manage Java on modern Linux distributions (like Ubuntu, Debian, Fedora, etc.) is using the system's package manager.
For Debian / Ubuntu / Mint:
# Update your package list
sudo apt update
# Install the default JDK (usually OpenJDK 11 or 17)
# This is the recommended approach for most users.
sudo apt install default-jdk
# If you need a specific version, e.g., OpenJDK 17
sudo apt install openjdk-17-jdk
For Fedora / CentOS / RHEL:
# Update your package list
sudo dnf update
# Install the default JDK (usually OpenJDK 17 or 21)
sudo dnf install java-latest-openjdk
# Or for a specific version, e.g., OpenJDK 17
sudo dnf install java-17-openjdk-devel
Verify the Installation:
After installation, open a terminal and verify that Java is installed correctly.

# Check the Java version
java -version
# Check the compiler version (part of the JDK)
javac -version
You should see output similar to this:
openjdk version "17.0.9" 2025-10-17
OpenJDK Runtime Environment (build 17.0.9+0-Ubuntu-0ubuntu122.04.1)
OpenJDK 64-Bit Server VM (build 17.0.9+0-Ubuntu-0ubuntu122.04.1, mixed mode, sharing)
javac 17.0.9
Installing Eclipse
It's highly recommended to download the Eclipse IDE for Java Developers from the official website.
- Go to the Eclipse Download Page: https://www.eclipse.org/downloads/
- Download the "Eclipse IDE for Java Developers" package. It will be a
.tar.gzfile. - Navigate to your Downloads folder in the terminal or use your file manager.
# Navigate to the directory where the file was downloaded
cd ~/Downloads
- Extract the archive. You can do this from the file manager by right-clicking, or via the command line.
# Extract the downloaded file
# Replace 'eclipse-inst-linux64.tar.gz' with the actual filename you downloaded
tar -xvf eclipse-inst-linux64.tar.gz
- Run the Installer. Navigate into the newly created
eclipse-installerdirectory and run the installer.
cd eclipse-installer
# Launch the installer
./eclipse-inst
A graphical installer will launch. Follow the on-screen instructions. It's best practice to install Eclipse to a location like /opt/eclipse or your home directory (~/eclipse). The installer will create a desktop shortcut for you.
First Steps: Creating a Java Project
-
Launch Eclipse: You can now launch Eclipse from your application menu or by running
~/eclipse/eclipsefrom the terminal. (图片来源网络,侵删)
 -
Select a Workspace: The first time you launch Eclipse, it will ask you for a "workspace." This is the folder where all your projects will be stored. You can create a new folder, for example,
~/workspace, and select it. -
Create a New Project:
- Go to
File->New->Java Project. - Give your project a name (e.g.,
HelloWorld). - Ensure the "Use an execution environment" or "JRE" is set to the JDK you installed earlier (e.g.,
JavaSE-17). - Click
Finish.
- Go to
-
Create a Class:
- In the "Project Explorer" view on the left, right-click on your
HelloWorldproject. - Go to
New->Class. - Enter a name for the class (e.g.,
Main). - Check the box
public static void main(String[] args). This will create the main method, which is the entry point for your Java application. - Click
Finish.
- In the "Project Explorer" view on the left, right-click on your
-
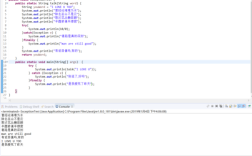
Write and Run Code:
- Eclipse will generate a template file. Add a simple
printstatement inside themainmethod.
public class Main { public static void main(String[] args) { System.out.println("Hello, Linux Eclipse Java World!"); } } - Eclipse will generate a template file. Add a simple
-
Run the Program:
- Right-click anywhere in the
Main.javaeditor window. - Select
Run As->Java Application. - The output will appear in the "Console" view at the bottom of the screen.
- Right-click anywhere in the
Essential Tips and Best Practices
A. Managing Java Versions (JDK)
If you have multiple JDKs installed, you need to tell Eclipse which one to use.
- Go to
Window->Preferences(on Linux) orEclipse->Settings(on macOS). - Navigate to
Java->Installed JREs. - Click
Add.... SelectStandard VMand clickNext. - Click
Directory...and browse to the JDK installation path. It's usually in/usr/lib/jvm/or/usr/lib/jvm/java-17-openjdk-amd64/. - Select the JDK and click
Finish. - Ensure the checkbox next to your chosen JDK is checked. This is your default JDK for all projects.
B. Using the Terminal (Integrated Console)
Eclipse has an integrated terminal that opens in the perspective. This is incredibly useful for running git commands, mvn (Maven) commands, or docker commands without leaving the IDE.
- Go to
Window->Show View->Terminalor simply pressAlt + Shift + T.
C. Debugging
Debugging is one of Eclipse's strongest features.
- Set a breakpoint by double-clicking in the margin to the left of the line number.
- Right-click your file and select
Debug As->Java Application. - The perspective will switch to the "Debug" perspective.
- You can use the buttons to step over, step into, or step out of code, inspect variables, and see the call stack.
D. Importing Existing Projects
If you have an existing Java project (e.g., from Git):
- Go to
File->Import. - Select
Git->Projects from Gitand follow the wizard to clone your repository. - Alternatively, if the project is already on your filesystem, select
Existing Projects into Workspace.
Troubleshooting Common Issues
-
"Failed to create the Java Virtual Machine"
- Cause: Eclipse is trying to run with a 32-bit JRE on a 64-bit system, or it can't find a valid JRE.
- Solution: Ensure you have a 64-bit JDK installed and that you've configured it in
Window->Preferences->Java->Installed JREs. You can also try launching Eclipse from the terminal to see the error message.
-
Eclipse is very slow
- Cause: This can be due to a large workspace, indexing, or insufficient memory allocated to Eclipse.
- Solution:
- Increase the heap size. Edit the
eclipse.inifile in your Eclipse installation directory. Add or modify the-Xms(initial heap size) and-Xmx(maximum heap size) lines. For example:-startup plugins/org.eclipse.equinox.launcher_1.6.400.v20250924-0641.jar --launcher.library plugins/org.eclipse.equinox.launcher.gtk.linux.x86_64_1.2.700.v20251108-1024 -Xms512m -Xmx2048m // Increase this value if you have enough RAM ... (other lines) - Disable automatic indexing in
Window->Preferences->General->Search-> uncheckEnable background search.
- Increase the heap size. Edit the
-
"Unsupported major.minor version"
- Cause: You compiled your code with a newer version of Java (e.g., Java 17) but are trying to run it on an older JRE (e.g., Java 8).
- Solution: Ensure the "Execution Environment" or "JRE" for your project is set to a version compatible with your code. You can check this by right-clicking the project ->
Properties->Java Build Path->Librariestab.