Of course! This is a classic and powerful combination. Let's break down how to use Python with Flask on a Linux system, from a simple "Hello, World" to a production-ready setup.
The Big Picture: Why This Stack is So Popular
- Linux: The operating system of choice for servers. It's stable, secure, highly customizable, and free. Most web hosting environments (cloud servers, VPS) run on Linux.
- Python: A versatile, readable, and powerful programming language with a massive ecosystem of libraries (packages) for everything from web development to data science.
- Flask: A "micro-framework" for Python. It's lightweight and gives you the core tools you need to build a web application without forcing you into a specific structure. It's simple to learn but can be scaled to complex applications.
Part 1: The Basics - A Simple Flask App
This part covers setting up your environment and running your first Flask application.
Step 1: Install Python and pip on Linux
Most modern Linux distributions come with Python pre-installed. You can check by opening your terminal and typing:
python3 --version
If you see a version number (e.g., Python 3.10.6), you're good to go. If not, you'll need to install it. For Debian/Ubuntu-based systems:
sudo apt update
sudo apt install python3 python3-pip
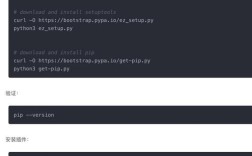
pip is Python's package installer, which we'll use to install Flask.
Step 2: Install Flask
Using pip, install Flask globally or, better yet, inside a Python virtual environment.
pip3 install Flask
Step 3: Create Your First Flask Application
Let's create a project directory and a simple app.
-
Create a project folder:
mkdir my_flask_app
cd my_flask_app
-
Create the main application file:
nano app.py
(You can use
vim,gedit, or any other text editor you prefer). -
Add the following code to
app.py:from flask import Flask # Create an instance of the Flask class app = Flask(__name__) # Define a route using a decorator # This route will be triggered when someone visits the root URL ('/') @app.route('/') def hello_world(): return '<h1>Hello, World from Flask on Linux!</h1>' # Define another route with a dynamic part @app.route('/user/<username>') def show_user_profile(username): # Show the user profile for that user return f'<h1>User Profile: {username}</h1>' # This allows the script to be run directly if __name__ == '__main__': # The debug=True flag will auto-reload the server when you save changes # and provide a helpful debugger in the browser. app.run(debug=True)
Step 4: Run the Flask App
In your terminal, make sure you are in the my_flask_app directory and run:
python3 app.py
You should see output like this:
 * Serving Flask app 'app'
 * Debug mode: on
WARNING: This is a development server. Do not use it in a production deployment.
Use a production WSGI server instead.
 * Running on http://127.0.0.1:5000
Press CTRL+C to quit
 * Restarting with stat
 * Debugger is active!
 * Debugger PIN: ...
Your Flask application is now running! Open your web browser and go to http://127.0.0.1:5000. You will see "Hello, World from Flask on Linux!".
Try the other route: http://127.0.0.1:5000/user/john_doe. You will see "User Profile: john_doe".
Part 2: Project Structure and Best Practices
For anything more than a simple script, you should organize your code.
Use a Virtual Environment
Virtual environments are essential. They create an isolated space for your project's dependencies, preventing conflicts between different projects.
-
Create the environment:
# In your project directory (my_flask_app)
python3 -m venv venv
This creates a
venvfolder containing a separate Python installation. -
Activate the environment:
source venv/bin/activate
Your terminal prompt will change to show
(venv), indicating the environment is active. -
Now, install Flask inside the environment:
pip install Flask
This will install Flask only in this
venv, not globally. -
Deactivate the environment when you're done:
deactivate
Organize Your Project
A better structure separates concerns (HTML, Python logic, static assets).
my_flask_app/
├── venv/
├── app.py
├── templates/
│   └── index.html
└── static/
└── style.csstemplates/: Flask automatically looks for HTML files in this folder.static/: For CSS, JavaScript, images, etc.
Updated app.py:
from flask import Flask, render_template
app = Flask(__name__)
@app.route('/')
def home():
    # render_template will look for index.html in the 'templates' folder
    return render_template('index.html', name="Linux User")
if __name__ == '__main__':
    app.run(debug=True)
templates/index.html:
<!DOCTYPE html>
<html lang="en">
<head>
    <meta charset="UTF-8">Flask App</title>
    <link rel="stylesheet" href="{{ url_for('static', filename='style.css') }}">
</head>
<body>
    <h1>Hello, {{ name }}!</h1>
    <p>This page is rendered from a template.</p>
</body>
</html>
static/style.css:
body {
    font-family: Arial, sans-serif;
    background-color: #f0f0f0;
    text-align: center;
    padding-top: 50px;
}
After creating these files, run python3 app.py (make sure your venv is activated!) and refresh your browser.
Part 3: Deploying to Production (The Linux Way)
The built-in Flask development server (app.run()) is not suitable for production. It's slow and not secure. For production, you need a proper WSGI server to handle requests and a reverse proxy to serve static files and handle SSL/TLS (HTTPS).
The most common stack is: Nginx (Reverse Proxy) + Gunicorn (WSGI Server)
Step 1: Install Gunicorn
Gunicorn is a WSGI server that will run your Flask application.
# Make sure your virtual environment is activated!
(venv) pip install gunicorn
Step 2: Run your app with Gunicorn
First, you need to tell Gunicorn how to find your Flask application. It looks for an "application" variable, which is typically the app instance in your app.py file.
Run this command from your project's root directory:
# The format is: module_name:variable_name
gunicorn --bind 0.0.0.0:8000 app:app
--bind 0.0.0.0:8000: Tells Gunicorn to listen on all available network interfaces on port 8000. This is important so Nginx can talk to it.app:app: The firstappis the Python module (app.py), and the secondappis the Flask application instance inside that module.
Your app is now running on port 8000.
Step 3: Install and Configure Nginx
Nginx will act as a front-end. It will receive requests from the internet, pass dynamic requests to Gunicorn, and serve static files (CSS, JS, images) directly.
-
Install Nginx:
sudo apt update
sudo apt install nginx
-
Create an Nginx configuration file for your site:
sudo nano /etc/nginx/sites-available/my_flask_app
-
Add the following configuration:
server { listen 80; server_name your_server_ip_or_domain.com; # Replace with your server's IP or domain location / { # Pass requests to the Gunicorn server proxy_pass http://127.0.0.1:8000; proxy_set_header Host $host; proxy_set_header X-Real-IP $remote_addr; } # Optional: Serve static files directly for better performance location /static { alias /path/to/your/my_flask_app/static; # Replace with the absolute path to your static folder expires 30d; } } -
Enable the site:
# Create a symbolic link from sites-available to sites-enabled
sudo ln -s /etc/nginx/sites-available/my_flask_app /etc/nginx/sites-enabled/
# Test the Nginx configuration for syntax errors
sudo nginx -t
# If the test is successful, reload Nginx to apply the changes
sudo systemctl reload nginx
Now, if you navigate to your server's IP address in your browser, Nginx will be listening on port 80, it will forward the request to Gunicorn on port 8000, which will run your Flask application and send the response back through Nginx to your browser.
Step 4: (Optional but Highly Recommended) Add SSL with Let's Encrypt
For a secure website, you need HTTPS. You can use Certbot to get free SSL certificates from Let's Encrypt.
sudo apt install certbot python3-certbot-nginx
sudo certbot --nginx -d your_domain.com
Certbot will automatically detect your Nginx configuration, obtain a certificate, and update your configuration to use HTTPS.