Of course! Here is a comprehensive guide to using Modbus with Python on GitHub, covering the most popular libraries, examples, and best practices.

What is Modbus?
First, a quick refresher. Modbus is a serial communication protocol developed by Modicon in 1979. It's one of the most widely used protocols in industrial automation and IoT. It's simple, robust, and open-source, making it a standard for connecting industrial electronic devices.
There are several common variants:
- Modbus RTU: Uses serial communication (RS-232, RS-485). It's compact and fast.
- Modbus TCP/IP: Uses Ethernet (TCP). It's the most common version for modern industrial networks.
- Modbus ASCII: An older, human-readable format over serial.
Top Python Libraries for Modbus
The Python ecosystem has excellent libraries for working with Modbus. Here are the most prominent ones, all available on GitHub.
pymodbus (The Recommended & Most Popular)
This is the de-facto standard for Modbus in Python. It's actively maintained, feature-rich, and supports all major Modbus variants (RTU, TCP, ASCII, and UDP).

- GitHub Repository: https://github.com/riptideio/pymodbus
- Why it's great:
- Comprehensive: Supports Client and Server roles for all Modbus variants.
- Well-documented: Excellent documentation with many examples.
- Asynchronous Support: Built-in support for
asyncio, which is perfect for high-performance, non-blocking I/O applications. - Extensible: Easy to extend and customize.
minimalmodbus (Simple & Lightweight)
This library is designed for simplicity, making it perfect for beginners or for projects where you only need to do basic Modbus RTU communication (e.g., reading from a single sensor).
- GitHub Repository: https://github.com/pyhys/minimalmodbus
- Why it's great:
- Extremely Easy to Use: The API is very simple and intuitive.
- RTU Focused: Primarily for Modbus RTU over serial ports.
- Good for Quick Scripts: Ideal for getting started with a Modbus device quickly.
pyModbusTCP (TCP/IP Specific)
As the name suggests, this library is a lightweight and easy-to-use implementation focused solely on Modbus TCP/IP.
- GitHub Repository: https://github.com/sourceperl/pyModbusTCP
- Why it's great:
- Simple and Focused: The API is straightforward for TCP client/server tasks.
- No Dependencies: It's a single file, making it very easy to integrate.
- Good for Beginners: A great choice if you only need Modbus TCP.
Getting Started with pymodbus (Recommended)
Let's dive into pymodbus as it's the most versatile library.
Installation
First, install the library using pip:

pip install pymodbus
Example 1: Modbus TCP Client (Reading Data)
This is the most common use case: a Python script that acts as a client to read data from a Modbus TCP server (like a PLC, a sensor, or another programmable device).
Let's say we want to read 10 holding registers (starting at address 0) from a device at IP 168.1.10 on port 502.
# pymodbus_client_example.py
from pymodbus.client import ModbusTcpClient
# --- Configuration ---
# The IP address and port of the Modbus TCP server
HOST = '192.168.1.10'
PORT = 502
# The Modbus slave (device) ID
SLAVE_ID = 1
# The starting address and number of registers to read
STARTING_ADDRESS = 0
NUM_REGISTERS = 10
# --- Create the Client ---
# The 'with' statement ensures the connection is properly closed
try:
    with ModbusTcpClient(HOST, port=PORT) as client:
        print(f"Connecting to {HOST}:{PORT}...")
        # Check if the connection is successful
        if not client.connect():
            print(f"Failed to connect to {HOST}")
            exit()
        print("Connection successful!")
        # --- Read Holding Registers ---
        # Holding registers are address 0-19999 (often used for configuration)
        result = client.read_holding_registers(STARTING_ADDRESS, NUM_REGISTERS, slave=SLAVE_ID)
        # --- Process the Result ---
        if not result.isError():
            # The registers are stored in the 'registers' attribute of the result object
            registers = result.registers
            print(f"Successfully read {len(registers)} registers from address {STARTING_ADDRESS}:")
            print(registers)
        else:
            print(f"Error reading registers: {result}")
except Exception as e:
    print(f"An error occurred: {e}")
How to run it:
- Make sure you have a Modbus TCP server running and accessible at
168.1.10:502. - Save the code as
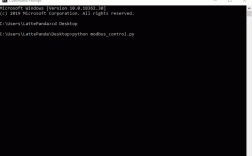
pymodbus_client_example.py. - Run from your terminal:
python pymodbus_client_example.py
Example 2: Modbus TCP Server (Simulating a Device)
Sometimes you need to simulate a Modbus device for testing. pymodbus makes this easy.
This script creates a server that exposes some dummy data.
# pymodbus_server_example.py
from pymodbus.server import StartTcpServer
from pymodbus.datastore import ModbusSequentialDataBlock
from pymodbus.datastore import ModbusSlaveContext, ModbusServerContext
from pymodbus.device import ModbusDeviceIdentification
import logging
# --- Setup Logging ---
# You can see more detailed connection logs
logging.basicConfig()
log = logging.getLogger()
log.setLevel(logging.DEBUG)
# --- Create a Data Store ---
# We'll create a slave with Holding Registers and Input Registers.
# Holding Registers (0-99): Can be written to by a client.
# Input Registers (100-199): Read-only, for simulation.
slave_context = ModbusSlaveContext(
    di=ModbusSequentialDataBlock(0, [17] * 100),  # Discrete Inputs (not used in this example)
    co=ModbusSequentialDataBlock(0, [0] * 100),   # Coils (not used in this example)
    hr=ModbusSequentialDataBlock(0, [16] * 100),  # Holding Registers
    ir=ModbusSequentialDataBlock(0, [23] * 100)   # Input Registers
)
# --- Create the Server Context ---
# This context manages our slave(s). We have one slave with ID 1.
context = ModbusServerContext(slaves={1: slave_context}, single=True)
# --- Device Identity ---
# This is optional but good practice for identifying your device.
identity = ModbusDeviceIdentification(
    info_name={"VendorName": "Pymodbus", "ProductCode": "PM", "VendorUrl": "http://github.com/riptideio/pymodbus",
               "ProductName": "Pymodbus Server", "ModelName": "Pymodbus Example Server",
               "MajorRevision": 1, "MinorRevision": 0}
)
# --- Start the Server ---
print("Starting Modbus TCP Server on port 502...")
try:
    # StartTcpServer is a blocking call. The script will run until stopped.
    StartTcpServer(context, identity=identity, address=("localhost", 502))
except KeyboardInterrupt:
    print("Server stopped by user.")
How to run it:
- Save the code as
pymodbus_server_example.py. - Run from your terminal:
python pymodbus_server_example.py - The server will now be listening. You can test it using a Modbus client tool (like ModbusPoll) or by running the client script from the first example (changing
HOSTto'localhost').
Getting Started with minimalmodbus (Simple RTU Example)
This is for when you have a device connected to your computer's serial port (e.g., via a USB-to-RS232 converter).
Installation
pip install minimalmodbus
Example: Reading a Temperature Sensor
Let's assume we have a temperature sensor connected to /dev/ttyUSB0 (Linux) or COM3 (Windows).
# minimalmodbus_example.py
import minimalmodbus
import time
# --- Configuration ---
# The serial port the device is connected to
PORT = '/dev/ttyUSB0'  # Change this to your port, e.g., 'COM3'
# The slave (device) ID (Baud address on the device)
SLAVE_ID = 1
# The register address for the temperature reading (check your device's manual)
TEMP_REGISTER_ADDRESS = 0
# The number of decimal places for the