Java Base64 图片上传实现指南
在Java中,使用Base64编码上传图片是一种常见的方法,特别适用于将图片数据直接嵌入到JSON或XML请求中,下面我将介绍完整的实现步骤。

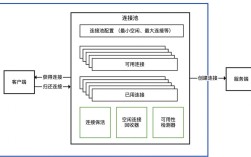
(图片来源网络,侵删)
Base64编码图片数据
你需要将图片文件转换为Base64字符串:
import java.io.File;
import java.io.FileInputStream;
import java.io.IOException;
import java.util.Base64;
public class ImageToBase64 {
    public static String convertToBase64(String imagePath) throws IOException {
        File file = new File(imagePath);
        FileInputStream imageInFile = new FileInputStream(file);
        byte[] imageData = new byte[(int) file.length()];
        imageInFile.read(imageData);
        imageInFile.close();
        // 使用Java 8的Base64类进行编码
        return Base64.getEncoder().encodeToString(imageData);
    }
}
创建上传服务类
下面是一个完整的图片上传服务实现:
import java.io.File;
import java.io.FileOutputStream;
import java.io.IOException;
import java.util.Base64;
import java.util.UUID;
public class ImageUploadService {
    // 保存Base64图片到服务器
    public String saveBase64Image(String base64Image, String uploadDir) throws IOException {
        // 移除Base64前缀(如果有)
        String[] parts = base64Image.split(",");
        String imageBase64 = parts.length > 1 ? parts[1] : parts[0];
        // 解码Base64
        byte[] imageBytes = Base64.getDecoder().decode(imageBase64);
        // 生成唯一文件名
        String fileName = UUID.randomUUID().toString() + ".jpg";
        String filePath = uploadDir + File.separator + fileName;
        // 创建目录(如果不存在)
        File uploadDirectory = new File(uploadDir);
        if (!uploadDirectory.exists()) {
            uploadDirectory.mkdirs();
        }
        // 写入文件
        try (FileOutputStream fos = new FileOutputStream(filePath)) {
            fos.write(imageBytes);
        }
        return fileName; // 返回保存的文件名
    }
    // 从Base64字符串获取图片类型
    public String getImageTypeFromBase64(String base64Image) {
        String[] parts = base64Image.split(",");
        if (parts.length > 1) {
            String prefix = parts[0];
            if (prefix.contains("jpeg")) return "jpg";
            if (prefix.contains("png")) return "png";
            if (prefix.contains("gif")) return "gif";
            if (prefix.contains("bmp")) return "bmp";
        }
        return "jpg"; // 默认类型
    }
}
控制器实现(Spring Boot示例)
import org.springframework.http.ResponseEntity;
import org.springframework.web.bind.annotation.*;
import org.springframework.web.multipart.MultipartFile;
import java.io.IOException;
import java.util.HashMap;
import java.util.Map;
@RestController
@RequestMapping("/api/images")
public class ImageController {
    private final ImageUploadService imageUploadService;
    public ImageController(ImageUploadService imageUploadService) {
        this.imageUploadService = imageUploadService;
    }
    @PostMapping("/upload")
    public ResponseEntity<?> uploadImage(@RequestBody Map<String, String> request) {
        try {
            String base64Image = request.get("image");
            String uploadDir = "uploads"; // 上传目录
            String fileName = imageUploadService.saveBase64Image(base64Image, uploadDir);
            Map<String, String> response = new HashMap<>();
            response.put("fileName", fileName);
            response.put("status", "success");
            return ResponseEntity.ok(response);
        } catch (IOException e) {
            return ResponseEntity.status(500).body("图片上传失败: " + e.getMessage());
        }
    }
    // 或者使用MultipartFile方式(前端使用FormData)
    @PostMapping("/upload-multipart")
    public ResponseEntity<?> uploadImageMultipart(@RequestParam("file") MultipartFile file) {
        try {
            // 将MultipartFile转换为Base64
            String base64Image = Base64.getEncoder().encodeToString(file.getBytes());
            String uploadDir = "uploads";
            String fileName = imageUploadService.saveBase64Image(base64Image, uploadDir);
            Map<String, String> response = new HashMap<>();
            response.put("fileName", fileName);
            response.put("status", "success");
            return ResponseEntity.ok(response);
        } catch (IOException e) {
            return ResponseEntity.status(500).body("图片上传失败: " + e.getMessage());
        }
    }
}
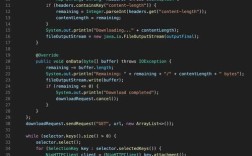
前端调用示例(JavaScript)
使用Base64字符串上传
const base64Image = "data:image/jpeg;base64,/9j/4AAQSkZJRgABAQAAAQ..."; // 你的Base64图片数据
fetch('/api/images/upload', {
    method: 'POST',
    headers: {
        'Content-Type': 'application/json',
    },
    body: JSON.stringify({
        image: base64Image
    })
})
.then(response => response.json())
.then(data => console.log('Success:', data))
.catch(error => console.error('Error:', error));
使用FormData上传(推荐)
const fileInput = document.getElementById('imageInput');
const file = fileInput.files[0];
const formData = new FormData();
formData.append('file', file);
fetch('/api/images/upload-multipart', {
    method: 'POST',
    body: formData
})
.then(response => response.json())
.then(data => console.log('Success:', data))
.catch(error => console.error('Error:', error));
注意事项
- 文件大小限制:Base64编码会使数据体积增加约33%,注意配置服务器允许的最大请求大小
- 安全性:验证上传的文件类型,防止恶意文件上传
- 性能:大文件上传时,Base64编码会消耗更多内存和CPU
- 路径处理:确保上传目录存在且有写入权限
- 文件名处理:使用随机文件名防止覆盖和路径遍历攻击
完整项目结构建议
src/
├── main/
│   ├── java/
│   │   └── com/example/
│   │       ├── controller/
│   │       │   └── ImageController.java
│   │       ├── service/
│   │       │   └── ImageUploadService.java
│   │       └── Application.java
│   └── resources/
│       └── application.properties
└── test/
    └── java/
实现提供了从Base64编码图片到服务器保存的完整流程,你可以根据实际需求进行调整。

(图片来源网络,侵删)