Of course! Using Eclipse with Python for Spark development is a common setup, especially for those coming from a Java or Scala background who are comfortable with the Eclipse IDE.

Here’s a comprehensive guide covering why you'd use this combination, how to set it up, best practices, and a complete "Hello World" example.
Why Use Eclipse for PySpark Development?
While many Python developers prefer VS Code or PyCharm for their excellent Python support, Eclipse offers some unique advantages:
- Integrated Java/Scala Environment: If you're working in a polyglot environment (Java, Scala, Python), Eclipse provides a single, consistent IDE for all of them.
- Deep Integration with Eclipse PyDev: PyDev is a mature, powerful plugin that turns Eclipse into a full-fledged Python IDE.
- Debugging: PyDev provides a robust graphical debugger for your PySpark code, allowing you to set breakpoints, inspect variables, and step through your code line by line.
- Code Analysis and Refactoring: It offers features like code completion, syntax highlighting, and refactoring tools that improve productivity.
- Version Control: Excellent integration with Git and other version control systems directly within the IDE.
Prerequisites
Before you start, make sure you have the following installed:
- Java Development Kit (JDK): Spark runs on the JVM. You need JDK 8 or 11 (the most commonly supported versions).
- Verify installation:
java -version
- Verify installation:
- Apache Spark: Download a pre-built version for Hadoop from the Apache Spark website.
- It's good practice to set the
SPARK_HOMEenvironment variable to the directory where you extracted Spark.
- It's good practice to set the
- Python: Python 3.7+ is recommended.
- Verify installation:
python --version
- Verify installation:
- pip: Python's package installer.
- Verify installation:
pip --version
- Verify installation:
- Eclipse IDE for Java Developers: Download it from the Eclipse downloads page. Choose the "Eclipse IDE for Java Developers" package as it includes the necessary underlying framework.
Step-by-Step Setup Guide
Step 1: Install the PyDev Plugin
This is the most crucial step. PyDev provides the Python-specific functionality within Eclipse.

- Launch Eclipse.
- Go to
Help->Install New Software.... - In the "Work with" field, enter the PyDev update site:
http://pydev.org/updates - Eclipse will show a list of available software. Select "PyDev" and click
Next. - Review the details, accept the license agreements, and click
Finish. - Eclipse will download and install PyDev. You may be prompted to restart Eclipse.
Step 2: Configure Python and Spark in Eclipse
- Go to
Window->Preferences(on macOS,Eclipse->Preferences). - Navigate to
PyDev->Interpreter - Python. - Click
New...to add a new Python interpreter. - Browse to your Python executable (e.g.,
/usr/bin/python3on Linux orC:\Python39\python.exeon Windows). Give it a name (e.g.,Python 3.9) and clickOK. - Eclipse will scan your installed packages. Wait for this to complete. This is important so PyDev knows about
pyspark. - Now, configure the Spark home. Go to
PyDev->Spark. - Check the box for
Use a Spark Home. - Browse to and select the directory where you installed Apache Spark (e.g.,
/path/to/spark-3.3.1orC:\spark\spark-3.3.1). This allows PyDev to find the necessary JAR files for syntax highlighting and code completion.
Your Eclipse environment is now configured for PySpark development!
Step 3: Install PySpark and Find Spark
You need to install the pyspark library in your Python environment and ensure your script can find the Spark installation.
-
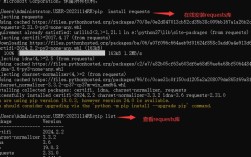
Install PySpark using pip:
pip install pyspark
-
Create a
findsparkutility script: A common pattern is to have a small script that locates your Spark installation and adds it to thePYTHONPATH. This makes your main code cleaner. (图片来源网络,侵删)
Create a new file named
find_spark.py:# find_spark.py import os import sys # Set the SPARK_HOME environment variable if it's not already set # os.environ['SPARK_HOME'] = '/path/to/your/spark-3.3.1' # Add the PySpark directory to the Python path spark_home = os.environ.get('SPARK_HOME', None) if not spark_home: raise ValueError('SPARK_HOME environment variable is not set') sys.path.insert(0, os.path.join(spark_home, 'python')) sys.path.insert(0, os.path.join(sp.path.join(spark_home, 'python', 'lib')))
Creating and Running a PySpark Project in Eclipse
Let's create a simple "Word Count" application.
Step 1: Create a New PyDev Project
- Go to
File->New->PyDev Project. - Give your project a name (e.g.,
PySparkEclipseDemo). - Ensure you select the correct interpreter you configured earlier (e.g.,
Python 3.9). - Click
Finish.
Step 2: Create a Python File
- Right-click on your project in the "Project Explorer" view.
- Go to
New->PyDev Module. - Name the file
word_count.py. - Make sure you select the correct source folder and click
Finish.
Step 3: Write the PySpark Code
Copy and paste the following code into word_count.py. Notice how we use findspark at the very beginning.
# word_count.py
# Step 1: Initialize SparkSession using findspark
# This must be done BEFORE importing pyspark.sql
import find_spark
find_spark.init()
from pyspark.sql import SparkSession
# Step 2: Create a SparkSession
# This is the entry point to any Spark functionality
spark = SparkSession.builder \
    .appName("WordCountEclipse") \
    .getOrCreate()
# Step 3: Create a sample RDD (Resilient Distributed Dataset)
# In a real application, you would read from a file (e.g., sc.textFile("hdfs://..."))
data = ["hello world", "hello eclipse", "eclipse spark", "hello spark"]
rdd = spark.sparkContext.parallelize(data)
# Step 4: Perform the Word Count transformation
# flatMap: Split each line into words
# map: Create a pair (word, 1)
# reduceByKey: Sum the counts for each word
word_counts = rdd.flatMap(lambda line: line.split(" ")) \
                 .map(lambda word: (word, 1)) \
                 .reduceByKey(lambda a, b: a + b)
# Step 5: Collect and print the results
# .collect() brings the data back to the driver node
output = word_counts.collect()
print("Word Count Results:")
for word, count in output:
    print(f"{word}: {count}")
# Step 6: Stop the SparkSession
spark.stop()
Step 4: Run the Application
- Right-click anywhere in the
word_count.pyeditor window. - Select
Run As->Python Run. - The "Console" view at the bottom of Eclipse will show the output.
Expected Output:
Word Count Results:
hello: 3
world: 1
eclipse: 2
spark: 2
Debugging PySpark Code in Eclipse
This is where Eclipse really shines.
- Set a Breakpoint: Double-click in the margin to the left of the line number where you want to pause execution. For example, set one on the line
word_counts = rdd.flatMap(...). - Debug As: Right-click the editor and select
Debug As->Python Run. - Switch to Debug Perspective: Eclipse will ask if you want to switch to the "Debug" perspective. Click
Switch. - Debug View: You will now see a new perspective with several views:
- Debug View: Shows the call stack. You can see your
word_count.pyfile at the top. - Variables View: Shows the current values of all variables in the current scope. You can inspect
rdd,word_counts, etc. - Console View: Still shows the standard output.
- Debug View: Shows the call stack. You can see your
- Control Execution: Use the buttons in the toolbar to control the execution:
- Resume (F8): Continue to the next breakpoint.
- Step Into (F5): Go inside a