Of course! Here is a comprehensive guide to using Python with Elasticsearch, covering everything from setup and installation to advanced operations.

What is Elasticsearch?
Elasticsearch is a powerful, open-source, distributed search and analytics engine. It's built on top of Apache Lucene and allows you to store, search, and analyze large volumes of data quickly and in near real-time.
Think of it as a highly scalable, JSON-based document database designed for full-text search, but it's much more than that. It's part of the Elastic Stack (formerly ELK Stack), which includes:
- Elasticsearch: The search and analytics engine.
- Logstash: A data processing pipeline that ingests data from multiple sources.
- Kibana: A data visualization and management tool.
Why Use Python with Elasticsearch?
Python is one of the most popular languages for data science, web development, and automation. Combining it with Elasticsearch allows you to:
- Index and query data from your Python applications.
- Build powerful search features (e.g., autocomplete, fuzzy search, relevance ranking).
- Analyze large datasets and create dashboards.
- Automate data ingestion and monitoring tasks.
Step 1: Prerequisites
- Python: You need Python 3.6+ installed on your system.
- Elasticsearch: You need a running Elasticsearch instance.
- Easy Start: The simplest way is with Docker. If you have Docker installed, run this command:
docker run -p 9200:9200 -p 9300:9300 -e "discovery.type=single-node" docker.elastic.co/elasticsearch/elasticsearch:8.10.4
This command downloads and starts a single-node Elasticsearch cluster. It will expose it on your local machine at
http://localhost:9200. (图片来源网络,侵删)
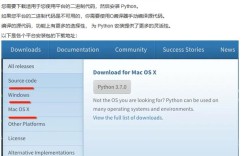
 - Manual Installation: You can also download and install it directly from the Elasticsearch website.
- Easy Start: The simplest way is with Docker. If you have Docker installed, run this command:
After starting Elasticsearch, open your browser and go to http://localhost:9200. You should see a JSON response like this:
{
  "name" : "node-1",
  "cluster_name" : "docker-cluster",
  "cluster_uuid" : "some-uuid",
  "version" : {
    "number" : "8.10.4",
    "build_flavor" : "default",
    "build_type" : "docker",
    "build_hash" : "some-hash",
    "build_date" : "2025-10-25T17:07:56.112593543Z",
    "build_snapshot" : false,
    "lucene_version" : "9.6.0",
    "minimum_wire_compatibility_version" : "7.17.0",
    "minimum_index_compatibility_version" : "7.0.0"
  },
  "tagline" : "You Know, for Search"
}
Step 2: Installing the Official Python Client
The official Python client for Elasticsearch is elasticsearch. It's the recommended library and is actively maintained.
Install it using pip:
pip install elasticsearch
Step 3: Connecting to Elasticsearch
First, you need to create a client object that connects to your Elasticsearch cluster.

from elasticsearch import Elasticsearch
# By default, it connects to localhost:9200
es = Elasticsearch()
# You can also specify the host and port explicitly
# es = Elasticsearch(["http://localhost:9200"])
# To connect to a cloud instance (like Elastic Cloud)
# es = Elasticsearch(
#     cloud_id="your_cloud_id",
#     basic_auth=("elastic", "your_password")
# )
# Check if the connection is successful
if es.ping():
    print("Connected to Elasticsearch!")
else:
    print("Could not connect to Elasticsearch.")
Note for Elasticsearch 8.x: Starting from version 8, security is enabled by default. The default username is
elasticand the password is auto-generated. You can find it in the Elasticsearch container logs or in your cloud provider's dashboard. The client will automatically handle TLS/SSL verification for local development.
Step 4: Indexing Data (Creating Documents)
In Elasticsearch, data is stored in indices (similar to tables in a database). Within an index, data is stored as JSON documents (similar to rows), and each document has a type (less important in modern ES) and a unique ID.
You can index data in two ways:
A. Indexing a Document with a Specific ID
This will either create a new document or update an existing one if the ID already exists.
# Define the document data
doc = {
    'author': 'John Doe',
    'text': 'Elasticsearch is a powerful search engine.',
    'timestamp': '2025-10-27T10:00:00',
    'likes': 15
}
# Index the document
# The index name is 'blog_posts'
# The document ID is '1'
response = es.index(index='blog_posts', id=1, document=doc)
print(f"Document indexed successfully. ID: {response['_id']}")
B. Indexing a Document with an Auto-Generated ID
If you don't provide an ID, Elasticsearch will generate a unique one for you.
doc2 = {
    'author': 'Jane Smith',
    'text': 'Python makes it easy to work with Elasticsearch.',
    'timestamp': '2025-10-27T11:00:00',
    'likes': 8
}
# The 'document' parameter is used for auto-generated IDs
response = es.index(index='blog_posts', document=doc2)
print(f"Document indexed successfully. Auto-generated ID: {response['_id']}")
Step 5: Searching Data (Querying)
This is where Elasticsearch shines. You can perform complex, full-text searches.
A. Simple match_all Query
This query returns all documents in an index.
# The 'query' parameter takes a dictionary defining the search
query = {
    "query": {
        "match_all": {}
    }
}
# Execute the search
response = es.search(index='blog_posts', query=query)
# Print the results
print(f"Found {response['hits']['total']['value']} documents:")
for hit in response['hits']['hits']:
    print(f"  ID: {hit['_id']}, Author: {hit['_source']['author']}, Text: {hit['_source']['text']}")
B. Full-Text Search with match Query
The match query is great for full-text search. It analyzes the search string before searching.
# Search for documents where the 'text' field contains the word 'python'
query = {
    "query": {
        "match": {
            "text": "python"
        }
    }
}
response = es.search(index='blog_posts', query=query)
print(f"Found {response['hits']['total']['value']} documents matching 'python':")
for hit in response['hits']['hits']:
    print(f"  - {hit['_source']['author']}: {hit['_source']['text']}")
C. term Query for Exact Value Matching
Use term for searching for exact values in keyword fields (like author or timestamp).
# Search for documents where the 'author' field is exactly 'John Doe'
query = {
    "query": {
        "term": {
            "author.keyword": "John Doe"
        }
    }
}
response = es.search(index='blog_posts', query=query)
print(f"Found {response['hits']['total']['value']} documents by 'John Doe':")
for hit in response['hits']['hits']:
    print(f"  - ID: {hit['_id']}, Text: {hit['_source']['text']}")
Note: In Elasticsearch, text fields are analyzed (broken down into tokens) for full-text search, while keyword fields are not. To search for an exact match on a text field, you often append
.keywordto its name.
D. bool Query (Combining Multiple Conditions)
The bool query is the most important one. It allows you to combine multiple queries using must (AND), should (OR), filter (must match, but doesn't score), and must_not (AND NOT).
# Find documents by 'Jane Smith' that also contain the word 'search'
query = {
    "query": {
        "bool": {
            "must": [
                { "match": { "author.keyword": "Jane Smith" } },
                { "match": { "text": "search" } }
            ]
        }
    }
}
response = es.search(index='blog_posts', query=query)
print(f"Found {response['hits']['total']['value']} documents matching the bool query:")
for hit in response['hits']['hits']:
    print(f"  - {hit['_source']['author']}: {hit['_source']['text']}")
Step 6: Updating a Document
To update a document, you use the update API. It's often best to use a script to update specific fields.
# Increment the 'likes' count for the document with ID '1'
update_query = {
    "script": {
        "source": "ctx._source.likes += params.likes_count",
        "lang": "painless", # The default scripting language
        "params": {
            "likes_count": 5
        }
    },
    "doc": { # Optional: if you want to update the whole document
        "last_updated": "2025-10-27T12:00:00"
    }
}
response = es.update(index='blog_posts', id=1, body=update_query)
print(f"Document updated: {response['result']}")
Step 7: Deleting Data
You can delete a single document or an entire index.
A. Deleting a Document
# Delete the document with ID '1'
response = es.delete(index='blog_posts', id=1)
print(f"Document deleted: {response['result']}")
B. Deleting an Index
Warning: This is a destructive operation and cannot be undone.
# Delete the entire 'blog_posts' index
# The 'ignore=404' parameter prevents an error if the index doesn't exist
response = es.indices.delete(index='blog_posts', ignore=404)
if response.get('acknowledged'):
    print("Index 'blog_posts' deleted successfully.")
else:
    print("Index 'blog_posts' not found or could not be deleted.")
Advanced Concepts
Mappings and Data Types
Mappings are like the schema definition in a relational database. They define what fields are in the documents, their data types (text, keyword, integer, date, boolean), and how they should be indexed.
It's good practice to define a mapping when you create an index to ensure consistent data handling.
# Define the mapping
mapping = {
    "mappings": {
        "properties": {
            "author": {
                "type": "text"  # Analyzed for full-text search
            },
            "author_keyword": {
                "type": "keyword" # Not analyzed, for exact matches
            },
            "text": {
                "type": "text"
            },
            "timestamp": {
                "type": "date"    # Special type for date operations
            },
            "likes": {
                "type": "integer"
            }
        }
    }
}
# Create the index with the mapping
es.indices.create(index='blog_posts_v2', body=mapping)
print("Index 'blog_posts_v2' created with mapping.")
Bulk Operations
For high-performance applications, you should use the bulk API to index, update, or delete many documents in a single request, which is much more efficient.
from elasticsearch import helpers
# Prepare a list of actions to perform
actions = [
    {
        "_index": "blog_posts_bulk",
        "_id": 1,
        "_source": {
            "author": "Bulk Author 1",
            "text": "This is the first bulk document.",
            "timestamp": "2025-10-27T13:00:00",
            "likes": 1
        }
    },
    {
        "_index": "blog_posts_bulk",
        "_id": 2,
        "_source": {
            "author": "Bulk Author 2",
            "text": "This is the second bulk document.",
            "timestamp": "2025-10-27T14:00:00",
            "likes": 1
        }
    },
    # You can also update or delete actions here
]
# Use the helpers.bulk function
success, failed = helpers.bulk(es, actions)
print(f"Successfully executed {success} operations.")
if failed:
    print(f"Failed to execute {len(failed)} operations.")
Putting It All Together: A Complete Example
Here's a script that demonstrates the full workflow: creating an index with a mapping, indexing data, searching, and cleaning up.
from elasticsearch import Elasticsearch, helpers
import time
# --- 1. Connect ---
es = Elasticsearch()
if not es.ping():
    raise Exception("Could not connect to Elasticsearch!")
INDEX_NAME = "my_python_articles"
MAPPING = {
    "mappings": {
        "properties": {
            "title": {"type": "text"},
            "content": {"type": "text"},
            "tags": {"type": "keyword"},
            "published_at": {"type": "date"}
        }
    }
}
# --- 2. Create Index with Mapping ---
if es.indices.exists(index=INDEX_NAME):
    es.indices.delete(index=INDEX_NAME)
    print(f"Deleted existing index '{INDEX_NAME}'")
es.indices.create(index=INDEX_NAME, body=MAPPING)
print(f"Created index '{INDEX_NAME}' with mapping.")
# --- 3. Prepare Data for Bulk Indexing ---
articles = [
    {
        "title": "Getting Started with Elasticsearch",
        "content": "Elasticsearch is a distributed, RESTful search and analytics engine... It is accessible to all via the standard JSON/REST API.",
        "tags": ["elasticsearch", "search", "database"],
        "published_at": "2025-10-26T10:00:00"
    },
    {
        "title": "A Guide to Python Web Frameworks",
        "content": "Python offers several excellent web frameworks. Django is a high-level framework... Flask is a micro-framework...",
        "tags": ["python", "web", "django", "flask"],
        "published_at": "2025-10-25T15:30:00"
    },
    {
        "title": "Advanced Search Techniques",
        "content": "To build powerful search applications, you need to master techniques like fuzzy search, phrase matching, and boosting.",
        "tags": ["search", "elasticsearch", "algorithms"],
        "published_at": "2025-10-27T09:00:00"
    }
]
actions = [
    {
        "_index": INDEX_NAME,
        "_source": article
    }
    for article in articles
]
# --- 4. Bulk Index Data ---
helpers.bulk(es, actions)
print(f"Successfully indexed {len(actions)} articles.")
# --- 5. Search for Data ---
print("\n--- Searching for articles about 'elasticsearch' ---")
query = {
    "query": {
        "match": {
            "content": "elasticsearch"
        }
    }
}
response = es.search(index=INDEX_NAME, query=query)
for hit in response['hits']['hits']:
    print(f"- Found: '{hit['_source']['title']}'")
print("\n--- Searching for articles tagged with 'python' ---")
query = {
    "query": {
        "term": {
            "tags": "python"
        }
    }
}
response = es.search(index=INDEX_NAME, query=query)
for hit in response['hits']['hits']:
    print(f"- Found: '{hit['_source']['title']}'")
# --- 6. Clean Up ---
# es.indices.delete(index=INDEX_NAME)
# print(f"\nCleaned up and deleted index '{INDEX_NAME}'.")
This guide should give you a solid foundation for using Python with Elasticsearch. The official Elasticsearch Client Reference is the best place to look for more detailed information on all available methods and parameters.