Of course! The term "iOS Python authcode" can mean a few different things, depending on the context. I'll break down the most common interpretations and provide detailed explanations and code examples for each.

The three main scenarios are:
- Running Python scripts on an iOS device (using an app).
- Python code that runs on a server to handle authentication for an iOS app (the most common backend scenario).
- Python code that interacts with an iOS device (e.g., using a framework like PyObjC).
Let's explore each one.
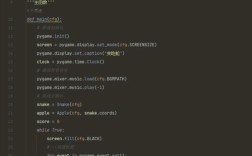
Scenario 1: Running Python Scripts on an iOS Device
You can't natively run Python on iOS like you would on a Mac or Linux machine. Apple's App Sandbox restricts this. However, there are excellent third-party apps that provide a Python environment.
Recommended Apps:
- Pythonista 3: The most popular and powerful choice. It's a full-featured Python IDE for iOS with access to many system features (like contacts, photos, clipboard, etc.) through its own modules.
- Pyto: Another excellent Python IDE with a focus on Jupyter notebooks and a modern UI. It also has good integration with iOS.
- a-Shell: More of a command-line environment, but it includes Python and is great for quick scripting and automation.
Example: Simple Authentication Check in Pythonista
Let's say you want to create a simple script in Pythonista that checks a username and password. This is for local, on-device use.

# A simple, on-device authentication check for Pythonista
# In a real app, you would NOT store passwords in plain text.
# This is just for demonstration.
USERS = {
    "alice": "securePassword123",
    "bob": "anotherSecretPassword"
}
def login():
    """Prompts the user for credentials and checks them."""
    print("--- Welcome to the On-Device Login ---")
    # Get input from the user using Pythonista's console
    username = input("Username: ")
    password = input("Password: ")
    # Check if the user exists and the password matches
    if username in USERS and USERS[username] == password:
        print(f"\nLogin successful! Welcome, {username}.")
        # You could now unlock features in your app
        return True
    else:
        print("\nLogin failed. Invalid username or password.")
        return False
# Run the login function
if __name__ == "__main__":
    login_success = login()
    if login_success:
        print("Proceeding to the main app...")
    else:
        print("Exiting.")
How to use this:
- Install Pythonista from the App Store.
- Open it, create a new script, paste the code, and run it.
Scenario 2: Python Backend for an iOS App (Most Common)
This is the most professional and common use case. Your iOS app (written in Swift) is the client, and your Python code (running on a server using a framework like Flask or Django) is the backend that handles authentication.
The authcode in this context is usually a JSON Web Token (JWT) or a similar access token.
The Flow:
- iOS App (Client): User enters their credentials (username/password).
- iOS App: Sends these credentials to a specific endpoint on your Python server (e.g.,
/api/login). - Python Server (Flask):
- Receives the credentials.
- Verifies them against a database.
- If valid, generates a signed
authcode(JWT). - Sends the JWT back to the iOS app.
- iOS App: Stores the JWT securely (e.g., in
Keychain). - iOS App: For all subsequent API calls, includes the JWT in the
Authorizationheader to prove the user is authenticated.
Example: Flask Backend for iOS Authentication
First, you need to install Flask and a JWT library:

pip install Flask Flask-JWT-Extended
Now, here's a simple app.py file for your server:
from flask import Flask, request, jsonify
from flask_jwt_extended import (
    JWTManager, jwt_required, create_access_token,
    get_jwt_identity
)
app = Flask(__name__)
# A secret key is needed to sign the JWT. Keep this secret!
# In production, use a strong, randomly generated key.
app.config["JWT_SECRET_KEY"] = "super-secret-key-do-not-share"
app.config["JWT_ACCESS_TOKEN_EXPIRES"] = 3600 # 1 hour
jwt = JWTManager(app)
# A dummy user database. In a real app, this would be a real database.
users = {
    "testuser": {
        "password": "password123" # NEVER store plain text passwords!
    }
}
@app.route("/api/login", methods=["POST"])
def login():
    """Endpoint for users to log in and receive a JWT."""
    data = request.get_json()
    username = data.get("username")
    password = data.get("password")
    user = users.get(username)
    # In a real app, you'd hash the password (e.g., with bcrypt) and compare
    if user and user["password"] == password:
        # Create an access token for the user
        # The identity can be any data that is json serializable
        access_token = create_access_token(identity=username)
        return jsonify(access_token=access_token), 200
    return jsonify({"msg": "Bad username or password"}), 401
@app.route("/api/protected", methods=["GET"])
@jwt_required() # This decorator protects the endpoint
def protected():
    """A protected endpoint that requires a valid JWT."""
    # Access the identity of the current user with get_jwt_identity
    current_user = get_jwt_identity()
    return jsonify(logged_in_as=current_user), 200
if __name__ == "__main__":
    # Use 0.0.0.0 to make it accessible from other devices on your network
    # Use a port like 5001 to avoid conflicts
    app.run(host='0.0.0.0', port=5001, debug=True)
How the iOS App (Swift) would interact with this:
import Foundation
// Struct to match the JSON response from /api/login
struct LoginResponse: Codable {
    let accessToken: String
}
// Struct to match the JSON for the login request
struct LoginRequest: Codable {
    let username: String
    let password: String
}
class AuthService {
    private let baseURL = "http://YOUR_SERVER_IP:5001/api" // Replace with your server's IP
    func login(username: String, password: String, completion: @escaping (Result<LoginResponse, Error>) -> Void) {
        guard let url = URL(string: "\(baseURL)/login") else {
            completion(.failure(NSError(domain: "Invalid URL", code: 0, userInfo: nil)))
            return
        }
        var request = URLRequest(url: url)
        request.httpMethod = "POST"
        request.setValue("application/json", forHTTPHeaderField: "Content-Type")
        let loginRequest = LoginRequest(username: username, password: password)
        do {
            request.httpBody = try JSONEncoder().encode(loginRequest)
        } catch {
            completion(.failure(error))
            return
        }
        URLSession.shared.dataTask(with: request) { data, response, error in
            if let error = error {
                completion(.failure(error))
                return
            }
            guard let httpResponse = response as? HTTPURLResponse, httpResponse.statusCode == 200 else {
                completion(.failure(NSError(domain: "Invalid response", code: 0, userInfo: nil)))
                return
            }
            guard let data = data else {
                completion(.failure(NSError(domain: "No data", code: 0, userInfo: nil)))
                return
            }
            do {
                let loginResponse = try JSONDecoder().decode(LoginResponse.self, from: data)
                completion(.success(loginResponse))
            } catch {
                completion(.failure(error))
            }
        }.resume()
    }
    func fetchUserData(completion: @escaping (Result<String, Error>) -> Void) {
        // This is where you'd get the token from Keychain and add it to the header
        // Example: "Authorization: Bearer <your_token>"
        // This part is more complex and involves secure storage.
        print("This function would make a request to /api/protected with the auth token.")
    }
}
// --- Usage Example ---
// let authService = AuthService()
// authService.login(username: "testuser", password: "password123") { result in
//     switch result {
//     case .success(let response):
//         print("Login successful! Token: \(response.accessToken)")
//         // Store this token securely in Keychain
//     case .failure(let error):
//         print("Login failed: \(error.localizedDescription)")
//     }
// }
Scenario 3: Python Interacting with an iOS Device
This is an advanced topic where you use Python on a Mac to control or get information from a connected iOS device. This is typically done for testing, automation, or creating custom tools.
The primary tool for this is libimobiledevice, a software library that talks to iOS devices. You can use it from Python via a wrapper like ideviceinstaller.
Setup (on a Mac):
- Install Homebrew if you don't have it.
- Install
libimobiledeviceand its Python wrapper.brew install libimobiledevice pip install ideviceinstaller
- Trust your computer on your iOS device (Settings > General > VPN & Device Management > Trust "Your Computer Name").
Example: Getting the UDID of a connected iOS device
This script uses subprocess to call the command-line tools provided by libimobiledevice.
import subprocess
import json
def get_ios_device_udid():
    """
    Gets the UDID of the first connected iOS device.
    Requires libimobiledevice to be installed and the device to be trusted.
    """
    try:
        # ideviceinfo is a command-line tool from libimobiledevice
        # -k allows us to query a specific key, in this case, the UniqueDeviceID (UDID)
        command = ["ideviceinfo", "-k", "UniqueDeviceID"]
        # Run the command and capture its output
        result = subprocess.run(command, capture_output=True, text=True, check=True)
        udid = result.stdout.strip()
        return udid
    except FileNotFoundError:
        print("Error: 'ideviceinfo' command not found.")
        print("Please install libimobiledevice: brew install libimobiledevice")
        return None
    except subprocess.CalledProcessError as e:
        print(f"Error running ideviceinfo: {e}")
        print("Make sure your iOS device is connected and trusted.")
        return None
if __name__ == "__main__":
    device_udid = get_ios_device_udid()
    if device_udid:
        print(f"Connected Device UDID: {device_udid}")
    else:
        print("Could not retrieve device UDID.")
Summary
| Scenario | What it means | Key Technologies | Best For |
|---|---|---|---|
| On-Device | Running Python scripts directly on an iPhone/iPad. | Pythonista, Pyto, a-Shell | Quick automation, personal scripts, learning on the go. |
| Backend | Python server authenticating an iOS app client. | Flask/Django, Flask-JWT-Extended, Swift | Professional apps, secure user management, API-driven services. |
| Mac-to-iOS | Python on a Mac controlling a connected iOS device. | libimobiledevice, subprocess |
Testing, automation, development tools. |
For most developers asking this question, Scenario 2 is the most likely goal. It's the standard architecture for modern mobile applications.