Of course! Here’s a comprehensive guide to using UI Automator with Python for Android UI testing.

Executive Summary
UI Automator is a powerful UI testing framework from Google that allows you to test across multiple apps by targeting UI components. While the official SDK is in Java/Kotlin, you can use it with Python by leveraging uiautomator2, a popular third-party library that acts as a wrapper around the UI Automator 2 framework.
This guide will cover:
- What is UI Automator and
uiautomator2? - How to Set Up Your Environment (Python, ADB, and the device/emulator).
- Installation of
uiautomator2. - Core Concepts and Basic Usage (connecting, finding elements, interacting with them).
- Practical Code Examples.
- Advanced Features (screenshots, screen recordings, installing/uninstalling apps).
- Running Tests on a Physical Device vs. Emulator.
What is UI Automator and uiautomator2?
-
UI Automator (The Android Framework): A system-level testing framework provided by Google. It's part of the AndroidX Test library. Its key advantage is that it can interact with any app on the device, not just your own app. It works by scanning the UI hierarchy and matching components based on properties like text, content description, or resource ID.
-
uiautomator2(The Python Wrapper): This is a Python library created by open-source contributors. It simplifies the process of using UI Automator from Python. It works by: (图片来源网络,侵删)
- Pushing a test server APK (
atx-agent) onto your Android device. - Starting an HTTP server on the device that listens for commands from your Python script.
- Translating your Python method calls into HTTP requests to this server.
- The server then uses the native UI Automator framework to perform the actions on the device.
- Pushing a test server APK (
Think of uiautomator2 as the bridge that lets you speak Python to the Android UI Automator engine.
Prerequisites: Environment Setup
Before you start, you need the following tools installed and configured.
A. Python
Ensure you have Python 3.6+ installed on your machine.
B. Android SDK Platform-Tools (ADB)
ADB (Android Debug Bridge) is essential for communicating with your Android device or emulator.

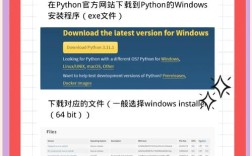
- Download: Get it from the official Android Developers site.
- Add to PATH: Add the
platform-toolsdirectory to your system's PATH environment variable so you can runadbfrom anywhere. - Verify: Open your terminal/command prompt and run:
adb version
You should see the ADB version number.
C. An Android Device or Emulator
You need a target to run your tests on.
- Physical Device: Enable Developer Options and USB Debugging in the device settings.
- Emulator: Create an Android Virtual Device (AVD) using Android Studio or the
avdmanagercommand line tool.
D. Verify ADB Connection
Connect your device or start your emulator. In your terminal, run:
adb devices
You should see your device/emulator listed with device next to it.
Installation of uiautomator2
It's highly recommended to install the library in a Python virtual environment.
# Create and activate a virtual environment (optional but recommended)
python -m venv venv
source venv/bin/activate  # On Windows: venv\Scripts\activate
# Install the library
pip install --pre uiautomator2
First-Time Setup on the Device
After installing the Python library, you need to prepare your Android device/emulator to work with uiautomator2. This is a one-time setup process per device.
Run the following command in your terminal:
python -m uiautomator2 init
This command will:
- Check if your device is connected via ADB.
- Install the
atx-agentAPK (the test server) on your device. - Grant the necessary permissions to the agent.
- Print the URL of the device's server, which looks like
http://<device_ip>:7912.
Core Concepts and Basic Usage
Let's write some Python code to interact with a device.
A. Connecting to the Device
The primary object you'll work with is Device.
import uiautomator2 as u2
# Connect to the device over USB
# This will use the first device found by 'adb devices'
d = u2.connect()
# Or connect to a specific device using its serial
# d = u2.connect("emulator-5554")
# Or connect via WiFi (once connected via USB, you can get the IP from d.info['wlanip'])
# d = u2.connect("192.168.1.10")
print("Device connected successfully!")
print(d.info) # Prints device information like model, Android version, etc.
B. Finding UI Elements
The Device object (d) has a method called info that gives you the current UI hierarchy. You can also use specific methods to find elements.
The most common way to find elements is using d(resourceId="...") or d(text="...").
| Selector Method | Description | Example |
|---|---|---|
d(resourceId="...") |
Finds an element by its Android resource ID. | d(resourceId="com.android.settings:id/search") |
d(text="...") |
Finds an element by its visible text. | d(text="Wi-Fi") |
d(description="...") |
Finds an element by its content description (used for accessibility). | d(description="Open navigation drawer") |
d(textContains="...") |
Finds an element whose text contains the given string. | d(textContains="search") |
d(textMatches="...") |
Finds an element whose text matches the given regex. | d(textMatches=r"Settings.*") |
d(className="...") |
Finds an element by its class name (e.g., android.widget.Button). |
d(className="android.widget.Button") |
C. Interacting with Elements
Once you have an element (or a list of elements), you can perform actions on it.
# Assuming you are on the Android Home Screen
# 1. Find and click an app by its text
print("Opening 'Settings' app...")
d(text="Settings").click()
# 2. Find a text field and enter text
print("Searching for 'Bluetooth'...")
# The resourceId might be different on your device
search_bar = d(resourceId="com.android.settings:id/search")
search_bar.set_text("Bluetooth") # Use .click() to focus first if needed
# 3. Find a button and click it
# The text might be 'SEARCH' or a magnifying glass icon
d(text="SEARCH").click()
# 4. Wait for an element to appear and then click it
# This is more robust than a direct click
print("Clicking on 'Bluetooth' option...")
d(text="Bluetooth").wait.exists(timeout=5000) # Wait for 5 seconds
d(text="Bluetooth").click()
Practical Code Example: A Simple Test Script
Here is a complete script that opens the Settings app, searches for "Battery", and verifies that the "Battery" option is present.
import uiautomator2 as u2
import time
def test_battery_settings():
    """
    A simple test to navigate to Battery settings in the Android Settings app.
    """
    try:
        # 1. Connect to the device
        print("Connecting to device...")
        d = u2.connect()
        print(f"Connected to: {d.info['productName']}")
        # 2. Launch the Settings app
        print("Launching Settings app...")
        d.app_start("com.android.settings")
        time.sleep(2) # Wait for app to launch
        # 3. Search for "Battery"
        print("Searching for 'Battery'...")
        # Using a more robust selector that looks for a search icon
        search_icon = d(resourceId="com.android.settings:id/search", className="android.widget.ImageButton")
        if not search_icon.exists:
            print("Could not find search icon. Aborting.")
            return
        search_icon.click()
        time.sleep(1)
        # Enter text into the search field
        search_field = d(resourceId="android:id/search_src_text")
        search_field.set_text("battery")
        time.sleep(2) # Wait for search results to load
        # 4. Verify and click the "Battery" option
        print("Verifying 'Battery' option exists...")
        battery_option = d(text="Battery")
        if battery_option.exists:
            print("Found 'Battery' option. Clicking it.")
            battery_option.click()
            time.sleep(2)
            print("Successfully navigated to Battery settings.")
        else:
            print("ERROR: 'Battery' option not found after search.")
            return
        # 5. Take a screenshot for proof
        d.screenshot("battery_settings.png")
        print("Screenshot saved as 'battery_settings.png'")
    except Exception as e:
        print(f"An error occurred: {e}")
    finally:
        # 6. Go back to home screen
        print("Pressing home button.")
        d.press("home")
if __name__ == "__main__":
    test_battery_settings()
Advanced Features
uiautomator2 offers much more than just clicking and typing.
A. Taking Screenshots
d.screenshot("my_screenshot.png")
B. Recording the Screen
# Start recording
d.screenrecord.start("my_recording.mp4")
# ... perform your test actions ...
# Stop recording (the file will be saved on your device)
d.screenrecord.stop()
# Pull the file from the device to your computer
d.pull("/sdcard/my_recording.mp4", ".")
C. Installing and Uninstalling Apps
# Install an APK from your local machine
d.install("path/to/your/app.apk")
# Uninstall an app
d.app_uninstall("com.example.your.app")
D. Handling Toast Messages
Toast messages are small pop-ups that appear temporarily.
# Wait for a toast with specific text to appear
d.toast.show("Successfully saved", 1) # Shows a toast for testing
assert d.toast.get_message(5, default="") == "Successfully saved"
E. Gestures (Swipe, Drag, etc.)
# Swipe from one point to another
d.swipe(100, 500, 100, 100, steps=10) # From (x1,y1) to (x2,y2) in 10 steps
# Swipe on an element
d(text="Settings").swipe("up")
# Drag an element
d.drag(100, 200, 300, 400, 0.5) # From (x1,y1) to (x2,y2) over 0.5 seconds
Running on a Physical Device vs. Emulator
| Feature | Physical Device | Emulator |
|---|---|---|
| Setup | Enable Developer Options & USB Debugging. | Create an AVD. |
| Connection | Usually via USB (adb devices). |
Via USB or Wi-Fi. |
| Performance | Can be faster or slower depending on the device. | Can be slow, especially on emulators without hardware acceleration. |
| Access | Has a real camera, sensors, etc. | Simulates sensors and can use a webcam for camera. |
| First-Time Setup | python -m uiautomator2 init |
python -m uiautomator2 init |
| Wi-Fi Connection | Possible after initial USB setup. Use d.wlan_ip to get the IP address. |
Possible after initial USB setup. |
Conclusion and Best Practices
- Use Waits: Always use
.wait.exists(timeout=...)ortime.sleep()to make your tests stable and wait for elements to appear. - Be Specific with Selectors: Prefer
resourceIdovertextwhen possible, as text can change with locale.textContainsis a good fallback. - Organize Tests: For larger projects, use a testing framework like
pytestto structure your tests, set up fixtures for connecting to the device, and generate reports. - Clean Up: Use
try...finallyblocks to ensure your app is closed or the device is returned to a known state after a test, even if it fails.