Of course! Here is a comprehensive guide for using Appium with Python, specifically tailored for the Appium 1.6.3 era. While Appium 1.6.3 is quite old (released in 2025), the core Python client concepts remain largely the same in modern versions, making this guide a great starting point.

This guide will cover:
- Prerequisites: What you need to have installed.
- Setting Up Your Python Environment: Installing the necessary libraries.
- Writing Your First Test Script: A complete, commented example.
- Running the Test: How to execute your script.
- Key Concepts & Important Notes for Appium 1.6.3: Understanding the differences from modern Appium.
Prerequisites
Before you start with the Python code, you need the following set up:
- Appium Server: You must have an Appium server running. You can download the Appium Desktop app from the official website. For version 1.6.3, you would use the corresponding release of Appium Desktop.
- Mobile Device or Emulator/Simulator:
- Android: An Android device with USB debugging enabled, or an Android Emulator (via Android Studio or AVD Manager).
- iOS: A real iOS device (with a paid Apple Developer account) or the iOS Simulator (on a Mac).
- App File (
.apkor.app):- Android: You need the Android Package Kit (
.apk) file of the app you want to test. - iOS: You need the application bundle (
.appor.ipa).
- Android: You need the Android Package Kit (
- Python and pip: Ensure you have Python 2.7 or Python 3.x installed, along with
pip(Python's package installer).
Setting Up Your Python Environment
You'll need to install the Appium Python client library. Open your terminal or command prompt and run:
pip install Appium-Python-Client
This command installs the appium-python-client package, which provides the webdriver module you'll use to control your app.

Writing Your First Test Script (Android Example)
This script will launch the Calculator app on an Android emulator, perform a simple calculation (5 + 7), and verify the result.
Create a file named first_test.py and paste the following code into it.
# first_test.py
from appium import webdriver
from time import sleep
# --- Desired Capabilities ---
# This is a dictionary that tells Appium how to connect to the device and what to run.
desired_caps = {}
# 1. Platform Name
desired_caps['platformName'] = 'Android'
# 2. Device Name (can be any name, it's just for your reference)
desired_caps['deviceName'] = 'Pixel_API_30'
# 3. App Path: The absolute path to the .apk file on your machine.
#    Replace this with the actual path to your app.
desired_caps['app'] = '/path/to/your/app/Calculator.apk'
# 4. Automation Name: 'UiAutomator2' is the modern and recommended choice.
#    For Appium 1.6.3, 'Appium' was also a common choice, but 'UiAutomator2' was available.
desired_caps['automationName'] = 'UiAutomator2'
# --- Appium Server URL ---
# The default URL for Appium is http://localhost:4723/wd/hub
server_url = 'http://localhost:4723/wd/hub'
# --- Initialize the Driver ---
# This command connects the Appium Python client to the Appium server.
print("Connecting to Appium server...")
driver = webdriver.Remote(server_url, desired_caps)
print("App launched. Waiting for it to load...")
sleep(5) # Wait for the app to fully load
try:
    # --- Find Elements and Interact ---
    # We use the 'Accessibility ID' locator strategy as it's the most reliable.
    # Make sure you have this ID in your app (or use another strategy like 'id' or 'xpath').
    # Find the '5' button and click it
    btn_5 = driver.find_element_by_accessibility_id('5')
    btn_5.click()
    print("Clicked 5")
    # Find the '+' button and click it
    btn_plus = driver.find_element_by_accessibility_id('plus')
    btn_plus.click()
    print("Clicked +")
    # Find the '7' button and click it
    btn_7 = driver.find_element_by_accessibility_id('7')
    btn_7.click()
    print("Clicked 7")
    # Find the '=' button and click it
    btn_equals = driver.find_element_by_accessibility_id('equals')
    btn_equals.click()
    print("Clicked =")
    # --- Get Result and Assert ---
    # Wait a moment for the result to appear
    sleep(2)
    # Find the result display element
    result_element = driver.find_element_by_accessibility_id('result')
    result_text = result_element.text
    print(f"The result is: {result_text}")
    # Assert that the result is correct
    assert '12' == result_text
    print("Test Passed! Result is correct.")
except Exception as e:
    print(f"An error occurred: {e}")
    print("Test Failed!")
finally:
    # --- Quit the Driver ---
    # This is crucial to end the session and close the app.
    print("Quiting the driver session.")
    driver.quit()
How to Customize the Script:
desired_caps['deviceName']: Change this to match the name of your emulator or device as shown in Android Studio oradb devices.desired_caps['app']: This is the most important part. You must change/path/to/your/app/Calculator.apkto the full path of the.apkfile on your computer.- Locators (
find_element_by_...):- Accessibility ID: The best option if your app supports it. It's the text used by screen readers.
- ID: The
resource-idfrom the Android UI hierarchy. - XPath: A powerful but sometimes brittle way to locate elements.
- You can use tools like Appium Desktop or UI Automator Viewer (in Android Studio's
toolsfolder) to find the correct locators for your app's elements.
Running the Test
-
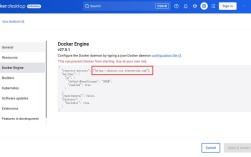
Start Appium Server: Open the Appium Desktop application. Click the "Start Server" button. You should see a log indicating the server is running on
http://127.0.0.1:4723. -
Launch Emulator/Simulator: Start your Android emulator or iOS simulator.
 (图片来源网络,侵删)
 -
Run the Python Script: Open your terminal or command prompt, navigate to the directory where you saved
first_test.py, and run the script:python first_test.py
You should see the script's print statements in your terminal, and you will be able to watch the Calculator app open on your emulator and perform the clicks automatically. If the test passes, you'll see "Test Passed!" at the end.
Key Concepts & Important Notes for Appium 1.6.3
While the code works, it's important to know how things have evolved since Appium 1.6.3.
Desired Capabilities (desired_caps)
The desired_caps dictionary is the heart of Appium configuration. Here are some common keys you might use:
| Capability | Description | Example |
|---|---|---|
platformName |
The target platform. | 'Android' or 'iOS' |
deviceName |
The name of the device/emulator. | 'Pixel_API_30' |
app |
Path to the app under test. | '/path/to/app.apk' |
automationName |
The backend automation engine. | 'UiAutomator2' (Android), 'XCUITest' (iOS) |
noReset |
Don't perform a full reset of the app state between sessions. | True or False |
fullReset |
(Android) Uninstall the app after the session. Use with caution. | True or False |
udid |
The unique device ID (for real devices). | 'emulator-5554' |
newCommandTimeout |
Seconds to wait for a new command before the session times out. | 60 |
Element Finding Strategies
In older scripts, you often saw methods like find_element_by_id(). These are now considered legacy.
-
Modern Approach (Recommended): Use
find_element()with theByclass. This is more explicit and less error-prone.# Old way (still works but not recommended) # element = driver.find_element_by_id('com.example.app:id/my_button') # Modern way (Recommended) from selenium.webdriver.common.by import By element = driver.find_element(By.ID, 'com.example.app:id/my_button')Other
Bystrategies include:By.ACCESSIBILITY_IDBy.XPATHBy.CLASS_NAME
Wait Strategies
Using sleep() is a bad practice because it makes your tests slow and unreliable. The element might appear faster or slower than the fixed time. The modern approach is to use Explicit Waits.
from selenium.webdriver.support.ui import WebDriverWait
from selenium.webdriver.support import expected_conditions as EC
# Wait up to 10 seconds until an element with ID 'my_button' is clickable
wait = WebDriverWait(driver, 10)
element = wait.until(EC.element_to_be_clickable((By.ID, 'com.example.app:id/my_button')))
element.click()
This will pause your script only as long as necessary, making your tests much more robust and faster.
Appium 1.6.3 vs. Modern Appium (2.x)
- JSONWP vs W3C: Appium 1.6.3 used the old JSON Wire Protocol. Modern Appium 2.x is built on the official W3C WebDriver standard, which is more robust and standardized.
- No need for
appiuminserver_url: In older versions, the URL was oftenhttp://localhost:4723/wd/hub/appium/. The modernhttp://localhost:4723/wd/hubis correct for both, but it's good to be aware of this difference if you see it in very old tutorials. - Plugins: Modern Appium 2.x supports plugins to extend functionality, which wasn't a major feature in 1.6.3.
Summary
You now have a working foundation for Appium automation with Python. Even though Appium 1.6.3 is outdated, understanding these core principles—Desired Capabilities, Driver Initialization, Element Finding, and Session Management—is essential for working with any version of Appium. To move forward, I highly recommend upgrading to the latest Appium server and adopting the modern Python client practices like using By and explicit waits.