Of course. Here is a comprehensive guide to using Python 2.7 on Linux.

Important Disclaimer: Why You Should Avoid Python 2.7
Before we dive in, it's crucial to understand that Python 2.7 reached its official End-Of-Life (EOL) on January 1, 2025. This means:
- No Security Updates: It no longer receives security patches. Running it on a server or in a production environment is a significant security risk.
- No Bug Fixes: Issues that are discovered will not be fixed.
- No New Features: The language and its standard library will not evolve.
- Community Support is Gone: Most new libraries and frameworks have dropped support for Python 2.7.
You should only use Python 2.7 if you are maintaining a legacy application that cannot be easily upgraded. For any new project, you must use a modern version of Python (3.8+).
Option 1: Install via Your Distribution's Package Manager (Easiest)
This is the simplest method, but the version available might be very old and not suitable for some projects.
For Debian / Ubuntu / Mint
The python2.7 package is usually available in the repositories.

# Update your package list
sudo apt-get update
# Install Python 2.7
sudo apt-get install python2.7
# Verify the installation
python2.7 --version
# You should see: Python 2.7.x
You might also want to install pip for Python 2.7, which is the package manager.
sudo apt-get install python-pip
For RHEL / CentOS / Fedora
The package name is typically python27.
# For RHEL/CentOS 7 and older
sudo yum install python27
# For Fedora or newer RHEL/CentOS versions (using dnf)
sudo dnf install python2
# Verify the installation
python2.7 --version
To install pip for Python 2.7:
sudo yum install python2-pip
For Arch Linux
Arch has officially removed Python 2 from its repositories. You can still install it from the Arch User Repository (AUR).

# You need an AUR helper like yay or paru
# If you don't have one, you can install it manually from the AUR website.
# Example using yay:
yay -S python2
Option 2: Install from Source (More Control)
If your distribution's package manager is too old, or if you need a specific version, you can compile Python 2.7 from source.
-
Install Dependencies: You'll need the
build-essentialpackage and other development libraries.# For Debian/Ubuntu sudo apt-get update sudo apt-get install build-essential libssl-dev libreadline-dev libgdbm-dev zlib1g-dev libncurses5-dev libbz2-dev libsqlite3-dev libffi-dev tk-dev # For RHEL/CentOS sudo yum groupinstall "Development Tools" sudo yum install openssl-devel readline-devel gdbm-devel zlib-devel ncurses-devel bzip2-devel sqlite-devel libffi-devel tk-devel
-
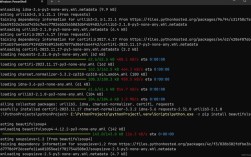
Download the Python 2.7 Source Code: Go to the Python 2.7 releases page and get the latest source tarball (e.g.,
Python-2.7.18.tgz).# Example for Python 2.7.18 wget https://www.python.org/ftp/python/2.7.18/Python-2.7.18.tgz
-
Compile and Install:
# Extract the archive
tar -xvf Python-2.7.18.tgz
# Navigate into the directory
cd Python-2.7.18
# Configure the build. The --prefix flag specifies where to install it.
# It's good practice to install it in a local directory like /usr/local.
./configure --prefix=/usr/local
# Compile the source code
make
# Install the compiled code
sudo make install
-
Verify the Installation: The binary will be installed at
/usr/local/bin/python2.7. You might need to add/usr/local/binto yourPATHif it's not already there./usr/local/bin/python2.7 --version # You should see: Python 2.7.18
Option 3: Using a Virtual Environment (Highly Recommended)
For any development work, you should always use a virtual environment. This isolates your project's dependencies from the system's global Python installation.
-
Install
virtualenvfor Python 2.7:# Use the pip you installed earlier sudo pip install virtualenv
-
Create a Virtual Environment: Navigate to your project directory and create a new environment.
# Create a directory for your project
mkdir my_legacy_project
cd my_legacy_project
# Create a virtual environment named 'venv'
# This will create a 'venv' folder containing a private Python 2.7 installation
virtualenv -p /usr/bin/python2.7 venv
- If you installed from source and it's not in your PATH, use the full path:
virtualenv -p /usr/local/bin/python2.7 venv
- If you installed from source and it's not in your PATH, use the full path:
-
Activate the Virtual Environment:
source venv/bin/activate
Your command prompt will change to show
(venv), indicating that the environment is active. -
Work Inside the Environment: Now, when you run
pythonorpip, it will use the versions inside yourvenv, not the system ones.(venv) $ python --version Python 2.7.18 (venv) $ pip install --upgrade pip (venv) $ pip install some-old-library==1.2.3
-
Deactivate the Environment: When you're done, simply type:
deactivate
Managing Pip Packages
Inside your activated virtual environment, pip is your best friend.
-
Install a package:
pip install requests==2.20.0
-
Upgrade a package:
pip install --upgrade requests
-
Uninstall a package:
pip uninstall requests
-
List installed packages:
pip list
-
Generate a
requirements.txtfile: This is essential for reproducing your project's environment.pip freeze > requirements.txt
-
Install packages from
requirements.txt:pip install -r requirements.txt
Summary: The Best Practice for Legacy Projects
- Do NOT use
sudowithpipinside a virtual environment. - Do NOT install Python 2.7 system-wide if possible.
- ALWAYS use a virtual environment for your project.
- ALWAYS pin your dependencies in a
requirements.txtfile.
This workflow ensures your legacy project is isolated, reproducible, and doesn't conflict with any other software on your system.