Of course! This is a very common and powerful stack. Here’s a comprehensive guide covering everything from basic setup to modern deployment methods.

We'll break this down into several parts:
- The Big Picture: How Python, Apache, and Ubuntu work together.
- Method 1: The Classic Mod_wsgi (Recommended for Beginners)
- Installing the Components
- Creating a Simple Python App
- Configuring Apache to Serve the App
- Running and Troubleshooting
- Method 2: The Modern Gunicorn + Nginx (Recommended for Production)
- Why this stack is often better
- Installing Gunicorn and Nginx
- Creating a Simple Python App (with a WSGI file)
- Configuring Gunicorn as a Service
- Configuring Nginx as a Reverse Proxy
- Essential Management Commands
- Security Considerations
The Big Picture: How They Work Together
Think of it like a restaurant:
- Ubuntu: The building and land. It's the operating system providing the foundation.
- Apache: The Maître d'. It listens for incoming customers (web requests) on port 80 (HTTP) or 443 (HTTPS). It handles the initial greeting and directs traffic.
- Python: The Chefs in the kitchen. This is your application logic where the real work happens (e.g., processing data, talking to a database).
- The Bridge (Mod_wsgi or Gunicorn): The waiter who takes orders from the Maître d' (Apache) and delivers them to the kitchen (Python), then brings the food back to the customer.
There are two main ways to create this bridge:
- Mod_wsgi: An Apache module that integrates Python directly into Apache. It's simpler to set up for one site.
- Gunicorn + Nginx: A more robust and scalable setup. Nginx (a very fast web server) handles all incoming requests and static files (CSS, images). It then passes dynamic requests to Gunicorn, which is a specialized Python "WSGI server" that runs your Python application.
Method 1: The Classic Mod_wsgi
This is the most straightforward way to get a Python app running behind Apache.

Step 1: Install the Components
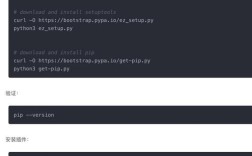
First, update your package list and install the necessary software. We'll install Python, Apache, the mod_wsgi module, and pip (Python's package installer).
# Update package lists
sudo apt update
# Install Python, pip, and Apache
sudo apt install python3 python3-pip apache2
# Install the mod_wsgi module for Python 3
sudo apt install libapache2-mod-wsgi-py3
Enable the mod_wsgi module and restart Apache to load it:
sudo a2enmod wsgi
sudo systemctl restart apache2
Step 2: Create a Simple Python App
Let's create a simple "Hello World" web application.
-
Create a project directory:
 (图片来源网络,侵删)
sudo mkdir -p /var/www/my_flask_app
sudo chown -R $USER:$USER /var/www/my_flask_app
cd /var/www/my_flask_app
-
Create the main application file (
app.wsgi): The.wsgiextension is a convention. This file acts as the entry point formod_wsgi.nano /var/www/my_flask_app/app.wsgi
Paste the following content into the file. This code imports your Flask app and tells
mod_wsgiwhere to find it in the Python path.#!/usr/bin/python3 import sys import logging # Add the project directory to the Python path sys.path.insert(0, '/var/www/my_flask_app') # Set up logging logging.basicConfig(stream=sys.stderr) logging.warning("Starting my_wsgi") # Import the Flask application instance from app import app as application # This is required for some versions of mod_wsgi application.secret_key = 'Add your secret key here' -
Create the Flask application file (
app.py): This is the actual web application.nano /var/www/my_flask_app/app.py
Paste in this simple Flask app:
from flask import Flask import os # Get the absolute path of the directory where the script is located basedir = os.path.abspath(os.path.dirname(__file__)) app = Flask(__name__) @app.route('/') def hello(): return "Hello, World from Python and Apache!" if __name__ == '__main__': app.run(debug=True) -
Create a
requirements.txtfile: It's good practice to list your dependencies.echo "flask" > requirements.txt
-
Install the Python dependencies:
pip3 install -r requirements.txt
Step 3: Configure Apache to Serve the App
Now, we'll tell Apache to use our new application.
-
Create an Apache virtual host configuration file:
sudo nano /etc/apache2/sites-available/my_flask_app.conf
-
Add the following configuration: Replace
your_server_domain_or_IPwith your server's domain name or IP address.<VirtualHost *:80> ServerName your_server_domain_or_IP ServerAlias www.your_server_domain_or_IP # Set the directory for the project DocumentRoot /var/www/my_flask_app # This directory directive will apply to the project <Directory /var/www/my_flask_app> # Allow .htaccess overrides AllowOverride All # Require that the user is authenticated # For public sites, you can comment out the Require all granted # or change it to 'Require all granted' if you have issues. Require all granted </Directory> # The WSGI script alias for the application WSGIScriptAlias / /var/www/my_flask_app/app.wsgi # Error logs ErrorLog ${APACHE_LOG_DIR}/my_flask_app_error.log CustomLog ${APACHE_LOG_DIR}/my_flask_app_access.log combined </VirtualHost> -
Enable the new site and disable the default one:
sudo a2ensite my_flask_app.conf
sudo a2dissite 000-default.conf
-
Check for syntax errors and restart Apache:
sudo apache2ctl configtest
# If it says "Syntax OK", then:
sudo systemctl restart apache2
Step 4: Run and Troubleshoot
Now, open your web browser and navigate to http://your_server_domain_or_IP. You should see "Hello, World from Python and Apache!".
If it doesn't work, check the logs:
- Apache Error Log:
sudo tail -f /var/log/apache2/error.log - Apache Access Log:
sudo tail -f /var/log/apache2/access.log - Systemd Journal (for mod_wsgi):
sudo journalctl -u apache2
Common issues:
- Permission Denied: Check the ownership of your files (
/var/www/my_flask_app) and the permissions inside the<Directory>block. - Module Not Found: Ensure
sys.path.insertinapp.wsgipoints to the correct directory. - Import Error: Make sure you installed your Flask app with
pip3.
Method 2: The Modern Gunicorn + Nginx (Production-Ready)
This setup is more performant and flexible. Nginx handles the static files and acts as a reverse proxy, while Gunicorn manages the Python application processes.
Step 1: Install Gunicorn and Nginx
# Install Gunicorn and Nginx
sudo apt install nginx gunicorn3
Step 2: Create a WSGI Entry Point
Your Python app needs a WSGI file that Gunicorn can execute. Let's use the same app from before.
-
Create a
wsgi.pyfile in your project root:nano /var/www/my_flask_app/wsgi.py
This file will simply import your app.
from app import app
if __name__ == "__main__":
    app.run()
Step 3: Configure Gunicorn as a Service
We'll run Gunicorn as a systemd service so it starts automatically on boot and can be managed easily.
-
Create the systemd service file:
sudo nano /etc/systemd/system/my_flask_app.service
-
Paste in the following configuration: Adjust the paths and user (
www-datais a common user for web services).[Unit] Description=Gunicorn instance to serve my_flask_app After=network.target [Service] User=www-data Group=www-data WorkingDirectory=/var/www/my_flask_app ExecStart=/usr/bin/gunicorn3 --workers 3 --bind unix:my_flask_app.sock wsgi:app [Install] WantedBy=multi-user.target
User/Group: The user that will run the process.WorkingDirectory: The directory where yourapp.pyis located.ExecStart: The command to start Gunicorn.gunicorn3: The command to run.--workers 3: The number of worker processes. A good starting point is(2 x CPU cores) + 1.--bind unix:my_flask_app.sock: Binds Gunicorn to a Unix socket. This is more efficient than a network port for communication with Nginx.wsgi:app: Tells Gunicorn to find the Flaskappobject inside thewsgi.pyfile.
-
Start and enable the Gunicorn service:
sudo systemctl start my_flask_app
sudo systemctl enable my_flask_app
-
Check its status:
sudo systemctl status my_flask_app
It should show
active (running).
Step 4: Configure Nginx as a Reverse Proxy
Now, we'll tell Nginx to forward requests to our Gunicorn socket.
-
Create a new Nginx server block:
sudo nano /etc/nginx/sites-available/my_flask_app
-
Add the following configuration: Replace
your_server_domain_or_IPandyour_email@example.com.server { listen 80; server_name your_server_domain_or_IP; location = /favicon.ico { access_log off; log_not_found off; } location /static/ { root /var/www/my_flask_app; expires 1y; add_header Cache-Control "public, immutable"; } location / { include proxy_params; proxy_pass http://unix:/var/www/my_flask_app/my_flask_app.sock; } }location /static/: This is an optional but highly recommended section to serve static files (CSS, JS, images) directly from Nginx, which is much faster than letting Gunicorn do it.location /: This is the catch-all for dynamic requests. It passes them to the Gunicorn socket.proxy_pass: The address of the Gunicorn socket.
-
Enable the site and test the Nginx configuration:
sudo ln -s /etc/nginx/sites-available/my_flask_app /etc/nginx/sites-enabled/
sudo nginx -t
-
If the test is successful, restart Nginx:
sudo systemctl restart nginx
Now, navigate to http://your_server_domain_or_IP in your browser. You should see your app!
Essential Management Commands
-
Check Apache Status:
sudo systemctl status apache2
sudo systemctl start apache2
sudo systemctl stop apache2
sudo systemctl restart apache2
-
Check Nginx Status:
sudo systemctl status nginx
sudo systemctl start nginx
sudo systemctl stop nginx
sudo systemctl restart nginx
-
Check Gunicorn Status:
sudo systemctl status my_flask_app
sudo systemctl start my_flask_app
sudo systemctl stop my_flask_app
sudo systemctl restart my_flask_app
-
View Logs:
- Apache:
sudo tail -f /var/log/apache2/error.log - Nginx:
sudo tail -f /var/log/nginx/error.log - Gunicorn:
sudo journalctl -u my_flask_app -f
- Apache:
Security Considerations
- Firewall: If you have a UFW firewall running, you need to allow HTTP and HTTPS traffic.
sudo ufw allow 'Apache Full'  # For Apache
# OR
sudo ufw allow 'Nginx Full'   # For Nginx
- Permissions: The user running your web server (
www-databy default) needs read access to your application files. Granting write access can be dangerous and should be done carefully. - HTTPS: For any public site, you must use HTTPS. You can easily get a free SSL certificate from Let's Encrypt using the
certbottool.sudo apt install certbot python3-certbot-nginx sudo certbot --nginx -d your_server_domain_or_IP
Certbot will automatically detect your Nginx/Apache config, obtain a certificate, and set up HTTPS redirection.