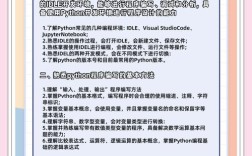
Of course! Using Python with VS Code over SSH is a powerful and common workflow, especially for working on remote servers, cloud instances (like AWS, GCP, Azure), or more powerful machines than your local one.

This guide will walk you through the entire process, from setup to best practices.
The Big Picture: How It Works
Instead of running VS Code on your local machine and connecting to a remote server via a terminal, you install a special VS Code Server on your remote machine. Your local VS Code instance then connects to this server, and all the code execution, file management, and extension magic happens on the remote machine. Your local machine acts primarily as a "client" displaying the UI.
Key Benefits:
- Full VS Code Experience: You get the same IntelliSense, debugging, and extension support as if you were running VS Code locally.
- No Syncing Needed: All your files, project configurations, and installed extensions live on the remote server. No need to worry about keeping your local and remote projects in sync.
- Access to Remote Resources: Directly use GPUs, datasets, or other hardware only available on the remote machine.
Prerequisites
- VS Code (Local): You must have VS Code installed on your local computer.
- SSH Access: You need a remote machine (a server, a Raspberry Pi, a cloud VM) that you can access via SSH. You should know its IP address/hostname and your SSH credentials (username/password or an SSH key).
- Python (Remote): Python must be installed on the remote machine.
Step-by-Step Guide
Step 1: Install the Remote - SSH Extension
This is the core extension that makes everything possible.

- Open VS Code on your local machine.
- Go to the Extensions view (click the square icon on the Activity Bar on the left, or press
Ctrl+Shift+X/Cmd+Shift+X). - Search for
Remote - SSHby Microsoft. - Click Install.
Step 2: Connect to Your Remote Server
There are two easy ways to connect for the first time.
Method A: Using the Command Palette (Recommended)
- Open the Command Palette (
Ctrl+Shift+P/Cmd+Shift+P). - Type
Remote-SSH: Connect to Host...and select it. - VS Code will prompt you for the SSH connection string. The format is:
username@hostname_or_ipFor example:
ec2-user@192.168.1.100orubuntu@my-server.com - Press Enter.
Method B: Using the Status Bar
- Look at the bottom-right corner of the VS Code window. You'll see a green status bar button that says
SSH. - Click it, and select
Connect to Host.... - Enter the same
username@hostname_or_ipstring.
After entering the connection string, VS Code will attempt to connect. The first time, it will ask for your password. If you use an SSH key, it will likely find it automatically if it's in the default location (~/.ssh/id_rsa). If not, it will prompt you for the key's passphrase or the password.
Step 3: The "Reconnecting" Window - Installing the VS Code Server
The first time you connect to a new remote host, VS Code will show a "Reconnecting" window.
This is normal and required. VS Code is now securely uploading and installing a small, lightweight "VS Code Server" onto your remote machine in ~/.vscode-server. This only happens once per remote host.
Do not close this window! It will take a minute or two to complete. Once it's done, you'll have a full VS Code environment running on your remote machine.
Step 4: Verify the Connection
You'll know you're connected when you see:
- A green status bar button showing the name of your remote host.
- The file explorer on the left will now show the file system of the remote machine.
- Any terminal you open (`Ctrl+``) will be a remote terminal running on the server, not your local one.
Step 5: Install a Python Extension on the Remote
This is a crucial step. Extensions run on the remote machine. So, you need to install the Python extension specifically for the remote context.
- Go back to the Extensions view (
Ctrl+Shift+X). - You'll see a small dropdown menu near the top of the extensions list. It probably says
Local - WindowsorLocal - macOS. Click this dropdown and select your remote host. - Now, search for
Pythonby Microsoft and click Install. This installs the Python interpreter and linter directly onto the remote server where your code will run.
Step 6: Start Coding! (Working with Python)
Now you're all set up. Here’s how to work with Python projects.
Selecting a Python Interpreter
VS Code needs to know which Python executable to use for linting, formatting, and running code.
- Open a Python file (e.g.,
main.py). - Look at the bottom-right corner of the status bar. It should show the path to the Python interpreter on the remote machine (e.g.,
/usr/bin/python3). - If it doesn't, or if you want to use a virtual environment, click on the Python version in the status bar.
- VS Code will show a list of discovered Python interpreters. You can also select
Enter interpreter path...to manually point to a specific one (e.g., one inside a virtual environment).
Using a Virtual Environment (Highly Recommended)
It's best practice to use a virtual environment for each project.
- Create a virtual environment on the remote server:
- Open the Remote Terminal (`Ctrl+``).
- Navigate to your project directory:
cd /path/to/your/project - Create the environment:
python3 -m venv .venv
- Select the virtual environment in VS Code:
- Click on the Python version in the bottom-right status bar.
- Select the interpreter inside your
.venvfolder (e.g.,/path/to/your/project/.venv/bin/python).
VS Code will now automatically use this virtual environment for all extensions (linting, IntelliSense, etc.).
Running and Debugging Code
- Run: You can use the "Run Python File in Terminal" button at the top-right of the editor, or simply run it from your remote terminal:
python main.py. - Debug: Set breakpoints in your code by clicking in the gutter. Then, press
F5to start a debugging session. The debugger will connect to the Python process running on the remote server.
Troubleshooting Common Issues
-
"Connection Refused" or "Timeout":
- Cause: Your local machine can't reach the remote host.
- Solution: Check the hostname/IP and port. Ensure the SSH server is running on the remote machine. You can test this from your local terminal with
ssh username@hostname.
-
"Permission Denied (publickey,password)":
- Cause: Authentication failure.
- Solution: Double-check your username. If using a key, ensure it's correctly set up on the remote server (
~/.ssh/authorized_keys) and your local machine knows where to find it. VS Code usually defaults to~/.ssh/id_rsa.
-
"Failed to connect to server. Connection closed." after entering password:
- Cause: This can happen if your SSH server has a setting that disallows interactive sessions or if the VS Code server installation fails silently.
- Solution: Try connecting from your local terminal (
ssh username@hostname). If that works, the issue is specific to VS Code. Sometimes, deleting the partially installed server folder on the remote machine (rm -rf ~/.vscode-server) and trying again helps.
-
Python extension isn't working (no IntelliSense, etc.):
- Cause: You installed the Python extension for your local machine, not the remote one.
- Solution: Go to the Extensions view, change the extension context dropdown from
Localto your remote host, and install the Python extension there. Also, ensure you have selected the correct Python interpreter (including virtual environments) for the remote context.