Of course! Using Python with Sphinx for search is a very common and powerful combination. Sphinx is a fast and feature-rich full-text search engine.

Here’s a comprehensive guide covering everything from the basics to more advanced topics, with practical code examples.
What is Sphinx?
Sphinx is a standalone search engine, meaning it runs as its own separate process (a daemon). Your Python application acts as a client that connects to this Sphinx daemon to index data and perform searches.
Key strengths:
- Speed: Extremely fast for both indexing and searching, even with millions of documents.
- Full-Text Search: Excellent for natural language queries, supporting features like stemming, word forms, and phrase proximity.
- Relevance Ranking: Provides powerful ranking algorithms to sort search results by relevance.
- Filtering & Faceting: You can filter results by any attribute (e.g., "find all red products in the 'electronics' category").
- Scalability: Can be distributed across multiple servers.
Core Concepts
Before diving into the code, you need to understand Sphinx's main components:

-
Source: This is the definition of your data. It tells Sphinx where to get the data from (e.g., a MySQL database, a PostgreSQL database, or a pipe from a script). A source defines a set of fields (full-text searchable text) and attributes (filterable/sortable values like IDs, dates, or categories).
-
Index: This is the actual search data structure that Sphinx builds from your source. It's like a highly optimized inverted index that maps words to the documents they appear in. You can have multiple indexes.
-
SphinxQL: This is the primary way to interact with the Sphinx search daemon. It's a SQL-like language with Sphinx-specific extensions. You send
SELECTqueries to Sphinx to perform searches. -
Searchd: This is the Sphinx search daemon process. You need to run this service for your Python application to connect to.
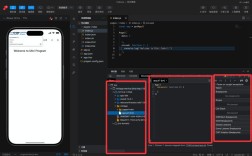
 (图片来源网络,侵删)
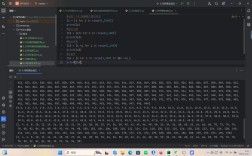
Step-by-Step Guide: Setting up and Using Sphinx with Python
Let's build a complete, practical example. We'll create a simple blog post search system.
Step 1: Install Sphinx
First, you need to install the Sphinx software itself.
On macOS (using Homebrew):
brew install sphinx-doc
# Note: This installs the documentation tool. For the search engine, you might need:
brew install sphinxsearch
On Ubuntu/Debian:
sudo apt-get update
sudo apt-get install sphinxsearch
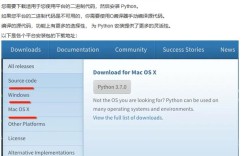
On Windows: Download the installer from the official Sphinx website.
Step 2: Configure Sphinx
Sphinx is configured via a sphinx.conf file. Let's create one.
-
Create a directory for our project:
mkdir sphinx_blog_example
cd sphinx_blog_example
-
Create a Python script to generate some sample data and a
sphinx.conffile.setup.py(for data generation)import sqlite3 # Create a simple SQLite database with blog posts conn = sqlite3.connect('blog.db') cursor = conn.cursor() # Create table cursor.execute(''' CREATE TABLE IF NOT EXISTS posts ( id INTEGER PRIMARY KEY, title TEXT NOT NULL, content TEXT NOT NULL, author TEXT NOT NULL, published_at TIMESTAMP DEFAULT CURRENT_TIMESTAMP ) ''') # Insert some sample data sample_posts = [ ('Getting Started with Python', 'Python is a versatile programming language. It is easy to learn and powerful.', 'Alice'), ('Advanced Python Techniques', 'Learn about decorators, generators, and context managers in Python.', 'Bob'), ('A Guide to Web Scraping', 'We will use BeautifulSoup and Scrapy to scrape data from websites.', 'Alice'), ('Sphinx Search for Python Apps', 'This tutorial explains how to integrate the Sphinx search engine into a Python application.', 'Charlie'), ('SQLAlchemy vs. Django ORM', 'A comparison between two popular Python ORMs for database interaction.', 'Bob'), ] cursor.executemany('INSERT INTO posts (title, content, author) VALUES (?, ?, ?)', sample_posts) conn.commit() conn.close() print("Database 'blog.db' created with sample data.") -
Create the
sphinx.conffile. This is the most important part.sphinx.conf# -- sphinx.conf -- # Data source definition source blog_posts { # Type: we are getting data from a SQL database type = mysql # --- IMPORTANT: For SQLite, use the 'pipe' source type --- # type = pipe # pipe_command = python /path/to/your/sphinx_blog_example/get_sphinx_data.py # pipe_filter = python /path/to/your/sphinx_blog_example/filter_sphinx_data.py # --- For this example, we'll stick with a conceptual SQL setup --- # Replace with your actual DB connection details if using MySQL/PostgreSQL sql_host = localhost sql_user = your_db_user sql_pass = your_db_password sql_db = blog sql_port = 3306 # Default MySQL port # The table to index sql_query = \ SELECT id, title, content, author, \ UNIX_TIMESTAMP(published_at) AS published_ts \ FROM posts # Fields to be full-text searchable sql_field_string = title sql_field_string = content # Attributes for filtering and sorting sql_attr_uint = id # Unsigned integer attribute sql_attr_string = author # String attribute (for filtering) sql_attr_timestamp = published_ts # Timestamp attribute for sorting } # Index definition index blog_index { source = blog_posts path = /var/data/sphinx/blog_index # IMPORTANT: A directory where Sphinx has write permissions docinfo = extern charset_type = utf-8 } # Indexer settings indexer { mem_limit = 128M } # Searchd daemon settings searchd { listen = 9312 listen = 9306:mysql41 log = /var/log/sphinx/searchd.log query_log = /var/log/sphinx/query.log pid_file = /var/run/sphinx/searchd.pid }Note on SQLite: Sphinx doesn't have native SQLite support in the same way it does for MySQL/PostgreSQL. The standard approach is to use the
pipesource type, which runs an external script (pipe_command) to output the data in a specific format that Sphinx can read. For simplicity, the example above uses a conceptual SQL setup. If you want to use SQLite, you would need to write a Python script that connects to theblog.dband prints the data in the format Sphinx expects.
Step 3: Index the Data
Now, use the indexer command-line tool to process your sphinx.conf and build the search index.
# You may need to specify the config file location and create the data/log directories
sudo mkdir -p /var/data/sphinx /var/log/sphinx
sudo chown $USER:$USER /var/data/sphinx /var/log/sphinx # Or give appropriate permissions to the user running searchd
# Build the index
indexer --config sphinx.conf blog_index
You should see output indicating that the documents have been indexed.
Step 4: Start the Sphinx Daemon (searchd)
Run the searchd daemon. This makes your index available for searching.
searchd --config sphinx.conf
This command will run in the foreground. To run it as a background daemon, you'd typically use sudo service sphinxsearch start or similar, depending on your OS.
Step 5: Connect from Python
Now for the fun part! We'll use the pysphinx library, which is a SphinxQL client.
Install the library:
pip install pysphinx
search_client.py
import pysphinx
def search_blog(query):
    """
    Connects to Sphinx and performs a search.
    """
    # Connect to the Sphinx daemon
    # The host and port should match your sphinx.conf settings
    conn = pysphinx.Connection(host='127.0.0.1', port=9312)
    cursor = conn.cursor()
    # --- The SphinxQL Query ---
    # SELECT <attributes> FROM <index> WHERE <match_expression> [OPTION <search_options>]
    query_str = f"""
    SELECT id, title, author,
           @relevance AS relevance,
           @count AS matched_count
    FROM blog_index
    WHERE MATCH(%s)
    ORDER BY relevance DESC
    LIMIT 10
    """
    # Execute the query
    # The query string uses %s placeholders, which we provide as a tuple
    cursor.execute(query_str, (query,))
    # Fetch the results
    results = cursor.fetchall()
    # Close the connection
    conn.close()
    return results
if __name__ == "__main__":
    search_term = input