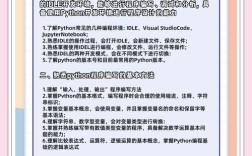
Of course! Using Spark with Kafka in Python is a very common and powerful pattern for building real-time data pipelines and stream processing applications.

Here's a comprehensive guide covering the concepts, setup, code examples, and best practices.
Core Concepts
First, let's understand the main components and how they interact.
- Apache Kafka: A distributed streaming platform. It acts as a central message broker. You publish data to topics, and consumers read from these topics. Kafka provides durability, scalability, and ordering guarantees.
- Apache Spark: A unified analytics engine for large-scale data processing. We'll be using its Structured Streaming module, which is built on the Spark SQL engine. It allows you to treat a stream of data (like from Kafka) as a table that you can query continuously.
- The Flow:
- Producers: Applications that generate data and send it to Kafka topics.
- Spark Structured Streaming Application (The Consumer):
- Connects to Kafka as a consumer.
- Reads data from one or more topics in near real-time.
- Processes the data using Spark's powerful transformations (e.g.,
map,filter,groupBy,agg). - Outputs the results to a sink (e.g., console, a new Kafka topic, a database, Parquet files).
- Sinks: The final destination for the processed data.
Prerequisites & Setup
Before writing code, you need the right tools and libraries.
A. Install Required Libraries
You'll need the pyspark library and the Spark Kafka connector. The connector is a separate JAR file that Spark needs to communicate with Kafka.

Using pip:
pip install pyspark
Downloading the Kafka Connector JAR: You need to download the correct Kafka connector JAR from the Maven repository. The most common one is for Kafka 3.x.
- Download Link: org.apache.spark:spark-sql-kafka-0-10_2.12:3.5.0
Save this JAR file in a known location on your machine (e.g., /path/to/spark-kafka-connector.jar).
B. Have a Running Kafka Instance
For this example, you'll need a Kafka broker running. The easiest way is with Docker:
# Using Docker Compose (recommended)
# Create a docker-compose.yml file with the following content:
# version: '3'
# services:
#   zookeeper:
#     image: confluentinc/cp-zookeeper:7.3.2
#     container_name: zookeeper
#     environment:
#       ZOOKEEPER_CLIENT_PORT: 2181
#       ZOOKEEPER_TICK_TIME: 2000
#   kafka:
#     image: confluentinc/cp-kafka:7.3.2
#     container_name: kafka
#     depends_on:
#       - zookeeper
#     ports:
#       - "9092:9092"
#     environment:
#       KAFKA_BROKER_ID: 1
#       KAFKA_ZOOKEEPER_CONNECT: 'zookeeper:2181'
#       KAFKA_LISTENER_SECURITY_PROTOCOL_MAP: PLAINTEXT:PLAINTEXT,PLAINTEXT_HOST:PLAINTEXT
#       KAFKA_ADVERTISED_LISTENERS: PLAINTEXT://kafka:29092,PLAINTEXT_HOST://localhost:9092
#       KAFKA_OFFSETS_TOPIC_REPLICATION_FACTOR: 1
#       KAFKA_GROUP_INITIAL_REBALANCE_DELAY_MS: 0
# Then run:
docker-compose up -d
After a minute or two, you'll have Kafka running on localhost:9092.
Code Example 1: Reading from Kafka and Writing to Console
This is the classic "Hello, World!" for Spark Streaming. It reads messages from a Kafka topic and prints them to the console.
Let's assume you have a Kafka topic named spark_topic.
# spark_kafka_consumer.py
from pyspark.sql import SparkSession
from pyspark.sql.functions import col, from_json, current_timestamp
from pyspark.sql.types import StructType, StructField, StringType, IntegerType, TimestampType
# 1. Define the Spark Session
# This is the entry point for any Spark functionality.
# We add the path to the Kafka connector JAR file.
spark_jars_path = "/path/to/spark-kafka-connector.jar" # <-- IMPORTANT: Update this path
spark = SparkSession.builder \
    .appName("SparkKafkaExample") \
    .config("spark.jars", spark_jars_path) \
    .getOrCreate()
# 2. Define the Schema for the incoming JSON data
# This is crucial for Spark to parse the data correctly.
# If your data is plain text, you can use StringType() for the 'value' field.
schema = StructType([
    StructField("id", IntegerType(), True),
    StructField("product", StringType(), True),
    StructField("quantity", IntegerType(), True)
])
# 3. Define the Kafka Source
kafka_df = spark \
    .readStream \
    .format("kafka") \
    .option("kafka.bootstrap.servers", "localhost:9092") \
    .option("subscribe", "spark_topic") \
    .option("startingOffsets", "latest") \
    .load()
# The raw Kafka DataFrame has two columns: 'key' (binary) and 'value' (binary).
# We need to cast the 'value' column to a string and then parse it as JSON.
parsed_df = kafka_df.selectExpr("CAST(value AS STRING)") \
    .select(from_json(col("value"), schema).alias("data")) \
    .select("data.*")
# 4. Define the Processing Logic
# Here we just add a timestamp to each record.
processed_df = parsed_df.withColumn("processing_time", current_timestamp())
# 5. Define the Sink and Start the Query
# We will write the stream to the console for debugging.
# 'outputMode' can be 'append', 'complete', or 'update'.
query = processed_df.writeStream \
    .outputMode("append") \
    .format("console") \
    .option("truncate", "false") \
    .start()
# 6. Wait for the stream to terminate
query.awaitTermination()
How to Run This:
- Update the
spark_jars_pathin the code to the location where you saved the JAR file. - Start the Spark application:
spark-submit spark_kafka_consumer.py
- Send data to the Kafka topic (in a new terminal):
# Using the Docker container from the setup
echo '{"id": 1, "product": "laptop", "quantity": 5}' | docker exec -i kafka kafka-console-producer --bootstrap-server localhost:9092 --topic spark_topic
echo '{"id": 2, "product": "mouse", "quantity": 20}' | docker exec -i kafka kafka-console-producer --bootstrap-server localhost:9092 --topic spark_topic
You should see the parsed data printed in the Spark console output.
Code Example 2: Aggregation and Writing to Kafka
A more realistic example is to perform an aggregation (e.g., count products sold per minute) and write the results back to a new Kafka topic.
# spark_kafka_aggregator.py
from pyspark.sql import SparkSession
from pyspark.sql.functions import col, from_json, window, current_timestamp
from pyspark.sql.types import StructType, StructField, StringType, IntegerType
spark_jars_path = "/path/to/spark-kafka-connector.jar"
spark = SparkSession.builder \
    .appName("SparkKafkaAggregator") \
    .config("spark.jars", spark_jars_path) \
    .getOrCreate()
schema = StructType([
    StructField("id", IntegerType(), True),
    StructField("product", StringType(), True),
    StructField("quantity", IntegerType(), True)
])
# Read from the source topic
kafka_df = spark \
    .readStream \
    .format("kafka") \
    .option("kafka.bootstrap.servers", "localhost:9092") \
    .option("subscribe", "spark_topic") \
    .option("startingOffsets", "latest") \
    .load()
# Parse the JSON value
parsed_df = kafka_df.selectExpr("CAST(value AS STRING)") \
    .select(from_json(col("value"), schema).alias("data")) \
    .select("data.*")
# Perform aggregation: Count products sold every 1 minute
# The 'window' function groups events by a sliding time window.
aggregated_df = parsed_df \
    .groupBy(
        window(col("processing_time"), "1 minute"),
        col("product")
    ) \
    .count() \
    .selectExpr("to_json(struct(*)) AS value") # Convert the result back to a JSON string
# Write the aggregated results to a new Kafka topic
query = aggregated_df.writeStream \
    .outputMode("update") \
    .format("kafka") \
    .option("kafka.bootstrap.servers", "localhost:9092") \
    .option("topic", "spark_topic_aggregated") \
    .option("checkpointLocation", "/tmp/spark-kafka-checkpoint") \
    .start()
query.awaitTermination()
Key Differences in this Example:
windowfunction: This is the core of time-based aggregation. It groups rows into time windows (e.g., every 1 minute).outputMode("update"): This mode is efficient. It only outputs the rows that have changed since the last trigger. For windowed aggregations, this is usually what you want.- *`.selectExpr("to_json(struct()) AS value")
** Before writing to Kafka, we must convert our DataFrame into a format Kafka understands. We take all columns, put them into a struct, convert that struct to a JSON string, and name that columnvalue`. checkpointLocation: This is essential for writing to Kafka (or any stateful sink). It stores the offsets of the processed data and the query's state. If the query fails and restarts, it can resume from where it left off, ensuring exactly-once processing semantics.
Important Configuration Options
| Option | Description | Example |
|---|---|---|
kafka.bootstrap.servers |
Comma-separated list of Kafka broker addresses. | "localhost:9092,localhost:9093" |
subscribe |
A single topic or a comma-separated list of topics to subscribe to. | "my_topic" |
subscribePattern |
A Java regex pattern to subscribe to multiple topics. | "topic_[A-Za-z0-9]+" |
startingOffsets |
The starting offset for each partition. "latest" starts from new data. "earliest" starts from the beginning. |
"latest" or "earliest" |
endingOffsets |
The offset to stop reading. Useful for batch-like processing. | "latest" |
group.id |
The consumer group ID. Kafka uses this to track which partitions a consumer is reading. | "spark-streaming-group" |
kafka.security.protocol |
Protocol used to communicate with Kafka brokers. | "SASL_SSL", "PLAINTEXT" |
checkpointLocation |
Directory for storing checkpoint data (required for stateful operations and Kafka sinks). | "/tmp/spark-checkpoint" |
Best Practices
- Schema-on-Read vs. Schema-on-Write: For Kafka, the data is often serialized (e.g., as JSON, Avro, Protobuf). It's highly recommended to define a schema in Spark (
StructType) to parse the data correctly. This prevents runtime errors and makes your code more robust. - Checkpointing: Always use a
checkpointLocationfor production streaming jobs. It provides fault tolerance and allows your application to recover from failures. - Stateful Operations: Operations like
groupByorwindoware stateful. Spark stores the state in the checkpoint location. Be mindful of the amount of state you are storing. - Resource Management: Structured Streaming queries run in micro-batches. Configure your Spark cluster's resources (cores, memory) appropriately to handle the throughput of your data stream.
- Error Handling: In production, you should write your processed data to a sink that can handle failures gracefully (e.g., HDFS, S3, a database) instead of just the console. The console sink is for debugging only.