Of course! Generating Java code from a WSDL (Web Services Description Language) file is a fundamental step when consuming a web service. The Apache CXF framework provides excellent tools to do this, most notably the cxf-xjc-utils plugin and the wsdl2java command-line tool.

Here’s a comprehensive guide covering both the command-line approach and the Maven plugin approach, which is the most common in modern projects.
Prerequisites
- Java Development Kit (JDK): Version 8 or later.
- Apache CXF: You need to have the CXF tools on your classpath. The easiest way is to download the binary distribution.
- Download from the Apache CXF Official Website.
- Unzip the archive. The
bindirectory contains the necessary scripts.
- Maven: (Optional, but highly recommended for the Maven plugin approach).
What Does the Code Generation Do?
When you run the tool, CXF will analyze the WSDL file and generate:
- Service Endpoint Interface (SEI): A Java interface that represents the web service's operations. You will implement this interface to create your client.
- Service Class: A factory class to create instances of your service client.
- Data Objects (JAXB): Java classes that map to the XML types defined in the WSDL's
<types>section. These are typically annotated with JAXB annotations (@XmlRootElement,@XmlElement, etc.). - Exception Classes: Java classes for any SOAP faults defined in the WSDL.
- Holder Classes: If the WSDL uses
outorinoutparameters, CXF will generate "Holder" classes to handle them.
Method 1: Using the Command-Line Tool (wsdl2java)
This method is great for quick tests, learning, or integrating into a simple build script.
Step 1: Get the WSDL File
You can either get a WSDL file from a URL or a local file. For this example, let's use a public test WSDL.

Example WSDL URL: http://www.webservicex.net/globalweather.asmx?wsdl
Step 2: Run the wsdl2java Command
Navigate to the bin directory of your CXF installation. The command syntax is:
./wsdl2java.sh -p <package.name> -d <output.directory> <wsdl.url.or.file>
-por--package: The Java package name for the generated code.-dor--outputDir: The directory where the Java source files will be saved.<wsdl.url.or.file>: The path to your WSDL file or its URL.
Example Command
Let's generate code for the Global Weather service into a directory called generated-client.
# Navigate to your CXF bin directory
cd /path/to/apache-cxf-3.x.x/bin
# Run the command
./wsdl2java.sh -p com.example.weather.client -d ./generated-client http://www.webservicex.net/globalweather.asmx?wsdl
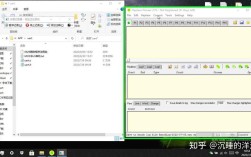
Step 3: Examine the Generated Code
After running the command, you will see a new directory generated-client with the following structure (simplified):

generated-client/
└── com/
    └── example/
        └── weather/
            └── client/
                ├── GlobalWeather.java          // The Service Class
                ├── GlobalWeatherSoap.java       // The Service Endpoint Interface (SEI)
                ├── GetCitiesByCountry.java      // Data Object (Request)
                ├── GetCitiesByCountryResponse.java // Data Object (Response)
                ├── GetWeather.java              // Data Object (Request)
                ├── GetWeatherResponse.java       // Data Object (Response)
                └── ObjectFactory.java           // JAXB Factory
Step 4: Use the Generated Code to Create a Client
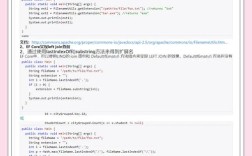
Now you can write a simple Java program to use the generated classes.
import com.example.weather.client.GlobalWeather;
import com.example.weather.client.GlobalWeatherSoap;
import com.example.weather.client.GetWeather;
import com.example.weather.client.GetWeatherResponse;
public class WeatherClient {
    public static void main(String[] args) {
        // 1. Create an instance of the generated Service class
        GlobalWeather service = new GlobalWeather();
        // 2. Get the port (the SEI) from the service
        // The name "GlobalWeatherSoap" comes from the WSDL's <portType> name
        GlobalWeatherSoap weatherSoap = service.getGlobalWeatherSoap();
        // 3. Create the request object
        GetWeather request = new GetWeather();
        request.setCityName("London");
        request.setCountryName("United Kingdom");
        try {
            // 4. Invoke the web service operation
            GetWeatherResponse response = weatherSoap.getWeather(request);
            // 5. Process the response
            String weatherData = response.getGetWeatherResult();
            System.out.println("Weather Data for London, UK:");
            System.out.println(weatherData);
        } catch (Exception e) {
            System.err.println("Error calling web service: " + e.getMessage());
            e.printStackTrace();
        }
    }
}
To compile and run this, you need the CXF libraries in your classpath.
# Compile the client code and generated code
javac -cp "/path/to/apache-cxf-3.x.x/lib/*:." generated-client/com/example/weather/client/*.java WeatherClient.java
# Run the client
java -cp "/path/to/apache-cxf-3.x.x/lib/*:." WeatherClient
Method 2: Using the Maven Plugin (Recommended for Projects)
This is the standard approach for any real-world project. It automates the code generation as part of your build process (e.g., mvn generate-sources).
Step 1: Set up your pom.xml
Add the cxf-codegen-plugin to the <build><plugins> section of your pom.xml.
<project ...>
    <properties>
        <cxf.version>3.5.5</cxf.version> <!-- Use the latest version -->
        <project.build.sourceEncoding>UTF-8</project.build.sourceEncoding>
    </properties>
    <dependencies>
        <!-- Add CXF runtime dependencies -->
        <dependency>
            <groupId>org.apache.cxf</groupId>
            <artifactId>cxf-rt-frontend-jaxws</artifactId>
            <version>${cxf.version}</version>
        </dependency>
        <dependency>
            <groupId>org.apache.cxf</groupId>
            <artifactId>cxf-rt-transports-http</artifactId>
            <version>${cxf.version}</version>
        </dependency>
        <!-- Other dependencies like Spring, etc. -->
    </dependencies>
    <build>
        <plugins>
            <!-- Plugin to generate Java from WSDL -->
            <plugin>
                <groupId>org.apache.cxf</groupId>
                <artifactId>cxf-codegen-plugin</artifactId>
                <version>${cxf.version}</version>
                <executions>
                    <execution>
                        <id>generate-sources</id>
                        <phase>generate-sources</phase>
                        <configuration>
                            <sourceRoot>${project.build.directory}/generated/cxf</sourceRoot>
                            <wsdlOptions>
                                <wsdlOption>
                                    <wsdl>http://www.webservicex.net/globalweather.asmx?wsdl</wsdl>
                                    <wsdlLocation>http://www.webservicex.net/globalweather.asmx?wsdl</wsdlLocation>
                                    <packaging>com.example.weather.maven.client</packaging>
                                </wsdlOption>
                            </wsdlOptions>
                        </configuration>
                        <goals>
                            <goal>wsdl2java</goal>
                        </goals>
                    </execution>
                </executions>
            </plugin>
            <!-- Optional: Add the generated source directory to the compile source path -->
            <plugin>
                <groupId>org.codehaus.mojo</groupId>
                <artifactId>build-helper-maven-plugin</artifactId>
                <version>3.3.0</version>
                <executions>
                    <execution>
                        <id>add-source</id>
                        <phase>generate-sources</phase>
                        <goals>
                            <goal>add-source</goal>
                        </goals>
                        <configuration>
                            <sources>
                                <source>${project.build.directory}/generated/cxf</source>
                            </sources>
                        </configuration>
                    </execution>
                </executions>
            </plugin>
        </plugins>
    </build>
</project>
Step 2: Run the Maven Command
Open a terminal in your project's root directory and run:
mvn clean generate-sources
Maven will download the plugin and dependencies, execute the code generation, and place the Java files in target/generated/cxf/com/example/weather/maven/client/.
Step 3: Write Your Client
The Java client code is identical to the one in the command-line example, but now you can run it directly from your IDE or using mvn compile exec:java (if you configure the exec-maven-plugin).
Advanced Configuration & Common Options
You can customize the code generation with many options.
Common wsdl2java Command-Line Options
-server: Generates a server-side implementation skeleton (instead of a client).-frontendjaxwsorjaxws21: Specifies the frontend.jaxwsis the default and recommended.-client: Explicitly generate client-side code.-exclude: A regular expression to exclude packages from generation.-autoNameResolution: Automatically resolves name conflicts (can be useful but sometimes unpredictable).-xjc-Xlocator: Generate@XmlLocationannotations on beans.-xjc-Xannotate: Generate annotations from XML Schema annotations.
Common Maven Plugin Configuration
You can configure the plugin inside the <wsdlOption> tag.
<wsdlOption>
    <wsdl>path/to/your/local/service.wsdl</wsdl>
    <wsdlLocation>http://my-service.com/production?wsdl</wsdlLocation>
    <packaging>com.mycompany.service</packaging>
    <!-- Additional JAXB bindings -->
    <bindingFiles>
        <bindingFile>src/main/resources/jaxb-binding.xjb</bindingFile>
    </bindingFiles>
</wsdlOption>
Example: Customizing Package Names with JAXB Bindings
Sometimes the WSDL doesn't specify a target namespace, or you want to change the generated package names. You can do this with a JAXB bindings file (.xjb).
Create a file src/main/resources/jaxb-binding.xjb:
<jaxb:bindings
    xmlns:jaxb="http://java.sun.com/xml/ns/jaxb"
    xmlns:xs="http://www.w3.org/2001/XMLSchema"
    xmlns:wsdl="http://schemas.xmlsoap.org/wsdl/"
    jaxb:version="2.1">
    <!-- Change the default package for all schema elements -->
    <jaxb:bindings schemaLocation="http://www.webservicex.net/globalweather.asmx?wsdl#types?schema1">
        <jaxb:schemaBindings>
            <jaxb:package name="com.example.weather.custom.model"/>
        </jaxb:schemaBindings>
    </jaxb:bindings>
</jaxb:bindings>
Then reference this file in your Maven plugin configuration as shown above.