Of course! Using OpenCV with Python on Linux is a powerful and common combination for computer vision tasks. This guide will walk you through the entire process, from installation to a simple "Hello, World!" example.

Here's a breakdown of what we'll cover:
- Prerequisites: What you need before you start.
- Installation: The best way to install OpenCV and its dependencies.
- Verification: How to confirm your installation is working.
- A Simple Example: Reading and displaying an image.
- Common Issues: Troubleshooting tips.
Prerequisites
Before you install OpenCV, make sure you have the following:
- A Linux Distribution: This guide works for Ubuntu, Debian, Fedora, CentOS, Mint, and other popular distributions.
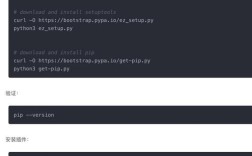
- Python 3: OpenCV works best with Python 3. You can check if you have it installed by opening your terminal and typing:
python3 --version
If it returns a version (e.g.,
Python 3.8.10), you're good to go. If not, you'll need to install it first. On Ubuntu/Debian, you can use:sudo apt update sudo apt install python3 python3-pip
- pip (Python's Package Installer): This is used to install Python packages. The command above should install
pipfor Python 3 aspip3. You can check with:pip3 --version
Installation (Recommended Method)
There are two main ways to install OpenCV: using pip or from source. For 99% of users, using pip is the recommended, easiest, and fastest method.

Method A: Using pip (Recommended)
This is the simplest way. It downloads pre-compiled binaries, so you don't have to worry about complex dependencies.
-
Install System Dependencies: OpenCV requires some system-level libraries to build its Python bindings. It's crucial to install these first to avoid errors.
For Ubuntu/Debian/Mint:
sudo apt update
sudo apt install -y build-essential cmake git libgtk2.0-dev pkg-config libavcodec-dev libavformat-dev libswscale-dev
sudo apt install -y libtbb2 libtbb-dev libjpeg-dev libpng-dev libtiff-dev libdc1394-22-dev
For Fedora/CentOS/RHEL:
 (图片来源网络,侵删)
sudo dnf update -y
sudo dnf groupinstall "Development Tools" -y
sudo dnf install cmake gtk2-devel libdc1394-devel libjpeg-turbo-devel libpng-devel libtiff-devel libv4l-devel
sudo dnf install tbb-devel gstreamer1-plugins-base-devel
-
Install OpenCV using
pip3: Now, install the mainopencv-pythonpackage. This includes the core OpenCV library. It's a large package, so the first download might take a few minutes.pip3 install opencv-python
Optional but Recommended Packages:
opencv-contrib-python: This package includes not only the core modules but also the contrib modules, which contain many extra algorithms and functionalities (like SIFT, SURF, etc.). It's highly recommended to install this instead of the base package.pip3 install opencv-contrib-python
opencv-python-headless: If you only need to run OpenCV on a server without a display (for processing images/videos in the background), use this lighter version. It doesn't include the GUI (imshow) functionality.
That's it! OpenCV is now installed.
Verification
Let's write a simple Python script to verify that everything is working correctly.
-
Open your favorite code editor (like VS Code, Sublime Text, or even
nanoin the terminal). -
Create a file named
test_opencv.py. -
Paste the following code into the file. This script prints the OpenCV version and loads an image.
import cv2 import sys # Print the OpenCV version print("OpenCV Version: " + cv2.__version__) # Check if a command-line argument for an image path is provided if len(sys.argv) > 1: image_path = sys.argv[1] else: # Use a sample image from the internet if no path is provided image_path = "https://raw.githubusercontent.com/opencv/opencv/master/samples/data/lena.jpg" try: # Read the image # The 'cv2.IMREAD_COLOR' flag loads the image in BGR format image = cv2.imread(image_path, cv2.IMREAD_COLOR) # Check if the image was loaded successfully if image is None: print(f"Error: Could not read image from {image_path}") else: print(f"Successfully loaded image with shape: {image.shape}") # Display the image in a window cv2.imshow("Test Image", image) # Wait for a key press to close the window # The '0' means it will wait indefinitely for any key cv2.waitKey(0) # Close all OpenCV windows cv2.destroyAllWindows() except Exception as e: print(f"An error occurred: {e}") -
Save the file.
-
Run the script from your terminal. You can either provide a path to your own image or let it use the default Lena image.
# Option 1: Run with the default image
python3 test_opencv.py
# Option 2: Run with your own image
# python3 test_opencv.py /path/to/your/image.jpg
If everything is installed correctly, you should see a window pop up with the image, and the terminal will print the OpenCV version and the image dimensions. Press any key in the image window to close it.
A Simple Example (Video Capture)
Here's another classic example that accesses your webcam. This is a great way to test the video capture functionality.
-
Create a file named
webcam_test.py. -
Paste this code:
import cv2 # Create a VideoCapture object to access the default camera (usually 0) cap = cv2.VideoCapture(0) # Check if the camera opened successfully if not cap.isOpened(): print("Error: Could not open video device.") exit() # Loop to continuously get frames from the camera while True: # Read a frame from the camera # 'ret' is a boolean that is True if a frame was read successfully # 'frame' is the image itself ret, frame = cap.read() if not ret: print("Error: Failed to capture frame.") break # Display the frame in a window named "Webcam Feed" cv2.imshow("Webcam Feed", frame) # Wait for 1 millisecond and check if the 'q' key is pressed # If 'q' is pressed, break the loop if cv2.waitKey(1) & 0xFF == ord('q'): break # Release the VideoCapture object and close all OpenCV windows cap.release() cv2.destroyAllWindows() print("Webcam feed stopped.") -
Run the script:
python3 webcam_test.py
A window should appear showing your webcam's live feed. Press the 'q' key to stop the script and close the window.
Common Issues and Troubleshooting
-
ImportError: libopencv_core.so.4.5.0: cannot open shared object fileor similar errors.- Cause: The OpenCV shared libraries are not in your system's library path (
LD_LIBRARY_PATH). - Solution (Recommended): The
pipinstallation should handle this automatically by installing the libraries in a standard location. If you still have issues, you might need to update your library cache:sudo ldconfig
- Alternative Solution: If you installed OpenCV in a non-standard location (like from source), you need to add its
libdirectory to yourLD_LIBRARY_PATHenvironment variable.
- Cause: The OpenCV shared libraries are not in your system's library path (
-
Error: Couldn't read video stream fileor camera not found.-
Cause: Your application doesn't have permission to access the webcam.
-
Solution: Make sure your user is part of the
videogroup.# Check your groups groups # If 'video' is not listed, add your user to it sudo usermod -aG video $USER # IMPORTANT: You will need to **log out and log back in** for this change to take effect.
-
-
X11 display not founderror when running on a server.- Cause: You are trying to use a GUI function like
cv2.imshow()on a system that has no graphical display (a headless server). - Solution: You have two options:
- Use the headless version: Uninstall the full version and install
opencv-python-headless.pip3 uninstall opencv-python pip3 install opencv-python-headless
- Use a virtual display: Install a virtual display server like
xvfb. This allows applications to think they have a display.sudo apt install xvfb xvfb-run -a python3 your_script_with imshow.py
- Use the headless version: Uninstall the full version and install
- Cause: You are trying to use a GUI function like
You are now set up to start your computer vision journey on Linux with OpenCV and Python! Good luck