Of course! Let's dive deep into QPainter in Python. It's one of the most fundamental and powerful classes in the Qt framework, used for all 2D drawing operations.

What is QPainter?
QPainter is the core class for drawing on Qt widgets and other paintable surfaces (like QPixmap, QImage, or even directly on a printer). Think of it as your artist's toolkit. You use it to draw:
- Primitive Shapes: Lines, rectangles, ellipses, polygons, arcs, etc.
- Text: With different fonts, colors, and alignments.
- Images and Pixmaps: Displaying pictures or other graphical elements.
- Paths: Complex custom shapes using vector paths.
You can't create a QPainter object by itself. It must be created in the context of a "paint event," which is handled by a subclass of QWidget.
The Core Concept: The Paint Event (paintEvent)
Drawing happens in response to a paintEvent. This event is automatically triggered by Qt when:
- A window is first shown on the screen.
- The window is resized.
- Another window is moved away from, revealing your window.
- You call the
update()orrepaint()method on your widget.
The paintEvent gives you a QPaintEvent object, which contains information about what part of the widget needs to be repainted. Inside this event handler, you create a QPainter object, tell it what to draw, and then it's done.

Step-by-Step Example: A Basic Drawing Widget
Let's create a simple custom widget that draws a blue rectangle and some red text.
The Code
import sys
from PyQt5.QtWidgets import QApplication, QWidget
from PyQt5.QtGui import QPainter, QColor, QFont
from PyQt5.QtCore import Qt
class DrawingWidget(QWidget):
    def __init__(self):
        super().__init__()
        # Set window properties
        self.setWindowTitle('QPainter Example')
        self.setGeometry(300, 300, 400, 300)
    def paintEvent(self, event):
        """
        This is the main drawing function. It's called automatically by Qt.
        """
        # 1. Create a QPainter object.
        # The 'self' argument means we are drawing on this widget.
        painter = QPainter(self)
        # --- Optional: Set Anti-Aliasing for smoother lines ---
        painter.setRenderHint(QPainter.Antialiasing)
        # 2. Set up the drawing style (Pen and Brush)
        # The pen is used for outlines and lines.
        painter.setPen(QColor('black')) # A black pen
        painter.setPen(Qt.NoPen)       # Or no pen at all
        # The brush is used for filling shapes.
        painter.setBrush(QColor(0, 0, 255, 127)) # A semi-transparent blue brush
                                                # (R, G, B, Alpha)
        # 3. Draw a rectangle
        # The coordinates are (x, y, width, height)
        painter.drawRect(50, 50, 200, 100)
        # 4. Draw some text
        painter.setPen(QColor('red')) # Change pen color to red
        font = QFont()
        font.setPointSize(20)
        font.setBold(True)
        painter.setFont(font)
        # The text is drawn from its top-left corner.
        painter.drawText(50, 200, "Hello, QPainter!")
        # 5. The painter object is automatically cleaned up (deleted)
        # when the paintEvent function finishes. You don't need to delete it manually.
if __name__ == '__main__':
    app = QApplication(sys.argv)
    widget = DrawingWidget()
    widget.show()
    sys.exit(app.exec_())
How to Run It
- Make sure you have PyQt5 installed:
pip install PyQt5 - Save the code as a Python file (e.g.,
painter_example.py). - Run it from your terminal:
python painter_example.py
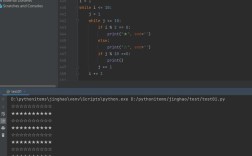
You will see a window like this:
Key Components of QPainter
Let's break down the main parts of the example and explore more features.
The painter Object
painter = QPainter(self)
This is the crucial line. It initializes the painter to draw on the widget instance (self). You can also pass other objects like QPixmap or QImage to draw on them instead.
Coordinate System
By default, the origin (0, 0) is at the top-left corner of the widget. The X-axis increases to the right, and the Y-axis increases downwards.
You can change this using painter.translate(x, y) to shift the origin, or painter.rotate(angle) to rotate the coordinate system. Important: transformations are cumulative, so you might need to save and restore the painter's state.
The Drawing Tools: QPen and QBrush
QPen: Defines the outline of shapes and lines. You can set its color, width (setWidth()), style (setStyle(), e.g.,Qt.DashLine), and cap/join styles.QBrush: Defines how the inside of shapes is filled. You can set its color and style (setStyle(), e.g.,Qt.SolidPattern,Qt.DensePattern,Qt.HorPattern).
Example:
# A thick, dashed, green pen
pen = QPen(QColor('green'), 5, Qt.DashLine)
painter.setPen(pen)
# A yellow, cross-hatched brush
brush = QBrush(Qt.Dense6Pattern)
brush.setColor(QColor('yellow'))
painter.setBrush(brush)
painter.drawRect(10, 10, 100, 100)
Drawing Primitives
QPainter has a rich set of drawing methods:
drawRect(x, y, w, h)drawEllipse(x, y, w, h)ordrawEllipse(center_x, center_y, rx, ry)drawLine(x1, y1, x2, y2)drawPoint(x, y)drawPolygon(points)wherepointsis aQPolygonor list ofQPointdrawPath(path)wherepathis aQPainterPathfor complex shapes
Drawing Text
drawText(x, y, "my text"): Draws text at the given coordinates.drawText(rect, flags, "my text"): Draws text within a rectangle, using alignment flags likeQt.AlignCenter,Qt.AlignTop | Qt.AlignHCenter, etc.
You control the font with painter.setFont(QFont(...)).
Transformations (Advanced)
You can transform the painter's coordinate system to achieve effects like rotation, scaling, and shearing.
painter.save() # Save the current state
# Move the origin to the center of the widget
painter.translate(self.width() / 2, self.height() / 2)
# Rotate the coordinate system by 45 degrees
painter.rotate(45)
# Now, drawing at (0, 0) will be at the center and rotated
painter.setBrush(QColor('purple'))
painter.drawRect(-50, -25, 100, 50) # Centered at the new (0,0)
painter.restore() # Restore the original state (before translate/rotate)
Drawing on QPixmap (Off-Screen Drawing)
A very common and important technique is to draw on an off-screen surface (a QPixmap) first, and then simply "blit" (copy) that image to the screen in the paintEvent. This is much more efficient if your drawing is complex and doesn't change on every repaint.
Why do this?
- Performance: If drawing is expensive (e.g., plotting a graph with thousands of points), you only do it once when the data changes, not on every paint event.
- Flicker-Free: The entire complex scene is drawn at once, then displayed, avoiding flickering.
Example: Drawing on a QPixmap
import sys
from PyQt5.QtWidgets import QApplication, QWidget
from PyQt5.QtGui import QPainter, QPixmap, QColor
from PyQt5.QtCore import Qt, QRect
class PixmapWidget(QWidget):
    def __init__(self):
        super().__init__()
        self.setWindowTitle('Pixmap Drawing')
        self.setGeometry(300, 300, 400, 300)
        # 1. Create an off-screen QPixmap
        self.pixmap = QPixmap(400, 300)
        self.pixmap.fill(Qt.white) # Fill with a white background
        # 2. Draw onto the QPixmap
        self.draw_on_pixmap()
    def draw_on_pixmap(self):
        # Create a QPainter for the QPixmap
        painter = QPainter(self.pixmap)
        painter.setPen(QColor('blue'))
        painter.setBrush(QColor(0, 0, 255, 100)) # Semi-transparent blue
        # Draw some shapes
        painter.drawRect(50, 50, 150, 100)
        painter.drawEllipse(250, 50, 100, 100)
        painter.end() # IMPORTANT: Close the painter when done
    def paintEvent(self, event):
        # 3. In the paintEvent, just draw the pre-rendered pixmap
        painter = QPainter(self)
        painter.drawPixmap(self.rect(), self.pixmap)
if __name__ == '__main__':
    app = QApplication(sys.argv)
    widget = PixmapWidget()
    widget.show()
    sys.exit(app.exec_())
In this example, draw_on_pixmap is called once in __init__. The paintEvent then becomes extremely simple—it just copies the finished image to the screen. If you needed to update the drawing, you would call draw_on_pixmap() again and then self.update() to trigger a new paint event.