Of course! Let's break down how to work with WebSockets in Java, focusing on both the server-side and client-side (HTML/JavaScript) aspects.

What is a WebSocket?
A WebSocket is a computer communication protocol that provides a full-duplex, bidirectional communication channel over a single, long-lived connection between a client (like a web browser) and a server.
Unlike traditional HTTP:
- HTTP is request-response: The client must always ask for data. The server cannot push data to the client on its own.
- WebSocket is persistent: Once the connection is established, either the client or the server can send messages to the other at any time. This is much more efficient for real-time applications.
Key Use Cases for WebSockets
- Chat Applications: Real-time messaging between users.
- Live Notifications: News feeds, stock tickers, or social media notifications.
- Multiplayer Games: Synchronizing game state between players.
- Collaborative Tools: Real-time document editing (like Google Docs).
- Live Dashboards: Real-time data visualization (e.g., server monitoring).
The Java Server-Side
For the Java server, we'll use the Jakarta WebSocket API (formerly Java WebSocket API). This is a standard specification, so you can choose from several implementations. The most popular one is Tyrus, which is the reference implementation.
Step 1: Set up a Maven Project
First, create a new Maven project and add the Tyrus server dependency to your pom.xml.

<dependencies>
    <!-- Jakarta WebSocket API (for the annotations and interfaces) -->
    <dependency>
        <groupId>jakarta.platform</groupId>
        <artifactId>jakarta.jakartaee-api</artifactId>
        <version>10.0.0</version>
        <scope>provided</scope>
    </dependency>
    <!-- Tyrus Server Implementation (the actual server code) -->
    <dependency>
        <groupId>org.glassfish.tyrus</groupId>
        <artifactId>tyrus-server</artifactId>
        <version>2.1.3</version>
    </dependency>
    <!-- Tyrus Grizzly Container (to run the server standalone) -->
    <dependency>
        <groupId>org.glassfish.tyrus</groupId>
        <artifactId>tyrus-grizzly-server</artifactId>
        <version>2.1.3</version>
    </dependency>
</dependencies>
Note: If you're using a Jakarta EE server like WildFly or Payara, you might not need the tyrus-server and tyrus-grizzly-server dependencies as they provide their own implementation.
Step 2: Create the WebSocket Endpoint
This is the core of your server logic. An endpoint is a Java class annotated with @ServerEndpoint. This class will handle WebSocket connections, messages, and disconnections.
Create a new Java class, for example, ChatEndpoint.java.
import jakarta.websocket.*;
import jakarta.websocket.server.ServerEndpoint;
import java.io.IOException;
import java.util.Collections;
import java.util.HashSet;
import java.util.Set;
// This annotation marks this class as a WebSocket endpoint.
// The value is the URI path where clients will connect.
@ServerEndpoint("/chat")
public class ChatEndpoint {
    // A thread-safe Set to store all active client sessions.
    private static Set<Session> chatroomUsers = Collections.synchronizedSet(new HashSet<>());
    /**
     * Called when a new WebSocket connection is established.
     */
    @OnOpen
    public void onOpen(Session session) {
        chatroomUsers.add(session);
        System.out.println("New connection opened. Session ID: " + session.getId());
        // You could broadcast a "user joined" message here.
    }
    /**
     * Called when a message is received from a client.
     */
    @OnMessage
    public void onMessage(String message, Session session) throws IOException {
        System.out.println("Message from " + session.getId() + ": " + message);
        // Broadcast the received message to all connected clients.
        for (Session peer : chatroomUsers) {
            if (peer.isOpen()) {
                peer.getBasicRemote().sendText(message);
            }
        }
    }
    /**
     * Called when a WebSocket connection is closed.
     */
    @OnClose
    public void onClose(Session session) {
        chatroomUsers.remove(session);
        System.out.println("Connection closed. Session ID: " + session.getId());
        // You could broadcast a "user left" message here.
    }
    /**
     * Called when an error occurs during the WebSocket communication.
     */
    @OnError
    public void onError(Session session, Throwable throwable) {
        System.err.println("Error on session " + session.getId());
        throwable.printStackTrace();
    }
}
Step 3: Start the Server
To run this endpoint without a full Jakarta EE server, you can use the Grizzly server from Tyrus.

Create a main class to start the server.
import org.glassfish.tyrus.server.Server;
import java.util.Scanner;
public class ChatServer {
    public static void main(String[] args) {
        // Define the server configuration.
        // The first argument is the host, the second is the port, and the third
        // is the root package containing your WebSocket endpoints.
        Server server = new Server("localhost", 8025, "/websocket-server", ChatEndpoint.class);
        try {
            server.start();
            System.out.println("Chat server started on ws://localhost:8025/websocket-server/chat");
            System.out.println("Press any key to stop the server...");
            // Keep the server running until a key is pressed
            new Scanner(System.in).nextLine();
        } catch (Exception e) {
            e.printStackTrace();
        } finally {
            server.stop();
        }
    }
}
Now, you can run the ChatServer class. Your Java WebSocket server is listening for connections on ws://localhost:8025/websocket-server/chat.
The HTML/JavaScript Client-Side
The client-side is much simpler. Modern web browsers have a native WebSocket object that we can use to connect to our Java server.
Step 1: Create the HTML File
Create a file named index.html. This file will contain the chat UI and the JavaScript to connect to our server.
<!DOCTYPE html>
<html lang="en">
<head>
<meta charset="UTF-8">Java WebSocket Chat</title>
<style>
body { font-family: Arial, sans-serif; margin: 20px; }
#chat-log {
border: 1px solid #ccc;
padding: 10px;
height: 300px;
overflow-y: scroll;
margin-bottom: 10px;
}
#message-input {
width: 80%;
padding: 8px;
}
#send-button {
padding: 8px 15px;
}
</style>
</head>
<body>
<h1>Java WebSocket Chat</h1>
<div id="chat-log"></div>
<input type="text" id="message-input" placeholder="Type a message...">
<button id="send-button">Send</button>
<script>
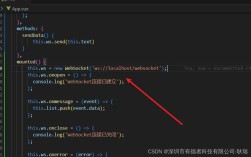
// 1. Create a new WebSocket connection.
// The URL must match the one defined in the @ServerEndpoint annotation.
// ws:// is for non-secure connections, wss:// is for secure (HTTPS).
const socket = new WebSocket('ws://localhost:8025/websocket-server/chat');
const chatLog = document.getElementById('chat-log');
const messageInput = document.getElementById('message-input');
const sendButton = document.getElementById('send-button');
// 2. Define event handlers for the WebSocket.
// onopen: Called when the connection is successfully established.
socket.onopen = function(event) {
console.log('Connection established!');
appendLog('Connected to the chat server.');
};
// onmessage: Called when a message is received from the server.
socket.onmessage = function(event) {
console.log('Message received from server:', event.data);
appendLog(event.data); // Display the message in the chat log.
};
// onclose: Called when the connection is closed.
socket.onclose = function(event) {
if (event.wasClean) {
console.log(`Connection closed cleanly, code=${event.code} reason=${event.reason}`);
} else {
console.error('Connection died');
}
appendLog('Connection to the server lost.');
};
// onerror: Called when an error occurs.
socket.onerror = function(error) {
console.error('WebSocket Error:', error);
appendLog('An error occurred.');
};
// 3. Function to send messages.
function sendMessage() {
const message = messageInput.value;
if (message) {
// Send the message through the WebSocket.
socket.send(message);
messageInput.value = ''; // Clear the input field.
}
}
// 4. Event listener for the send button.
sendButton.addEventListener('click', sendMessage);
// Allow sending the message by pressing Enter.
messageInput.addEventListener('keypress', function(event) {
if (event.key === 'Enter') {
sendMessage();
}
});
// Helper function to append text to the chat log