Of course! This is a very powerful and common combination for building desktop computer vision applications in Windows. Let's break down how to integrate Python, OpenCV, and MFC.

The Core Concept: Roles of Each Technology
- MFC (Microsoft Foundation Classes): This is a C++ library that provides a framework for creating Windows desktop applications. Its main job is to handle the User Interface (UI): windows, buttons, menus, dialogs, and the message loop that drives the application. It's the "skeleton" and "skin" of your application.
- Python: This is the high-level programming language. It's famous for its simplicity and vast ecosystem of libraries. It will be the "brain" of your application, containing the core logic.
- OpenCV (Open Source Computer Vision Library): This is the specialized library for Python (and other languages) that provides all the functions you need for computer vision tasks: reading images/videos, applying filters, detecting objects, face recognition, etc.
The Challenge: MFC is a C++ framework, while your logic is in Python. You can't directly call Python functions from C++ MFC code. Therefore, you need a bridge to allow them to communicate.
The Solution: A Two-Process Architecture with Pipes
The most robust and common way to achieve this is to run Python as a separate process and communicate with it from the MFC application.
Here's the architecture:
+----------------+      +---------------------+      +------------------+
|   MFC App      |----->|  Communication Pipe |----->|   Python Script  |
| (C++ / MFC)    |<-----|  (stdin/stdout)      |<-----| (with OpenCV)    |
| - UI (buttons, |      +---------------------+      | - Loads Image    |
|   dialogs)     |                                  | - Processes      |
| - Sends commands|                                  | - Sends results  |
|   to Python    |                                  +------------------+
| - Receives     |
|   results from |
|   Python       |
+----------------+
How it works:

- MFC (C++): The MFC application creates a console process that runs your Python script. It does this using Windows API functions like
CreateProcess. - Pipes: MFC creates two pipes (an input pipe and an output pipe) to connect its own standard input/output to the Python script's standard input/output.
- Communication Flow:
- MFC writes a command (e.g.,
"process_image C:/temp/my_photo.jpg") into the input pipe. The Python script, running in the other process, reads this command from its standard input (sys.stdin). - The Python script executes the command (e.g., loads the image, detects faces).
- The Python script writes the result (e.g., a base64 encoded image string, or the number of faces found) to its standard output (
sys.stdout). MFC reads this result from the output pipe.
- MFC writes a command (e.g.,
- UI Update: MFC receives the result and uses it to update the UI (e.g., display the processed image in a picture control, show the count in a static text box).
Step-by-Step Implementation Guide
Here is a detailed guide to building a simple application. The goal: An MFC dialog that lets you select an image, sends it to a Python script to convert to grayscale, and then displays the grayscale image back in the MFC dialog.
Prerequisites
- Visual Studio: Install Visual Studio with the "Desktop development with C++" workload.
- Python: Install Python on your system and make sure it's added to the system PATH.
- OpenCV for Python: Install the OpenCV library for Python.
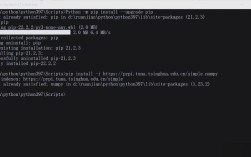
pip install opencv-python
- MFC Project: Create a new MFC project in Visual Studio. Choose the "MFC Application" template and select "Dialog based".
Step 1: The Python Script (image_processor.py)
This script will run in the background. It needs to be able to read commands from standard input and write results to standard output.
image_processor.py
import sys
import cv2
import base64
import numpy as np
def process_image(image_path):
    """Loads an image, converts it to grayscale, and returns it as a base64 string."""
    try:
        # Read the image from the path sent by MFC
        img = cv2.imread(image_path)
        if img is None:
            return "ERROR: Could not read image file."
        # Convert to grayscale
        gray_img = cv2.cvtColor(img, cv2.COLOR_BGR2GRAY)
        # Encode the image to a string format (base64) to send over the pipe
        # This is a simple way to transfer binary data as text
        _, buffer = cv2.imencode('.png', gray_img)
        img_str = base64.b64encode(buffer).decode('utf-8')
        return img_str
    except Exception as e:
        return f"ERROR: {str(e)}"
def main():
    """Main loop to listen for commands from MFC."""
    print("Python script ready.") # Signal that we are ready
    for line in sys.stdin:
        line = line.strip()
        if not line:
            continue
        # MFC will send the command as "process_image <path>"
        if line.startswith("process_image"):
            parts = line.split(" ", 1)
            if len(parts) == 2:
                image_path = parts[1]
                result = process_image(image_path)
                print(result) # Send the result back to MFC via stdout
            else:
                print("ERROR: Invalid command format.")
        elif line == "exit":
            break
if __name__ == "__main__":
    main()
Step 2: The MFC Dialog Application (C++)
We need to modify the generated MFC dialog to add UI elements and the logic to run the Python script.

-
Add UI Controls:
- Open the resource editor (
ResourceView). - Add a Button. Set its
IDtoIDC_SELECT_IMAGEand its Caption to "Select Image". - Add a Picture Control. Set its
TypetoFrameand itsIDtoIDC_IMAGE_DISPLAY. - Add a Static Text. Set its
IDtoIDC_STATUS_TEXTand Caption to "Status: Ready".
- Open the resource editor (
-
Add Member Variables:
- Open the
Class Wizard(Ctrl+W). - For the
IDC_SELECT_IMAGEbutton, add aBN_CLICKEDmessage handler to your dialog class (e.g.,CMfcOpencvDlg). - For the
IDC_STATUS_TEXTstatic text, add a Control Variable of typeCString, namedm_strStatus. - For the
IDC_IMAGE_DISPLAYpicture control, add a Control Variable of typeCStatic, namedm_imageDisplay.
- Open the
-
Add Code to
CMfcOpencvDlg.cpp:a. Include necessary headers:
#include <string>
#include <iostream>
#include <fstream>
#include <windows.h> // For CreateProcess, pipes, etc.
#include <tchar.h>   // For TCHAR functions
b. Add Member Variables to
CMfcOpencvDlg.h: We need handles for the process and the pipes.// CMfcOpencvDlg.h private: HANDLE m_hProcess; HANDLE m_hPipeRead; HANDLE m_hPipeWrite; HANDLE m_hOutputRead; HANDLE m_hOutputWrite;c. Implement the "Select Image" Button Handler:
// CMfcOpencvDlg.cpp
void CMfcOpencvDlg::OnBnClickedSelectImage()
{
    // 1. Let the user select an image file
    TCHAR szFilter[] = _T("Image Files (*.jpg;*.png;*.bmp)|*.jpg;*.png;*.bmp|All Files (*.*)|*.*||");
    CFileDialog dlg(TRUE, NULL, NULL, OFN_HIDEREADONLY | OFN_OVERWRITEPROMPT, szFilter);
    if (dlg.DoModal() != IDOK)
    {
        return;
    }
    CString strImagePath = dlg.GetPathName();
    m_strStatus.Format(_T("Processing: %s"), strImagePath);
    UpdateData(FALSE); // Update the Static Text control
    // 2. Run the Python script and send the command
    RunPythonScript(strImagePath);
}
d. Implement the
RunPythonScriptFunction: This is the core function that sets up the pipes, launches Python, and communicates with it.// CMfcOpencvDlg.cpp void CMfcOpencvDlg::RunPythonScript(CString imagePath) { // SECURITY_ATTRIBUTES for the pipes SECURITY_ATTRIBUTES sa; sa.nLength = sizeof(SECURITY_ATTRIBUTES); sa.bInheritHandle = TRUE; sa.lpSecurityDescriptor = NULL; // Create pipes for stdin and stdout if (!CreatePipe(&m_hPipeRead, &m_hPipeWrite, &sa, 0)) { AfxMessageBox(_T("Failed to create input pipe.")); return; } if (!CreatePipe(&m_hOutputRead, &m_hOutputWrite, &sa, 0)) { AfxMessageBox(_T("Failed to create output pipe.")); return; } // Ensure the read handles to the pipes are not inherited SetHandleInformation(m_hPipeRead, HANDLE_FLAG_INHERIT, 0); SetHandleInformation(m_hOutputWrite, HANDLE_FLAG_INHERIT, 0); // Prepare the command to run CString pythonExe = _T("python.exe"); CString scriptPath = _T("C:\\path\\to\\your\\image_processor.py"); // IMPORTANT: Use full path! CString command = pythonExe + _T(" ") + scriptPath; // Set up the STARTUPINFO structure STARTUPINFO si; PROCESS_INFORMATION pi; ZeroMemory(&si, sizeof(si)); si.cb = sizeof(si); si.hStdError = m_hOutputWrite; si.hStdOutput = m_hOutputWrite; si.hStdInput = m_hPipeRead; si.dwFlags |= STARTF_USESTDHANDLES | STARTF_USESHOWWINDOW; si.wShowWindow = SW_HIDE; // Hide the Python console window ZeroMemory(&pi, sizeof(pi)); // Start the Python process if (!CreateProcess(NULL, command.GetBuffer(), NULL, NULL, TRUE, 0, NULL, NULL, &si, &pi)) { AfxMessageBox(_T("Failed to create Python process.")); return; } m_hProcess = pi.hProcess; // Store the process handle // Send the command to Python's stdin CString strCommand = _T("process_image ") + imagePath + _T("\n"); DWORD written; WriteFile(m_hPipeWrite, strCommand.GetString(), strCommand.GetLength(), &written, NULL); // Read the result from Python's stdout char buffer[4096]; std::string result; DWORD read; while (ReadFile(m_hOutputRead, buffer, sizeof(buffer) - 1, &read, NULL) != NULL && read > 0) { buffer[read] = '\0'; result += buffer; } // Process the result if (result.find("ERROR:") == 0) { m_strStatus = CString(result.c_str()); } else { // The result is a base64 encoded string // Decode it and display it in the Picture Control DisplayBase64Image(result); m_strStatus = _T("Image processed successfully."); } UpdateData(FALSE); // Clean up CloseHandle(pi.hProcess); CloseHandle(pi.hThread); CloseHandle(m_hPipeRead); CloseHandle(m_hPipeWrite); CloseHandle(m_hOutputRead); CloseHandle(m_hOutputWrite); }e. Implement the
DisplayBase64ImageFunction: This function decodes the base64 string and displays it in theCStaticcontrol.// CMfcOpencvDlg.cpp #include <atlconv.h> // For CA2CT #pragma comment(lib, "Gdiplus.lib") // Link against GDI+ #include <gdiplus.h> using namespace Gdiplus; ULONG_PTR gdiplusToken; // In your dialog's OnInitDialog(): // Gdiplus::GdiplusStartupInput gdiplusStartupInput; // Gdiplus::GdiplusStartup(&gdiplusToken, &gdiplusStartupInput, NULL); void CMfcOpencvDlg::DisplayBase64Image(std::string base64Str) { // Decode the base64 string std::string decodedStr = base64_decode(base64Str); if (decodedStr.empty()) return; // Create a stream from the decoded data IStream* pStream = SHCreateMemStream((BYTE*)decodedStr.data(), (UINT)decodedStr.size()); if (!pStream) return; // Create an image from the stream Image image(pStream); pStream->Release(); // Get the dimensions of the picture control CRect rect; m_imageDisplay.GetClientRect(&rect); int width = rect.Width(); int height = rect.Height(); // Create a memory DC to draw the image CWnd* pDesktop = GetDesktopWindow(); HDC hDesktopDC = pDesktop->GetDC()->m_hDC; HDC hMemDC = CreateCompatibleDC(hDesktopDC); if (!hMemDC) return; // Create a bitmap compatible with the display HBITMAP hBitmap = CreateCompatibleBitmap(hDesktopDC, width, height); if (!hBitmap) { DeleteDC(hMemDC); return; } SelectObject(hMemDC, hBitmap); // Draw the image, stretching it to fit the control Graphics graphics(hMemDC); // The image from OpenCV is BGR, GDI+ expects RGB. This might need color conversion. // For simplicity, we'll just draw it. A proper solution would involve a Bitmap from GDI+. // A simpler approach is to save the decoded data to a temp file and load it with CBitmap. // Let's use a simpler temp file method for this example. // --- Simpler Temp File Method --- char tempPath[MAX_PATH]; GetTempPathA(MAX_PATH, tempPath); char tempFile[MAX_PATH]; GetTempFileNameA(tempPath, "img", 0, tempFile); std::ofstream outFile(tempFile, std::ios::binary); outFile.write(decodedStr.data(), decodedStr.size()); outFile.close(); CBitmap bmp; bmp.LoadFromFile(CA2CT(tempFile)); // CA2CT is an ATL conversion macro DeleteFileA(tempFile); // Draw the bitmap in the picture control CDC* pDC = m_imageDisplay.GetDC(); BITMAP bitmapInfo; bmp.GetBitmap(&bitmapInfo); // Center the image int x = (width - bitmapInfo.bmWidth) / 2; int y = (height - bitmapInfo.bmHeight) / 2; pDC->BitBlt(x, y, bitmapInfo.bmWidth, bitmapInfo.bmHeight, &CDC::FromHandle(hMemDC), 0, 0, SRCCOPY); m_imageDisplay.ReleaseDC(pDC); DeleteObject(hBitmap); DeleteDC(hMemDC); } // You'll need a base64_decode function. Here's a simple one. #include <vector> #include <cctype> std::string base64_decode(std::string const& encoded_string) { int i = 0, j = 0, k = 0; int slen = encoded_string.size(); int pad = 0; std::vector<int> bin; std::string ret; // Calculate padding if (slen >= 2) { if (encoded_string[slen - 1] == '=') pad++; if (encoded_string[slen - 2] == '=') pad++; } // Convert base64 to binary for (i = 0; i < slen; i++) { int c = encoded_string[i]; if (c >= 'A' && c <= 'Z') c -= 'A'; else if (c >= 'a' && c <= 'z') c -= 'a' - 26; else if (c >= '0' && c <= '9') c -= '0' - 52; else if (c == '+') c = 62; else if (c == '/') c = 63; else if (c == '=') continue; else continue; bin.push_back(c); } // Convert binary to bytes for (j = 0; j < bin.size() - pad; j += 4) { int n = (bin[j] << 18) + (bin[j + 1] << 12) + (bin[j + 2] << 6) + bin[j + 3]; ret.push_back((n >> 16) & 255); if (pad < 2) ret.push_back((n >> 8) & 255); if (pad < 1) ret.push_back(n & 255); } return ret; }
Alternative (More Advanced) Methods
- Python C-API: This is the most direct and high-performance method. You write a C++ extension module for Python using its C API. This module is then linked directly into your MFC application. This is complex to set up but gives you seamless integration and direct memory access, which is great for performance-critical applications.
- pybind11: A modern, lightweight C++ header library that exposes C++ types in Python and vice versa. It's much easier to use than the raw C-API. You would compile your C++ MFC UI and your pybind11-bound Python code into a single DLL or executable. This is a very popular and powerful approach.
- gRPC / REST API: For more complex applications, you could run the Python code as a separate microservice (e.g., a Flask/FastAPI web server). The MFC application would then act as a client, sending HTTP requests to the Python service. This is overkill for simple apps but is the most scalable and maintainable architecture for large, distributed systems.
Summary
| Method | Pros | Cons | Best For |
|---|---|---|---|
| Two-Process with Pipes | Simple to understand, robust, decoupled, uses standard OS features. | Slower due to process creation and serialization overhead. Communication is text-based. | Most desktop applications, good balance of simplicity and power. |
| Python C-API | Highest performance, direct memory access, seamless integration. | Very complex to set up and debug. Steep learning curve. | High-performance, real-time vision systems where speed is critical. |
| pybind11 | High performance, modern C++, easier than C-API. | Still requires C++ compilation knowledge and a build system. | Modern C++ projects needing tight, high-performance Python integration. |
| gRPC / REST API | Highly scalable, language-agnostic, great for distributed systems. | Overkill for simple apps, introduces network latency, more complex setup. | Large applications where the vision component might be used by other clients. |
For most users starting out, the Two-Process with Pipes method is the perfect starting point. It clearly separates the concerns of UI (MFC) and logic (Python/OpenCV) and is relatively straightforward to implement.