Of course! Here is a comprehensive guide to getting started with Scrapy on Ubuntu, covering installation, setup, creating your first spider, and running your first crawl.

Table of Contents
- Prerequisites: What you need before you start.
- Installation: Step-by-step guide to install Scrapy and its dependencies.
- Project Setup: How to create and structure a Scrapy project.
- Your First Spider: Writing a simple spider to scrape quotes from a website.
- Running the Spider: Executing your spider and saving the output.
- Next Steps: Where to go from here.
Prerequisites
Before you begin, make sure you have the following:
- Ubuntu System: This guide is for Ubuntu 20.04/22.04. The commands are similar for other versions.
- Python 3: Scrapy requires Python 3.6 or newer. Ubuntu 20.04 and 22.04 come with Python 3 pre-installed.
- pip: Python's package installer, which is also usually included.
- Terminal Access: You'll need to open a terminal to run commands.
You can check your Python and pip versions with:
python3 --version
pip3 --version
Installation
The recommended way to install Scrapy is using pip inside a Python virtual environment. This helps keep your project dependencies isolated from your system's Python packages.
Step 1: Update Your System
It's always a good practice to update your package list before installing new software.

sudo apt update
sudo apt upgrade -y
Step 2: Install System Dependencies
Scrapy has some dependencies that need to be installed at the system level. The most important one is libssl-dev, which is required for pyOpenSSL.
sudo apt install python3-dev python3-pip libssl-dev libffi-dev build-essential -y
python3-dev: Development headers for Python.python3-pip: The Python package installer.libssl-dev,libffi-dev,build-essential: Needed to build some of Scrapy's C-based dependencies.
Step 3: Create and Activate a Virtual Environment
This is a crucial step for managing project dependencies.
-
Install
venv(if not already installed):sudo apt install python3-venv -y
-
Create a project directory and navigate into it:
mkdir my_scrapy_project
cd my_scrapy_project
-
Create the virtual environment:
python3 -m venv scrapy_env
This will create a
scrapy_envfolder in your project directory. -
Activate the virtual environment:
source scrapy_env/bin/activate
Your terminal prompt should change to show the name of the active environment, like this:
(scrapy_env) user@hostname:~/my_scrapy_project$.
Step 4: Install Scrapy
Now that your virtual environment is active, you can safely install Scrapy using pip.
pip install scrapy
pip will now install Scrapy and all its required packages (like Twisted, lxml, etc.) inside your scrapy_env folder, leaving your system's Python installation untouched.
Project Setup
Scrapy uses a project-based structure. It's best to create a new project for each scraping task.
-
Create a Scrapy Project: Make sure your virtual environment is still active. Then, run the
startprojectcommand:scrapy startproject tutorial
This will create a
tutorialdirectory with the following structure:tutorial/ ├── scrapy.cfg # deploy configuration file └── tutorial/ # project's Python module, you'll import your code from here ├── __init__.py ├── items.py # project items definition file ├── middlewares.py # project middlewares file ├── pipelines.py # project pipelines file ├── settings.py # project settings file └── spiders/ # a directory where you'll put your spiders └── __init__.py -
Navigate into the Project Directory:
cd tutorial
Your First Spider
A Spider is a class that you define, and Scrapy uses it to scrape information from a website (or a group of websites).
Let's create a spider to scrape quotes from http://quotes.toscrape.com/, a website designed specifically for scraping practice.
-
Create the Spider File: Create a new file in the
tutorial/spidersdirectory. Let's name itquotes_spider.py.# Make sure you are inside the tutorial/ directory touch tutorial/spiders/quotes_spider.py
-
Write the Spider Code: Open
quotes_spider.pywith your favorite text editor (e.g.,nano,vim, or VS Code) and add the following code:import scrapy class QuotesSpider(scrapy.Spider): name = "quotes" # Unique name for the spider # The list of URLs the spider will begin to crawl from start_urls = [ 'http://quotes.toscrape.com/page/1/', 'http://quotes.toscrape.com/page/2/', ] # This is the core method that will be called for each URL def parse(self, response): # The 'response' object holds the page content # We use CSS selectors to extract data for quote in response.css('div.quote'): yield { 'text': quote.css('span.text::text').get(), 'author': quote.css('small.author::text').get(), 'tags': quote.css('div.tags a.tag::text').getall(), } # Example of following a link to the next page # next_page = response.css('li.next a::attr(href)').get() # if next_page is not None: # yield response.follow(next_page, callback=self.parse)Code Explanation:
name = "quotes": A unique name to identify and run the spider.start_urls: A list of URLs where the spider will start crawling.parse(self, response): This is the default callback method that Scrapy calls for eachstart_url. It's where the scraping logic lives.response.css('div.quote'): Uses CSS selectors to find all<div>elements with the classquote.quote.css('span.text::text').get(): Gets the text content from the<span>with classtext.yield: Instead ofreturn, spidersyieldPython dictionaries (orscrapy.Itemobjects). This is how Scrapy collects the scraped data.:text: The:textpseudo-element extracts the inner text of an element..getall(): Returns a list of all matches.
Running the Spider
Now you're ready to run your spider and see it in action.
-
Navigate to the Project Root: Make sure you are in the
tutorialdirectory (the one containingscrapy.cfg). -
Run the Spider: Use the
scrapy crawlcommand, followed by the spider's name (quotes).scrapy crawl quotes
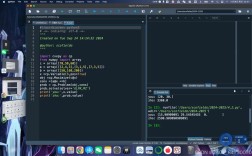
You will see Scrapy's logs in your terminal as it starts the engine, makes requests, and receives responses. The output will look something like this:
2025-10-27 10:30:00 [scrapy.utils.log] INFO: Scrapy 2.8.0 started (bot: tutorial)
...
2025-10-27 10:30:01 [scrapy.core.engine] DEBUG: Crawled (200) <GET http://quotes.toscrape.com/page/1/> (referer: None)
{'text': '“The world as we have created it is a process of our thinking. It cannot be changed without changing our thinking.”', 'author': 'Albert Einstein', 'tags': ['change', 'deep-thoughts', 'thinking', 'world']}
{'text': '“It is our choices, Harry, that show what we truly are, far more than our abilities.”', 'author': 'J.K. Rowling', 'tags': ['abilities', 'choices']}
... (and so on)
Saving the Output
Scrapy makes it easy to save the scraped data to a file. Use the -o or --output flag.
-
Save to a JSON file:
scrapy crawl quotes -o quotes.json
This will create a
quotes.jsonfile in yourtutorialdirectory.