Of course! Let's break down how to use PyAudio and Cocos together. This is a powerful combination for creating interactive audio applications, games, or audiovisual experiences.

PyAudio is a low-level Python library for audio I/O. It's great for capturing microphone input or playing back audio, but it doesn't have any graphics capabilities.
Cocos (specifically Cocos2d) is a framework for building 2D games, visualizations, and interactive applications. It handles windows, graphics, events, and animations, but it doesn't have built-in, low-level audio processing.
By combining them, you can create applications that react to sound in real-time (e.g., visualizing a microphone's input) or play complex, synchronized soundscapes.
Core Concepts: The Data Flow
The key to understanding the combination is understanding the data flow between the two libraries:

- PyAudio (The "Ears"): PyAudio runs in its own thread. It continuously reads audio data from the microphone (or a file) in small, manageable chunks called frames or buffers.
- Data: This audio data is a NumPy array (or a byte string) representing the sound wave's amplitude at each point in time.
- Cocos (The "Eyes" and "Brain"): Cocos has a main game loop that runs at a certain frames-per-second (FPS). In this loop, we can access the latest audio data that PyAudio has captured.
- Interaction: We can then process this audio data (e.g., calculate its volume, frequency) and use the results to update Cocos objects (e.g., change the size of a sprite, move a particle, alter the background color).
Example 1: Real-Time Microphone Visualizer
This is the "Hello, World!" of audiovisual programming. We'll create a Cocos window that displays a bar whose height corresponds to the volume of your microphone input in real-time.
Step 1: Install Prerequisites
You'll need to install the necessary libraries. PyAudio can sometimes be tricky to install on certain operating systems.
# Install the core libraries
pip install cocos2d pyaudio numpy
If you have trouble installing PyAudio on Windows:
You might need to use a pre-compiled wheel. Go to Christoph Gohlke's Unofficial Windows Binaries for Python Extension Packages, find the appropriate .whl file for your Python version and architecture (e.g., pyaudio‑0.2.11‑cp39‑cp39‑win_amd64.whl), and install it using pip.
On macOS:
You might need to install PortAudio first:
brew install portaudio
Then install PyAudio:
pip install pyaudio

On Linux (Debian/Ubuntu):
You might need to install dependencies first:
sudo apt-get install portaudio19-dev python3-pyaudio
Then install PyAudio:
pip install pyaudio
Step 2: The Python Code
Create a file named visualizer.py and paste the following code. The comments explain each part in detail.
import pyaudio
import numpy as np
import cocos
# --- PyAudio Configuration ---
FORMAT = pyaudio.paInt16
CHANNELS = 1
RATE = 44100
CHUNK = 1024  # Number of frames per buffer
# --- Cocos Configuration ---
WINDOW_WIDTH = 800
WINDOW_HEIGHT = 600
class AudioVisualizer(cocos.layer.Layer):
    """
    This layer is responsible for all audio processing and visual updates.
    """
    is_event_handler = True  # This layer will handle events
    def __init__(self):
        super().__init__()
        # 1. Initialize PyAudio
        self.p = pyaudio.PyAudio()
        # 2. Open the audio stream (input from microphone)
        self.stream = self.p.open(format=FORMAT,
                                  channels=CHANNELS,
                                  rate=RATE,
                                  input=True,
                                  frames_per_buffer=CHUNK)
        # 3. Create a Cocos sprite to visualize the audio
        # We use a simple white rectangle.
        # The position is the bottom-center of the sprite.
        self.visualizer = cocos.sprite.Sprite('white.png')
        self.visualizer.position = (WINDOW_WIDTH // 2, 50)
        self.visualizer.scale_x = WINDOW_WIDTH // 2
        self.visualizer.scale_y = 1
        self.add(self.visualizer)
        # 4. Create a label to display the volume level
        self.volume_label = cocos.text.Label('Volume: 0',
                                             font_name='Arial',
                                             font_size=24,
                                             anchor_x='center',
                                             anchor_y='center')
        self.volume_label.position = (WINDOW_WIDTH // 2, WINDOW_HEIGHT - 50)
        self.add(self.volume_label)
        print("Microphone started. Press ESC to exit.")
    def on_exit(self):
        """Called when the Cocos window is closed."""
        print("Closing audio stream...")
        self.stream.stop_stream()
        self.stream.close()
        self.p.terminate()
        super().on_exit()
    def draw(self):
        """
        This method is called by Cocos in its main game loop.
        We will read audio data and update our visuals here.
        """
        try:
            # Read audio data from the stream
            data = self.stream.read(CHUNK, exception_on_overflow=False)
            # Convert the byte data to a NumPy array
            # np.fromstring is deprecated, np.frombuffer is the modern way
            audio_data = np.frombuffer(data, dtype=np.int16)
            # Calculate the Root Mean Square (RMS) to get the volume
            # This gives a good measure of the overall signal power
            rms = np.sqrt(np.mean(audio_data**2))
            # Normalize the RMS value to a 0.0 to 1.0 range
            # Max possible value for int16 is 32768
            normalized_volume = min(rms / 32768.0, 1.0)
            # Update the visualizer's height
            # Scale it up for a better visual effect
            self.visualizer.scale_y = normalized_volume * 10
            # Update the label text
            self.volume_label.element.text = f'Volume: {normalized_volume:.2f}'
        except Exception as e:
            print(f"Error reading audio stream: {e}")
# --- Main Execution ---
if __name__ == "__main__":
    # Create the Cocos director, which manages the game window and scenes
    cocos.director.init(width=WINDOW_WIDTH, height=WINDOW_HEIGHT, caption="PyAudio + Cocos Visualizer")
    # Create the main scene and add our layer to it
    main_scene = cocos.scene.Scene()
    main_scene.add(AudioVisualizer())
    # Run the main scene
    cocos.director.run(main_scene)
Step 3: Run the Visualizer
Execute the script from your terminal:
python visualizer.py
A window should appear. You will see a white rectangle at the bottom. Make some noise, speak into your microphone, or play music, and you should see the rectangle's height change in real-time, along with a volume reading.
Example 2: Synchronized Audio Playback (Advanced)
This example shows how to play a sound file and have Cocos objects react to it. The challenge is that Cocos's main loop and PyAudio's stream reading are asynchronous. We'll use a shared data structure (a queue) to pass information between them.
This is more complex but demonstrates a robust pattern.
import pyaudio
import numpy as np
import cocos
import threading
import queue
import time
# --- Configuration ---
FORMAT = pyaudio.paInt16
CHANNELS = 1
RATE = 44100
CHUNK = 1024
# For this example, you need a WAV file.
# Create a simple one online or use any .wav file you have.
# Make sure it's in the same directory as the script.
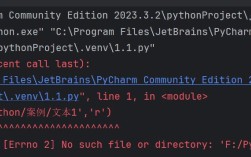
AUDIO_FILE = "my_sound.wav"
WINDOW_WIDTH = 800
WINDOW_HEIGHT = 600
# A thread-safe queue to pass audio data from the PyAudio thread to the Cocos thread
audio_queue = queue.Queue(maxsize=10)
class AudioPlayerThread(threading.Thread):
"""A dedicated thread to handle audio playback."""
def __init__(self):
super().__init__()
self.daemon = True # Thread will exit when the main program exits
self.p = pyaudio.PyAudio()
self.running = True
def run(self):
try:
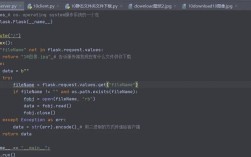
wf = open(AUDIO_FILE, "rb")
stream = self.p.open(format=self.p.get_format_from_width(2),
channels=CHANNELS,
rate=RATE,
output=True)
data = wf.read(CHUNK)
while data and self.running:
stream.write(data)
# Put the RMS of the chunk into the queue for Cocos to use
audio_data_np = np.frombuffer(data, dtype=np.int16)
rms = np.sqrt(np.mean(audio_data_np**2))
audio_queue.put(rms)
data = wf.read(CHUNK)
stream.stop_stream()
stream.close()
wf.close