Of course! Here is a comprehensive guide to the MySQL Connector/J, the official JDBC driver for connecting Java applications to MySQL databases.

What is MySQL Connector/J?
MySQL Connector/J is the official JDBC Type 4 JDBC driver for MySQL. In simple terms, it's a library (a .jar file) that acts as a bridge between your Java application and a MySQL database.
- JDBC (Java Database Connectivity): A standard Java API for executing SQL statements against a database. It provides methods for querying and updating data in a database.
- Type 4 Driver: This means it's a pure Java driver that communicates directly with the database server using the database's native protocol (in this case, MySQL's protocol). It doesn't require any native libraries or client-side libraries to be installed on the machine where the Java application is running.
Why Use It?
- Official Support: Developed and maintained by Oracle (the owner of MySQL).
- Standard JDBC API: You use the standard
java.sqlandjavax.sqlpackages, so your code is portable. - Performance: It's optimized for performance and reliability.
- Features: Supports a wide range of MySQL features, including stored procedures, batch updates, SSL/TLS encryption, and more.
Step-by-Step Guide to Using Connector/J
Here’s a complete walkthrough, from setup to executing a query.
Step 1: Download the Connector/J JAR File
You need to get the driver JAR file.
- Go to the official MySQL Connector/J download page: https://dev.mysql.com/downloads/connector/j/
- Select the platform-independent "Platform Independent (Architecture Independent), ZIP Archive" or "TAR Archive".
- Download the file and extract it. Inside, you'll find a file named
mysql-connector-j-<version>.jar. This is the file you need.
Step 2: Add the JAR to Your Project
You need to make this JAR file available to your Java application's classpath.

Using an IDE (like IntelliJ or Eclipse):
This is the most common and recommended method.
-
IntelliJ IDEA:
- Go to
File->Project Structure...->Modules. - Select your module and go to the
Dependenciestab. - Click the icon and select
JARs or directories.... - Navigate to and select the
mysql-connector-j-<version>.jarfile you downloaded. - Click
OK. The JAR is now added to your project.
- Go to
-
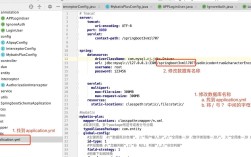
Eclipse:
 (图片来源网络,侵删)
- Right-click on your project in the "Project Explorer".
- Go to
Build Path->Configure Build Path.... - In the "Libraries" tab, click
Add External JARs.... - Navigate to and select the
mysql-connector-j-<version>.jarfile. - Click
Apply and Close.
Using Maven (Recommended for most projects):
If you use Maven, you don't need to download the JAR manually. Just add the dependency to your pom.xml file.
<dependency>
    <groupId>com.mysql</groupId>
    <artifactId>mysql-connector-j</artifactId>
    <version>8.0.33</version> <!-- Use the latest version -->
</dependency>
Maven will automatically download the JAR and manage it for you.
Using Gradle:
If you use Gradle, add the dependency to your build.gradle file.
implementation 'com.mysql:mysql-connector-j:8.0.33' // Use the latest version
Step 3: Write the Java Code
Here is a complete, runnable example that connects to a MySQL database, executes a query, and processes the results.
Prerequisites:
- You have a MySQL server running.
- You have a database and a user set up. For this example, let's assume:
- Database:
test_db - User:
java_user - Password:
secure_password - Table:
users(withid INT,name VARCHAR(255),email VARCHAR(255))
- Database:
import java.sql.Connection;
import java.sql.DriverManager;
import java.sql.ResultSet;
import java.sql.SQLException;
import java.sql.Statement;
public class MySQLExample {
    // --- Database Connection Details ---
    // For MySQL 8.0+, use the 'com.mysql.cj.jdbc.Driver' class name.
    private static final String DB_URL = "jdbc:mysql://localhost:3306/test_db?useSSL=false&serverTimezone=UTC";
    private static final String USER = "java_user";
    private static final String PASS = "secure_password";
    public static void main(String[] args) {
        // The 'try-with-resources' statement ensures that the connection is closed automatically.
        try (Connection conn = DriverManager.getConnection(DB_URL, USER, PASS)) {
            if (conn != null) {
                System.out.println("Connected to the database successfully!");
                // --- Example 1: Create a Statement and Execute a Query ---
                System.out.println("\n--- Reading all users ---");
                readUsers(conn);
                // --- Example 2: Using PreparedStatement (Prevents SQL Injection) ---
                System.out.println("\n--- Finding user by name (using PreparedStatement) ---");
                findUserByName(conn, "John Doe");
            }
        } catch (SQLException e) {
            System.err.println("Connection failed or SQL error!");
            e.printStackTrace();
        }
    }
    /**
     * Reads all users from the 'users' table and prints them.
     */
    private static void readUsers(Connection conn) throws SQLException {
        // try-with-resources for Statement and ResultSet
        String sql = "SELECT id, name, email FROM users";
        try (Statement stmt = conn.createStatement();
             ResultSet rs = stmt.executeQuery(sql)) {
            // Loop through the result set and print each user
            while (rs.next()) {
                // Retrieve by column name is safer and more readable
                int id = rs.getInt("id");
                String name = rs.getString("name");
                String email = rs.getString("email");
                System.out.println("ID: " + id + ", Name: " + name + ", Email: " + email);
            }
        }
    }
    /**
     * Finds a user by their name using a PreparedStatement.
     * @param conn The database connection.
     * @param nameToFind The name of the user to find.
     */
    private static void findUserByName(Connection conn, String nameToFind) throws SQLException {
        String sql = "SELECT id, name, email FROM users WHERE name = ?";
        // Using PreparedStatement to prevent SQL injection
        try (PreparedStatement pstmt = conn.prepareStatement(sql)) {
            // Set the parameter for the query (?)
            pstmt.setString(1, nameToFind);
            try (ResultSet rs = pstmt.executeQuery()) {
                if (rs.next()) {
                    int id = rs.getInt("id");
                    String name = rs.getString("name");
                    String email = rs.getString("email");
                    System.out.println("Found User -> ID: " + id + ", Name: " + name + ", Email: " + email);
                } else {
                    System.out.println("No user found with the name: " + nameToFind);
                }
            }
        }
    }
}
Key Connection URL Parameters
The connection URL (jdbc:mysql://...) is crucial. Here are some important parameters you can add:
useSSL=false: Historically used to disable SSL. For MySQL 8.0.28+, SSL is enabled by default. To disable it, you must useuseSSL=false&allowPublicKeyRetrieval=true. It's highly recommended to use SSL in production.serverTimezone=UTC: Specifies the time zone for the server. This is required to prevent a time zone mismatch warning.allowPublicKeyRetrieval=true: Needed whenuseSSL=falseto allow the driver to get the server's public key for authentication.user: Your MySQL username.password: Your MySQL password.
Example for a production-like secure connection:
String DB_URL_SECURE = "jdbc:mysql://localhost:3306/test_db?useSSL=true&serverTimezone=UTC";
Best Practices
- Use
try-with-resources: Always wrapConnection,Statement,PreparedStatement, andResultSetintry-with-resourcesblocks. This guarantees they are closed automatically, preventing resource leaks. - Use
PreparedStatement: Whenever you are accepting input from a user (like for aWHEREclause), always use aPreparedStatement. It automatically escapes special characters, preventing SQL injection attacks. - Connection Pooling: For high-performance applications, creating a new database connection for every request is very slow. Use a connection pool (like HikariCP, Apache DBCP, or C3P0) to manage a pool of reusable connections.
- Don't Hardcode Credentials: Store database credentials in environment variables, a configuration file (outside your source code), or a secure secret management system. Do not put them directly in your Java code.
- **Handle