Of course! Using Python with Visual Studio (specifically Visual Studio Code, which is the free and most popular choice) is a powerful and modern setup. This guide will walk you through everything you need to know, from installation to debugging and deployment.

Which Visual Studio Should You Use?
This is the most important first question. There are three main products, and you should pick the right one for your needs.
| Product | Best For | Key Features | Python Support |
|---|---|---|---|
| Visual Studio Code (VS Code) | Almost everyone. Data Science, Web Development, Scripting, Beginners. | Lightweight, fast, highly customizable with extensions. Excellent terminal integration. | Excellent (via free extensions). The recommended choice for 99% of Python developers. |
| Visual Studio (Community Edition) | Windows Developers. Building complex desktop apps, games, large enterprise applications, and web services with .NET. | Full-featured IDE with a powerful debugger, performance profiler, and deep integration with the .NET ecosystem. | Excellent (built-in). Has a full Python workload with a professional-grade debugger and tools. |
| Visual Studio for Mac | Mac Developers. Primarily for .NET development on macOS. | Similar to Windows Visual Studio but tailored for the Mac ecosystem. | Good (built-in). Includes Python support, but the development is slower than VS Code. |
Recommendation: Start with Visual Studio Code. It's free, cross-platform (Windows, macOS, Linux), and has a massive ecosystem of extensions that make it the best environment for Python development.
Setting Up Visual Studio Code for Python
Step 1: Install VS Code
If you haven't already, download and install Visual Studio Code from the official website: https://code.visualstudio.com/
Step 2: Install Python
You need Python installed on your system. Download it from the official Python website: https://www.python.org/downloads/

- Crucial: During installation on Windows, make sure to check the box that says "Add Python to PATH". This makes it easy for VS Code to find your Python installation.
Step 3: Install the Python Extension in VS Code
This is the magic step that brings Python to life in VS Code.
- Open VS Code.
- Click on the Extensions icon in the Activity Bar on the left (it looks like four squares).
- In the search bar, type
Python. - Find the extension published by Microsoft and click Install.
Step 4: Select a Python Interpreter
VS Code needs to know which Python installation to use for running your code and providing features like linting and autocompletion.
- Open a folder in VS Code where you want to create your Python project (
File > Open Folder). - Open the Command Palette (
Ctrl+Shift+PorCmd+Shift+P). - Type
Python: Select Interpreterand press Enter. - A list of your installed Python interpreters will appear. Choose the one you want to use (e.g., Python 3.10). If you don't see it, you can browse to find it.
VS Code will remember this choice for your project.
Core Features in Action
A. Writing and Running Code
- Create a new file, save it with a
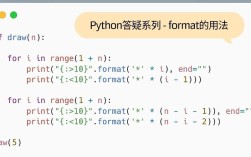
.pyextension (e.g.,hello.py). - Write some simple code:
# hello.py print("Hello, Visual Studio Code!") name = input("What is your name? ") print(f"Nice to meet you, {name}!") - To run the file:
- Simplest way: Click the "Run Python File" button in the top-right of the editor.
- Using the terminal: Open the integrated terminal (
Ctrl+``orView > Terminal) and typepython hello.py.
B. The Integrated Terminal (Your Best Friend)
VS Code has a built-in terminal that you can access directly from the editor. This is where you'll run your scripts, install packages, and use Git.

- To open it:
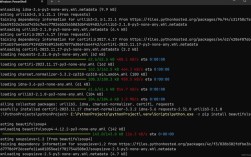
View > Terminalor use the shortcutCtrl+``(backtick). - To install packages, just use
pip:# In the terminal pip install requests pip install pandas
C. Linting and Formatting (Code Quality)
These tools help you catch errors and keep your code clean and consistent.
- Pylint: Finds bugs and enforces a coding style.
- Flake8: A simpler linter that checks for style and errors.
- Black: An opinionated code formatter that automatically formats your code.
- Autopep8: Formats code to conform to the PEP 8 style guide.
How to set them up:
- Install the tools in your terminal:
pip install pylint black autopep8 - VS Code's Python extension will often detect these automatically. You can also configure them in your
settings.jsonfile (File > Preferences > Settings).
D. Debugging (The Superpower)
This is where VS Code (and Visual Studio) truly shines. You can set breakpoints, inspect variables, and step through your code line by line.
- Set a Breakpoint: Click in the gutter (to the left of the line numbers) next to the line where you want the code to pause. A red dot will appear.
- Open the Debug View: Click on the "Run and Debug" icon (a bug) in the Activity Bar on the left.
- Create a
launch.jsonfile: VS Code will ask you to select an environment. Choose "Python File". This creates a configuration file that tells VS Code how to debug your script. - Start Debugging: Press the green "Play" button (or
F5). The script will run until it hits your breakpoint. - Debugging Controls:
- Continue (F5): Run until the next breakpoint.
- Step Over (F10): Execute the current line and move to the next.
- Step Into (F11): Go inside a function call.
- Step Out (Shift+F11): Finish the current function and return to where it was called.
- You can hover over variables to see their current values or add them to the "Watch" panel.
E. Jupyter Notebooks
VS Code has excellent support for Jupyter Notebooks, which are essential for data science and machine learning.
- Create a new file and name it
my_notebook.ipynb. - You can write code in "cells" and run them individually. The output (plots, tables, print statements) appears directly below the cell.
- VS Code provides a full data viewer for Pandas DataFrames, making it easy to explore your data.
Advanced: Data Science with Python
For a more specialized data science experience, you can install the Python Data Science extension pack in VS Code. This includes:
- Jupyter (for notebooks)
- Pylance (a faster, more powerful language server for autocompletion)
- Jupyter Cell Tags (for organizing notebooks)
- Python Preview (for experimental features like interactive data exploration)
Summary: Why Use VS Code for Python?
| Feature | Benefit |
|---|---|
| Free & Cross-Platform | Works on Windows, macOS, and Linux. No cost. |
| Lightweight & Fast | Starts quickly and is very responsive, even on large projects. |
| Huge Extension Ecosystem | You can add support for Git, Docker, databases, virtually any technology. |
| Integrated Terminal | No need to switch between your editor and a separate command prompt. |
| Powerful Debugging | A professional-grade debugger that's easy to set up and use. |
| Excellent Git Integration | See changes, stage files, and commit directly from the interface. |
| Customizable | You can change the theme, keyboard shortcuts, and editor settings to fit your workflow. |