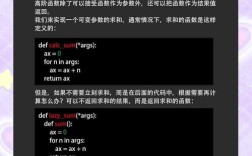
Of course! Creating a Python application that works with a touch screen is a fantastic project. The core idea is to capture the coordinates of the user's touch (or tap) and then perform an action based on where they touched.

Here’s a comprehensive guide covering the concepts, libraries, and a complete, practical example.
The Core Concept: Coordinates and Events
A touch screen doesn't send a special "touch" signal. Instead, it acts like a mouse that you can't see. When you touch the screen, the operating system registers it as a mouse click (or "mouse down" and "mouse up" events) at the specific X and Y coordinates of the touch point.
Therefore, most Python GUI libraries that can handle mouse clicks can also handle touch events with little to no modification. The key is to bind a function to the "click" event that can read the (x, y) coordinates.
Recommended Libraries for Touch Screen Applications
You have several excellent options, depending on your project's complexity and the operating system.

| Library | Best For | Ease of Use | Cross-Platform | Key Feature |
|---|---|---|---|---|
| Kivy | Complex, multi-touch apps (games, kiosks) | Medium | Excellent | Built from the ground up for touch, handles multi-touch natively. |
| Pygame | Games, simulations, simple apps | Easy | Excellent | Very popular, simple event loop, great for graphics. |
| Tkinter | Simple desktop apps, GUI prototypes | Very Easy | Excellent | Comes with Python, no installation needed. |
| PyQt / PySide | Professional, complex desktop apps | Hard | Excellent | Very powerful but has a steep learning curve. |
For most touch screen projects, Kivy is the top recommendation because it's designed for it. Pygame is a close second and often easier to start with for simple applications.
Example 1: Simple Touch Buttons with Pygame (Recommended for Beginners)
Pygame is perfect for this. It's simple, widely used, and its event-driven model works beautifully with touch.
This example will create a window with three colored rectangles. When you touch a rectangle, it will print its name and flash.
Step 1: Install Pygame
pip install pygame
Step 2: The Code (touch_buttons.py)
import pygame
import sys
# 1. Initialize Pygame
pygame.init()
# 2. Set up the display
SCREEN_WIDTH = 800
SCREEN_HEIGHT = 600
screen = pygame.display.set_mode((SCREEN_WIDTH, SCREEN_HEIGHT))
pygame.display.set_caption("Pygame Touch Screen Demo")
# 3. Define colors
WHITE = (255, 255, 255)
BLACK = (0, 0, 0)
RED = (200, 50, 50)
GREEN = (50, 200, 50)
BLUE = (50, 50, 200)
# 4. Define button properties
buttons = [
    {"rect": pygame.Rect(100, 100, 200, 150), "color": RED, "text": "RED", "name": "Red Button"},
    {"rect": pygame.Rect(350, 100, 200, 150), "color": GREEN, "text": "GREEN", "name": "Green Button"},
    {"rect": pygame.Rect(225, 300, 200, 150), "color": BLUE, "text": "BLUE", "name": "Blue Button"},
]
# Font for button text
font = pygame.font.Font(None, 36)
flash_timer = 0 # For a simple visual feedback
# 5. Main game loop
running = True
while running:
    # --- Event Handling ---
    for event in pygame.event.get():
        if event.type == pygame.QUIT:
            running = False
        # This is the key part for touch/mouse clicks
        elif event.type == pygame.MOUSEBUTTONDOWN:
            # Get the (x, y) position of the click/touch
            mouse_pos = pygame.mouse.get_pos()
            # Check if the click is inside any button's rectangle
            for button in buttons:
                if button["rect"].collidepoint(mouse_pos):
                    print(f"Touched: {button['name']} at {mouse_pos}")
                    # Add visual feedback: make the button flash white
                    flash_timer = 10 # Flash for 10 frames
                    break # Exit the loop once a button is found
    # --- Drawing ---
    # Fill the background
    screen.fill(WHITE)
    # Draw buttons
    for button in buttons:
        # If we are flashing and this button was the one touched, draw it white
        if flash_timer > 0 and button["rect"].collidepoint(pygame.mouse.get_pos()):
            pygame.draw.rect(screen, WHITE, button["rect"])
        else:
            pygame.draw.rect(screen, button["color"], button["rect"])
        # Draw a border
        pygame.draw.rect(screen, BLACK, button["rect"], 3)
        # Draw the text on the button
        text_surface = font.render(button["text"], True, BLACK)
        text_rect = text_surface.get_rect(center=button["rect"].center)
        screen.blit(text_surface, text_rect)
    # --- Update the Display ---
    pygame.display.flip()
    # --- Control Frame Rate and Flash Timer ---
    clock = pygame.time.Clock()
    clock.tick(60) # Limit to 60 FPS
    if flash_timer > 0:
        flash_timer -= 1
# 6. Quit Pygame
pygame.quit()
sys.exit()
How to Run It
- Save the code as
touch_buttons.py. - Run it from your terminal:
python touch_buttons.py - A window will appear. Click or tap the colored rectangles to see the response.
Example 2: Multi-Touch Drawing with Kivy (Advanced & Powerful)
Kivy is the go-to library for professional multi-touch applications. It's more complex but gives you incredible control over touch events.

Step 1: Install Kivy
pip install kivy
Step 2: The Code (multitouch_draw.py)
This example creates a canvas where you can draw with multiple fingers at the same time.
from kivy.app import App
from kivy.uix.widget import Widget
from kivy.graphics import Line, Color
from kivy.properties import ListProperty
# This custom widget will handle the drawing
class TouchPaintWidget(Widget):
    # We'll store the color for each touch point
    line_color = ListProperty([1, 0, 0, 1]) # Default: Red, full opacity
    def on_touch_down(self, touch):
        # This method is called whenever a finger touches the screen
        print(f"Touch down at: {touch.pos}")
        # Set a random color for this new line
        self.line_color = [
            touch.x / self.width,  # R
            touch.y / self.height, # G
            0.5,                   # B
            1.0                    # A (Alpha)
        ]
        # Create a new line instruction for this touch
        with self.canvas:
            Color(*self.line_color)
            touch.ud['line'] = Line(points=(touch.x, touch.y), width=15)
    def on_touch_move(self, touch):
        # This method is called as a finger moves across the screen
        # Add the new position to the line's points
        if 'line' in touch.ud:
            touch.ud['line'].points += (touch.x, touch.y)
    def on_touch_up(self, touch):
        # This method is called when a finger is lifted
        print(f"Touch up at: {touch.pos}")
        # The line is already drawn, so we don't need to do anything here.
        # If we wanted to, we could remove the line instruction from the canvas.
# This is the main application class
class TouchPaintApp(App):
    def build(self):
        # Create an instance of our custom widget
        return TouchPaintWidget()
# Run the application
if __name__ == '__main__':
    TouchPaintApp().run()
How to Run It
- Save the code as
multitouch_draw.py. - Run it:
python multitouch_draw.py - Try drawing on the screen with one finger, then try with two or three fingers at the same time!
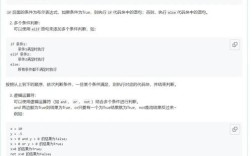
Important Considerations for Touch Screen Projects
- Physical Screen Size: The coordinates
(x, y)are based on the window's pixel dimensions. If your touch screen is small (like a Raspberry Pi 7" touchscreen), you'll want to make your window match the screen's resolution for a "touch-friendly" experience. - Event Loop: Both Pygame and Kivy rely on a continuous loop (
while runningin Pygame, the App'sbuildand event loop in Kivy). Your application logic runs inside this loop. - Calibration: If your touch coordinates don't match the cursor position, your screen might need calibration. This is usually handled by the operating system or the device's driver, not Python.
- Testing: The best way to test is on the actual device. If you're developing on a PC without a touch screen, remember that Pygame and Kivy will still respond to mouse clicks, which makes development much easier.