Of course! Creating a Java Web Service that handles XML is a classic and foundational task in Java enterprise development. The two primary technologies for this are JAX-WS (Java API for XML Web Services) and JAX-RS (Java API for RESTful Web Services).

- JAX-WS is designed for creating SOAP (Simple Object Access Protocol) web services. SOAP is a protocol that defines a strict XML message structure. It's robust, secure, and often used in enterprise environments, especially with systems like SAP, Oracle, and .NET.
- JAX-RS is designed for creating REST (Representational State Transfer) web services. REST typically uses JSON for data exchange, but it can also handle XML. It's simpler, more lightweight, and the de facto standard for modern web and mobile APIs.
I will guide you through both, starting with JAX-WS (the classic XML-focused approach) and then showing how JAX-RS can also produce/consume XML.
Part 1: JAX-WS for SOAP Web Services (XML-Centric)
This is the most traditional way to create a Java web service that uses XML. We'll use the built-in javax.xml.ws API that comes with the Java Standard Edition.
Step 1: Create a Java Interface for the Service
This interface will define the methods that your web service will expose. It's annotated with @WebService.
HelloWorld.java

import javax.jws.WebService;
import javax.jws.WebMethod;
import javax.jws.WebParam;
// This annotation marks this interface as a Web Service Interface
@WebService
public interface HelloWorld {
    // This annotation marks the method as a web service operation
    @WebMethod
    String getHelloWorldMessage(@WebParam(name = "name") String name);
    @WebMethod
    String getUserDetails(@WebParam(name = "userId") int userId);
}
Step 2: Create the Implementation Class
This class implements the interface and contains the actual business logic.
HelloWorldImpl.java
import javax.jws.WebService;
// This annotation links this implementation to the service interface
@WebService(endpointInterface = "com.example.HelloWorld")
public class HelloWorldImpl implements HelloWorld {
    @Override
    public String getHelloWorldMessage(String name) {
        return "Hello, " + name + "! Welcome to JAX-WS Web Service.";
    }
    @Override
    public String getUserDetails(int userId) {
        // In a real app, you would fetch this from a database
        if (userId == 101) {
            return "<user><id>101</id><name>John Doe</name><email>john.doe@example.com</email></user>";
        }
        return "<user><id>" + userId + "</id><name>Unknown User</name></user>";
    }
}
Step 3: Create a Publisher Class to Deploy the Service
This main class will start a simple HTTP server and publish your web service on a specific URL.
Publisher.java

import javax.xml.ws.Endpoint;
public class Publisher {
    public static void main(String[] args) {
        // The URL where the web service will be available
        String url = "http://localhost:9999/ws/hello";
        // Create an instance of the implementation class
        HelloWorldImpl helloWorldImpl = new HelloWorldImpl();
        // Publish the service
        System.out.println("Publishing JAX-WS SOAP service at: " + url);
        Endpoint.publish(url, helloWorldImpl);
        System.out.println("Service is running. Press any key to stop...");
        try {
            System.in.read();
        } catch (Exception e) {
            e.printStackTrace();
        }
        System.out.println("Service stopped.");
    }
}
Step 4: Run and Test the Service
- Compile and Run: Run the
Publisher.javaclass. - WSDL Generation: The server will start. Open a web browser and navigate to
http://localhost:9999/ws/hello?wsdl. You will see the Web Services Description Language (WSDL) file, which is an XML document that describes your service's interface, endpoints, and message formats. This is how clients know how to interact with your service. - Test with a SOAP Client: You can use a tool like SoapUI or even
curlto test the service.
Testing with curl:
The SOAP message must be wrapped in a specific XML envelope. Here's an example to call the getHelloWorldMessage operation.
curl -X POST \
     -H "Content-Type: text/xml; charset=utf-8" \
     -H "SOAPAction: getHelloWorldMessage" \
     -d '<soapenv:Envelope xmlns:soapenv="http://schemas.xmlsoap.org/soap/envelope/" xmlns:ser="http://example.com/">
          <soapenv:Header/>
          <soapenv:Body>
             <ser:getHelloWorldMessage>
                <name>World</name>
             </ser:getHelloWorldMessage>
          </soapenv:Body>
       </soapenv:Envelope>' \
     http://localhost:9999/ws/hello
Expected SOAP Response:
You will get a response that looks like this (the actual XML structure is defined by the WSDL):
<SOAP-ENV:Envelope xmlns:SOAP-ENV="http://schemas.xmlsoap.org/soap/envelope/">
   <SOAP-ENV:Header/>
   <SOAP-ENV:Body>
      <ns2:getHelloWorldMessageResponse xmlns:ns2="http://example.com/">
         <return>Hello, World! Welcome to JAX-WS Web Service.</return>
      </ns2:getHelloWorldMessageResponse>
   </SOAP-ENV:Body>
</SOAP-ENV:Envelope>
Part 2: JAX-RS for RESTful Web Services (with XML)
While JAX-RS is famous for JSON, it can easily be configured to produce and consume XML. We'll use the JAX-RS API with a reference implementation like Jersey.
Step 1: Set up Dependencies (using Maven)
You need to add the Jersey dependency to your pom.xml.
pom.xml
<dependencies>
    <!-- JAX-RS API (Jakarta EE 9) -->
    <dependency>
        <groupId>jakarta.platform</groupId>
        <artifactId>jakarta.jakartaee-api</artifactId>
        <version>9.1.0</version>
        <scope>provided</scope>
    </dependency>
    <!-- Jersey as the JAX-RS implementation -->
    <dependency>
        <groupId>org.glassfish.jersey.containers</groupId>
        <artifactId>jersey-container-grizzly2-http</artifactId>
        <version>3.1.1</version>
    </dependency>
    <dependency>
        <groupId>org.glassfish.jersey.inject</groupId>
        <artifactId>jersey-hk2</artifactId>
        <version>3.1.1</version>
    </dependency>
</dependencies>
Step 2: Create a Model (POJO) for XML Mapping
This class will be automatically converted to/from XML. You need annotations to define the XML element names.
User.java
import jakarta.xml.bind.annotation.XmlRootElement;
@XmlRootElement // This is crucial for JAXB to recognize this class as a root element for XML conversion
public class User {
    private int id;
    private String name;
    private String email;
    // No-arg constructor is required by many frameworks
    public User() {}
    public User(int id, String name, String email) {
        this.id = id;
        this.name = name;
        this.email = email;
    }
    // Getters and Setters
    public int getId() { return id; }
    public void setId(int id) { this.id = id; }
    public String getName() { return name; }
    public void setName(String name) { this.name = name; }
    public String getEmail() { return email; }
    public void setEmail(String email) { this.email = email; }
}
Step 3: Create the JAX-RS Resource Class
This class defines the REST endpoints. We'll use @Produces and @Consumes to specify that we are working with XML.
UserResource.java
import jakarta.ws.rs.*;
import jakarta.ws.rs.core.MediaType;
import jakarta.ws.rs.core.Response;
import java.util.*;
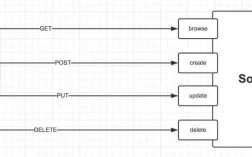
@Path("/users") // The base path for all resource methods
public class UserResource {
// In-memory "database"
private Map<Integer, User> userStore = new HashMap<>();
public UserResource() {
userStore.put(1, new User(1, "Alice", "alice@example.com"));
userStore.put(2, new User(2, "Bob", "bob@example.com"));
}
// GET /users/{id} -> Returns a single user as XML
@GET
@Path("/{id}")
@Produces(MediaType.APPLICATION_XML) // Specifies that this method produces XML
public Response getUser(@PathParam("id") int id) {
User user = userStore.get(id);
if (user == null) {
return Response.status(Response.Status.NOT_FOUND).entity("