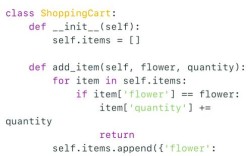
好的 AdaBoost算法简介

(图片来源网络,侵删)
AdaBoost(Adaptive Boosting)是一种集成学习算法,通过组合多个弱学习器(通常是简单的决策树)来构建一个强学习器,其核心思想是:
- 自适应调整样本权重:每次迭代中,增加被前一个弱学习器错误分类的样本的权重,使其在后续训练中得到更多关注。
- 组合弱学习器:根据每个弱学习器的性能(准确率)分配权重,准确率越高的弱学习器在最终决策中占的比重越大。
AdaBoost算法步骤
- 初始化样本权重:对所有训练样本赋予相同的初始权重 ( D_1(i) = \frac{1}{N} ),( N ) 是样本总数。
- 迭代训练弱学习器:
- 使用当前权重分布 ( D_t ) 训练一个弱学习器 ( h_t )。
- 计算弱学习器的加权错误率:( \epsilont = \sum{i=1}^{N} D_t(i) \cdot \mathbb{I}(h_t(x_i) \neq y_i) )。
- 计算弱学习器的权重:( \alpha_t = \frac{1}{2} \ln \left( \frac{1 - \epsilon_t}{\epsilon_t} \right) )。
- 更新样本权重: [ D_{t+1}(i) = \frac{D_t(i) \cdot \exp(-\alpha_t \cdot y_i \cdot h_t(x_i))}{Z_t} ] ( Z_t ) 是归一化因子,确保权重和为1。
- 构建强学习器:
最终强学习器为所有弱学习器的加权和: [ H(x) = \text{sign} \left( \sum_{t=1}^{T} \alpha_t \cdot h_t(x) \right) ]
Python实现AdaBoost
以下是使用Python从零实现AdaBoost的代码(基于决策树桩作为弱学习器):
import numpy as np
from sklearn.tree import DecisionTreeClassifier
class AdaBoost:
    def __init__(self, n_estimators=50):
        self.n_estimators = n_estimators
        self.alphas = []
        self.models = []
    def fit(self, X, y):
        n_samples, n_features = X.shape
        # 初始化样本权重
        D = np.ones(n_samples) / n_samples
        for _ in range(self.n_estimators):
            # 训练弱学习器(决策树桩,深度为1的决策树)
            model = DecisionTreeClassifier(max_depth=1)
            model.fit(X, y, sample_weight=D)
            predictions = model.predict(X)
            # 计算错误率
            incorrect = (predictions != y).astype(int)
            epsilon = np.dot(D, incorrect) / np.sum(D)
            # 计算弱学习器权重
            alpha = 0.5 * np.log((1 - epsilon) / (epsilon + 1e-10))  # 避免除以0
            self.alphas.append(alpha)
            self.models.append(model)
            # 更新样本权重
            D *= np.exp(-alpha * y * predictions)
            D /= np.sum(D)  # 归一化
    def predict(self, X):
        # 加权投票
        predictions = np.zeros(X.shape[0])
        for alpha, model in zip(self.alphas, self.models):
            predictions += alpha * model.predict(X)
        return np.sign(predictions)
使用示例
from sklearn.datasets import make_classification
from sklearn.model_selection import train_test_split
from sklearn.metrics import accuracy_score
# 生成数据集
X, y = make_classification(n_samples=1000, n_features=20, n_informative=2, n_redundant=10, random_state=42)
y = np.where(y == 0, -1, 1)  # 将标签转换为-1和1
# 划分训练集和测试集
X_train, X_test, y_train, y_test = train_test_split(X, y, test_size=0.2, random_state=42)
# 训练AdaBoost模型
ada = AdaBoost(n_estimators=50)
ada.fit(X_train, y_train)
# 预测
y_pred = ada.predict(X_test)
accuracy = accuracy_score(y_test, y_pred)
print(f"Accuracy: {accuracy:.4f}")
使用Scikit-learn的AdaBoost
Scikit-learn已经实现了AdaBoost,可以直接使用:

(图片来源网络,侵删)
from sklearn.ensemble import AdaBoostClassifier
# 使用Scikit-learn的AdaBoost
ada_sklearn = AdaBoostClassifier(n_estimators=50, random_state=42)
ada_sklearn.fit(X_train, y_train)
y_pred_sklearn = ada_sklearn.predict(X_test)
accuracy_sklearn = accuracy_score(y_test, y_pred_sklearn)
print(f"Scikit-learn AdaBoost Accuracy: {accuracy_sklearn:.4f}")
- 弱学习器选择:通常使用决策树桩(深度为1的决策树)。
- 权重更新:错误分类的样本权重增加,正确分类的样本权重减少。
- 弱学习器权重:错误率越低的弱学习器权重越高。
- 终止条件:达到预设的弱学习器数量或错误率足够低。
可能的改进
- 动态调整弱学习器数量:通过交叉验证选择最优的
n_estimators。 - 使用其他弱学习器:如感知机或SVM(但需确保弱学习器性能略优于随机猜测)。
- 并行化:AdaBoost的弱学习器可以并行训练(需调整权重更新策略)。
通过以上实现和示例,你可以理解AdaBoost的核心思想并应用于实际任务。