Of course! Here is a comprehensive guide to setting up and using Eclipse for Java development on a Mac. This guide covers everything from installation to configuration and best practices.

Part 1: Installation
The first step is to get the necessary software installed. You'll need two things: Java (the JDK) and Eclipse IDE.
Step 1: Install the Java Development Kit (JDK)
Eclipse is an IDE for Java, but it doesn't come with Java itself. You need to install the JDK to compile and run your code.
Recommendation: Use the version of Java that comes bundled with modern versions of macOS. It's stable, well-supported, and doesn't require separate installation.
-
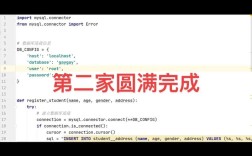
Check if Java is already installed: Open the Terminal app (you can find it in
Applications/Utilitiesor search for it with SpotlightCmd + Space). Type the following command and press Enter: (图片来源网络,侵删)
/usr/libexec/java_home -V
If you see output listing Java versions (e.g., "Java SE 17.0.x"), you're all set! You can skip to Step 2.
-
Install Java (if needed): If the command above shows "No Java runtime present," you can easily install it from the command line.
- Open the Terminal app.
- Install Homebrew if you don't have it (the recommended package manager for macOS):
/bin/bash -c "$(curl -fsSL https://raw.githubusercontent.com/Homebrew/install/HEAD/install.sh)"
- Install the latest LTS (Long-Term Support) version of the JDK (e.g., OpenJDK 17 or 21):
brew install openjdk@17
- After installation, Homebrew will give you instructions on how to set up the
JAVA_HOMEenvironment variable. Follow them. It will usually be a command like this to add it to your shell profile:echo 'export JAVA_HOME="$(brew --prefix openjdk@17)"' >> ~/.zshrc
- Restart your Terminal or run
source ~/.zshrcto apply the changes.
Step 2: Download and Install Eclipse IDE
- Go to the official Eclipse download page: https://www.eclipse.org/downloads/
- Under "Eclipse IDE for Enterprise Java and Web Developers," click the download link for macOS Cocoa 64-bit. This is the most popular bundle and includes tools for Java, web, and database development.
- The download will be a
.dmgfile. - Open the
.dmgfile. You will see an icon labeled Eclipse Installer. - Drag the Eclipse IDE icon from the window into your
Applicationsfolder. That's it! No complex installation wizard.
Part 2: First Launch and Workspace Setup
Now that Eclipse is in your Applications folder, let's launch it and configure it.
-
Launch Eclipse: Open your
Applicationsfolder and double-click the Eclipse IDE icon. (图片来源网络,侵删)
 -
Select a Workspace: The first time you launch Eclipse, it will ask you to choose a Workspace. A workspace is a folder where Eclipse will store all your projects.
- It's a good practice to create a dedicated folder for your work, for example, on your Desktop (
~/Desktop/JavaWorkspace) or in your Documents folder. - Check the box "Use this as the default and do not ask again" if you're happy with this location.
- Click Launch.
- It's a good practice to create a dedicated folder for your work, for example, on your Desktop (
-
Eclipse Welcome Screen: You might see a welcome screen. You can close it by clicking the "X" or by selecting File -> Close Welcome from the menu bar to get to the main workbench.
Part 3: The Eclipse Workbench Interface
When you close the welcome screen, you'll see the main Eclipse interface, called the Workbench. It has four main areas:
- Menu Bar: The top menu (File, Edit, View, etc.) with all actions.
- Toolbar: Quick access to common actions.
- Perspectives: A collection of views and editors for a specific type of task (e.g., Java, Debugging). You are currently in the Java perspective.
- Views and Editor Area:
- Editor Area (Center): Where you write your code. This is the main focus.
- Views (Sides): Provide supporting information. The most important ones are:
- Package Explorer: Shows your projects, folders, and files in a tree structure. This is your file navigator.
- Console: Displays the output of your program (e.g.,
System.out.printlnmessages, errors). - Problems: Lists any compilation errors or warnings in your code.
Part 4: Creating Your First Java Project
Let's create a simple "Hello, World!" project.
-
Create a New Project:
- Go to File -> New -> Java Project.
- In the "New Java Project" window:
- Project name: Enter
HelloWorld. - Location: This should default to your workspace folder. You can leave it as is.
- JRE: Ensure it's set to the correct Java version you installed (e.g., "JavaSE-17"). If not, click Configure JREs..., select your installed JDK, and click Finish.
- Project name: Enter
- Click Finish.
-
Explore the Project Structure: Look at the Package Explorer on the left. You'll see your
HelloWorldproject, which has asrcfolder. This is where your source code goes. -
Create a Class:
- Right-click on the
srcfolder in the Package Explorer. - Select New -> Class.
- In the "New Java Class" window:
- Package: You can leave this blank for a simple project, or enter
com.example.hello. - Name: Enter
Main. - Check the box
public static void main(String[] args). This will automatically generate the main method, which is the entry point for any Java application.
- Package: You can leave this blank for a simple project, or enter
- Click Finish.
- Right-click on the
-
Write the Code: Eclipse will open the
Main.javafile in the editor. It will already contain the class structure and the main method. Add the following line inside the main method:package com.example.hello; public class Main { public static void main(String[] args) { System.out.println("Hello, Mac World!"); } } -
Run the Program:
- Method 1 (Toolbar): Click the green "Run" button (▶) in the toolbar.
- Method 2 (Menu): Go to Run -> Run.
- Method 3 (Keyboard Shortcut): Press
Cmd + F11.
The first time you run it, Eclipse might ask you to configure a "Run" configuration. Just select your
HelloWorldproject and click Run. -
View the Output: Look at the Console view at the bottom. You should see your output:
Hello, Mac World!
Part 5: Essential Tips for Mac Users
-
Keyboard Shortcuts: Learning shortcuts will make you much more efficient.
Cmd + S: SaveCmd + O: Open a fileCmd + Shift + R: Open a resource (file) by name (very useful!)Cmd + Shift + T: Open a type (class) by nameCmd + D: Delete current lineCmd + /: Toggle comment for a line or blockCmd + 1: Quick fix (suggests solutions for errors)
-
Right-Click (Context Menu): Mac users don't have a right-click button by default. You can access the context menu (which is crucial for Eclipse) by:
- Two-finger tap on the trackpad.
- Pressing and holding the
Controlkey while you click. - Using an external mouse with right-click enabled.
-
Memory Issues: If Eclipse feels slow or crashes on your Mac, it might be running out of memory. You can increase the memory allocated to Eclipse.
- Right-click the Eclipse.app in your
Applicationsfolder and select "Show Package Contents". - Navigate to
Contents/Eclipse. - Find the file named
eclipse.ini. - Open it with a text editor (like TextEdit or VS Code).
- Look for lines like
-Xms512mand-Xmx1024m. These set the initial and maximum heap size. - You can increase the
-Xmxvalue. For a modern Mac with 8GB+ of RAM, setting it to-Xmx2048mor-Xmx4096mcan make a big difference.-startup plugins/org.eclipse.equinox.launcher_...jar --launcher.library plugins/org.eclipse.equinox.launcher.cocoa.macosx.x86_64_... -showsplash org.eclipse.platform --launcher.defaultAction openFile -vm /path/to/your/jdk/bin/java // This line might be needed -Xms512m -Xmx2048m // <-- Change this value ...other lines...
- Right-click the Eclipse.app in your
Part 6: Troubleshooting Common Issues
-
Problem: "Could not find the main class. Program will exit."
- Cause: This usually happens if you run the project from the wrong place or if the class is not in the default package and you don't have a
run configurationset up properly. - Solution: Make sure you are running the class file itself (e.g.,
Main), not the project. The green run button usually handles this, but if not, right-click yourMain.javafile in the Package Explorer and select Run As -> Java Application.
- Cause: This usually happens if you run the project from the wrong place or if the class is not in the default package and you don't have a
-
Problem: Eclipse is very slow or unresponsive.
- Solution: As mentioned above, increase the memory in
eclipse.ini. Also, make sure you are not running too many other memory-intensive applications at the same time.
- Solution: As mentioned above, increase the memory in
-
Problem: The UI looks blurry or scaled incorrectly.
- Cause: This can happen on high-resolution Retina displays.
- Solution: Go to Eclipse -> Preferences -> General -> Appearance. Try unchecking and rechecking the box for "Use font as rendered by native system" or try changing the "Zoom factor" setting.