Of course! Let's break down "Eclipse Android Java" from a historical perspective to a modern one.

This phrase refers to a specific, very popular development environment from the late 2000s and early 2010s for building Android applications.
Here’s a complete guide covering what it was, how it worked, and why it's no longer the recommended approach.
The "Classic" Trio: What Each Component Was
Eclipse
- What it is: An Integrated Development Environment (IDE). Think of it as a powerful, all-in-one workspace for writing, debugging, and managing code.
- Role in this stack: It was the main application where you spent your time. It provided:
- A code editor with syntax highlighting and auto-completion.
- A built-in compiler to turn your Java code into machine-readable instructions.
- A debugger to step through your code line-by-line and find bugs.
- A file explorer to manage your project's files and folders.
- A console to see log messages and errors.
Java
- What it is: A high-level, object-oriented programming language.
- Role in this stack: It was the programming language you used to write the logic for your Android app. You wrote Java code to define what your app does, how it responds to user input, and how it manages data. This Java code was compiled into an intermediate format called Dalvik Executable (.dex), which the Android operating system could run on a device.
Android
- What it is: The operating system for smartphones, tablets, and other devices.
- Role in this stack: It was the platform or "target" for your application. You were writing software specifically to run on Android. Android provided a massive set of pre-built libraries (called the Android SDK - Software Development Kit) that you could use to access device features like the camera, GPS, contacts list, and, most importantly, the user interface (UI).
How They Worked Together: The Development Workflow
The magic happened through a plugin called the Android Development Tools (ADT). You would install this plugin into your standard Eclipse IDE, and it would transform Eclipse into a dedicated Android development powerhouse.
Here’s the typical workflow:

-
Setup:
- Install the Java Development Kit (JDK).
- Download and install the Eclipse IDE for Java Developers.
- Download the Android SDK.
- Install the ADT plugin into Eclipse and point it to your Android SDK folder.
-
Creating a Project:
- In Eclipse, you'd go
File > New > Android Application Project. - The ADT plugin would create a standard project structure with folders like:
src/: For your Java source code.res/: For your app's resources (layouts, images, strings, etc.).AndroidManifest.xml: A crucial file that describes your app to the Android OS (its name, permissions, components, etc.).
- In Eclipse, you'd go
-
Writing Code:
-
UI Layouts: You would design your app's screens using a visual editor or by writing XML files in the
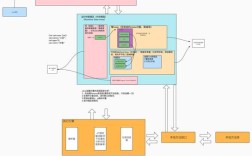
res/layout/folder. The ADT plugin provided a "Graphical Layout" editor that was a huge help. (图片来源网络,侵删)
 -
Java Logic: You would write Java code in the
src/folder. For example, you might create aMainActivity.javafile. This file would be linked to youractivity_main.xmllayout file. You could then write code like:// In MainActivity.java import android.os.Bundle; import android.app.Activity; import android.view.View; import android.widget.Button; import android.widget.Toast; public class MainActivity extends Activity { @Override protected void onCreate(Bundle savedInstanceState) { super.onCreate(savedInstanceState); // This line connects the Java code to the XML layout file. setContentView(R.layout.activity_main); // Find a button in the layout by its ID. Button myButton = (Button) findViewById(R.id.my_button_id); // Set a click listener for the button. myButton.setOnClickListener(new View.OnClickListener() { @Override public void onClick(View v) { // Show a small pop-up message when the button is clicked. Toast.makeText(getApplicationContext(), "Hello World!", Toast.LENGTH_SHORT).show(); } }); } }
-
-
Building and Running:
- You would click the green "Run" button in Eclipse.
- The ADT plugin would automatically compile your Java code, package it with resources, and build an Android Package (.apk) file.
- It would then either install this .apk on a connected Android device/emulator and launch it, or you would have to do it manually using the
adb(Android Debug Bridge) tool.
The Decline and The Modern Alternative: Android Studio
While Eclipse + ADT was fantastic for its time, it had several drawbacks:
- Stability and Performance: It was often slow, prone to crashing, and had memory leaks.
- Clunky UI: The interface could feel dated and unintuitive.
- Slow Builds: The build process was often slower than modern tools.
- Lack of Modern Features: It struggled to keep up with the rapid evolution of the Android platform.
In 2025, Google officially announced Android Studio as the new official IDE for Android development.
Why did Google create Android Studio?
- Built by Google, for Android: It's built on a modern, fast, and popular IDE called IntelliJ IDEA. It was designed from the ground up for Android development.
- Integrated Tools: It comes with all the essential tools pre-bundled and perfectly integrated: a visual layout editor, a powerful code profiler, an Android emulator, and a build system called Gradle.
- Speed and Intelligence: It offers much faster code analysis, smarter auto-completion, and more reliable refactoring.
- Seamless Updates: Updating the Android SDK and tools is handled smoothly within the IDE.
Summary Table: Eclipse vs. Android Studio
| Feature | Eclipse + ADT (The "Classic" Way) | Android Studio (The Modern Way) |
|---|---|---|
| IDE Foundation | Eclipse (General Purpose) | IntelliJ IDEA (Android-Focused) |
| Primary Language | Java | Kotlin (Primary), Java |
| Build System | Manual or Ant | Gradle (Powerful, flexible, automated) |
| UI Designer | Graphical Layout Editor | Layout Editor (Advanced, ConstraintLayout) |
| Performance | Often slow and buggy | Fast and stable |
| Official Status | Deprecated (No longer supported) | Officially Recommended by Google |
| Learning Curve | Steeper for beginners | More intuitive and better documentation |
Conclusion
"Eclipse Android Java" was the gateway into mobile development for a generation of developers. It was the standard, the go-to tool that made Android development accessible.
However, the landscape has completely changed. If you are starting Android development today, you should absolutely use Android Studio and learn Kotlin.
While you might find old tutorials or legacy projects still using the Eclipse setup, it is a historical technology. Modern Android development is a faster, more enjoyable, and more powerful experience with the current official tools.