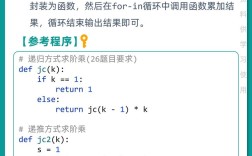
Python 被誉为“胶水语言”和“瑞士军刀”,因为它可以快速编写各种实用脚本来解决日常问题,下面我将 Python 常用脚本分为几个大类,并提供详细的代码示例和说明,你可以直接复制或根据需求修改使用。

文件与目录操作脚本
这类脚本是最常见的需求,可以帮你自动化处理文件,节省大量重复劳动。
批量重命名文件
这个脚本可以根据特定规则(如添加前缀、替换文本、修改序号)批量重命名指定目录下的文件。
import os
import re
def batch_rename(directory, prefix="NEW_", replace_from=None, replace_to=None):
    """
    批量重命名目录下的文件。
    :param directory: 目标目录路径
    :param prefix: 要添加的前缀
    :param replace_from: 要被替换的旧文本
    :param replace_to: 要替换成的新文本
    """
    if not os.path.isdir(directory):
        print(f"错误:'{directory}' 不是一个有效的目录。")
        return
    print(f"正在处理目录: {directory}")
    for filename in os.listdir(directory):
        old_path = os.path.join(directory, filename)
        # 跳过子目录
        if not os.path.isfile(old_path):
            continue
        # 构建新文件名
        new_filename = filename
        if replace_from and replace_to:
            new_filename = new_filename.replace(replace_from, replace_to)
        new_filename = prefix + new_filename
        new_path = os.path.join(directory, new_filename)
        # 如果新文件名与旧文件名不同,则重命名
        if old_path != new_path:
            try:
                os.rename(old_path, new_path)
                print(f"重命名: '{filename}' -> '{new_filename}'")
            except Exception as e:
                print(f"重命名 '{filename}' 失败: {e}")
# --- 使用示例 ---
# 场景1: 给所有文件添加 "MyPhoto_" 前缀
# batch_rename("/path/to/your/photos", prefix="MyPhoto_")
# 场景2: 将文件名中的 "old_text" 替换为 "new_text"
# batch_rename("/path/to/your/files", replace_from="old_text", replace_to="new_text")
# 场景3: 移除文件名中的 "copy_" 前缀
# batch_rename("/path/to/your/files", replace_from="copy_", replace_to="")
整理文件(按类型分类)
这个脚本可以将一个文件夹中的所有文件,根据它们的扩展名(如 .jpg, .txt, .pdf)移动到不同的子文件夹中,实现自动整理。
import os
import shutil
def organize_files_by_extension(source_dir):
    """
    根据文件扩展名将文件分类到不同的子文件夹中。
    """
    if not os.path.isdir(source_dir):
        print(f"错误:'{source_dir}' 不是一个有效的目录。")
        return
    # 遍历源目录中的所有文件
    for filename in os.listdir(source_dir):
        source_path = os.path.join(source_dir, filename)
        # 跳过子目录
        if not os.path.isfile(source_path):
            continue
        # 获取文件扩展名(小写)
        _, ext = os.path.splitext(filename)
        ext = ext.lower()
        # 如果没有扩展名,跳过或放到 'no_extension' 文件夹
        if not ext:
            ext = 'no_extension'
        # 创建目标文件夹路径
        target_dir = os.path.join(source_dir, ext[1:]) # 去掉点号
        if not os.path.exists(target_dir):
            os.makedirs(target_dir)
            print(f"创建目录: {target_dir}")
        # 移动文件
        target_path = os.path.join(target_dir, filename)
        try:
            shutil.move(source_path, target_path)
            print(f"移动: '{filename}' -> '{target_dir}'")
        except Exception as e:
            print(f"移动 '{filename}' 失败: {e}")
# --- 使用示例 ---
# organize_files_by_extension("/path/to/messy_folder")
网络与爬虫脚本
Python 是网络爬虫的王者,拥有 requests 和 BeautifulSoup 等强大的库。

简单网页爬取(获取所有链接)
这个脚本可以访问一个网页,并提取出其中的所有超链接。
import requests
from bs4 import BeautifulSoup
import re
def get_all_links(url):
    """
    获取指定网页中的所有链接。
    """
    try:
        # 发送HTTP请求
        response = requests.get(url, timeout=10)
        response.raise_for_status()  # 如果请求失败 (状态码非200), 则抛出异常
        # 使用BeautifulSoup解析HTML
        soup = BeautifulSoup(response.text, 'html.parser')
        # 查找所有的<a>标签
        links = []
        for a_tag in soup.find_all('a', href=True):
            link = a_tag['href']
            # 处理相对路径,转换为绝对路径
            if link.startswith('/'):
                link = url.rstrip('/') + link
            links.append(link)
        return links
    except requests.exceptions.RequestException as e:
        print(f"请求失败: {e}")
        return []
# --- 使用示例 ---
if __name__ == "__main__":
    target_url = "https://www.python.org"  # 替换成你想爬取的网址
    all_links = get_all_links(target_url)
    print(f"在 {target_url} 中找到 {len(all_links)} 个链接:")
    for i, link in enumerate(all_links[:20]): # 只打印前20个链接
        print(f"{i+1}. {link}")
API 数据获取与保存
很多网站提供 API 接口来获取结构化数据(如 JSON),这个脚本演示如何调用 API 并将结果保存为 JSON 文件。
import requests
import json
def fetch_and_save_api_data(url, output_filename):
    """
    从API获取数据并保存到JSON文件。
    """
    try:
        print(f"正在从 {url} 获取数据...")
        response = requests.get(url)
        response.raise_for_status()  # 检查请求是否成功
        # API返回的数据通常是JSON格式
        data = response.json()
        # 将数据保存到JSON文件,indent=4 使文件更易读
        with open(output_filename, 'w', encoding='utf-8') as f:
            json.dump(data, f, indent=4, ensure_ascii=False)
        print(f"数据已成功保存到 {output_filename}")
        return data
    except requests.exceptions.RequestException as e:
        print(f"API请求失败: {e}")
    except json.JSONDecodeError:
        print("响应不是有效的JSON格式。")
    return None
# --- 使用示例 ---
# 使用一个公开的API作为示例
api_url = "https://jsonplaceholder.typicode.com/posts/1" # 获取一篇模拟文章
output_file = "api_data.json"
fetch_and_save_api_data(api_url, output_file)
系统与自动化脚本
这类脚本可以与操作系统交互,实现自动化任务。
系统信息监控
这个脚本可以显示当前系统的基本信息,如 CPU 使用率、内存使用情况和磁盘空间。

import psutil
import platform
def get_system_info():
    """
    获取并打印系统信息。
    """
    print("--- 系统信息 ---")
    print(f"操作系统: {platform.system()} {platform.release()}")
    print(f"处理器: {platform.processor()}")
    print(f"架构: {platform.machine()}")
    print("\n--- CPU 信息 ---")
    cpu_percent = psutil.cpu_percent(interval=1)
    print(f"CPU 使用率: {cpu_percent}%")
    print(f"CPU 逻辑核心数: {psutil.cpu_count(logical=True)}")
    print(f"CPU 物理核心数: {psutil.cpu_count(logical=False)}")
    print("\n--- 内存信息 ---")
    mem = psutil.virtual_memory()
    print(f"总内存: {mem.total / (1024**3):.2f} GB")
    print(f"已用内存: {mem.used / (1024**3):.2f} GB")
    print(f"可用内存: {mem.available / (1024**3):.2f} GB")
    print(f"内存使用率: {mem.percent}%")
    print("\n--- 磁盘信息 ---")
    disk = psutil.disk_usage('/')
    print(f"总磁盘空间: {disk.total / (1024**3):.2f} GB")
    print(f"已用磁盘空间: {disk.used / (1024**3):.2f} GB")
    print(f"可用磁盘空间: {disk.free / (1024**3):.2f} GB")
    print(f"磁盘使用率: {disk.percent}%")
# --- 使用示例 ---
# 需要先安装库: pip install psutil
# get_system_info()
定时任务(提醒)
这个脚本可以在指定的时间点弹出一个提醒窗口,非常适合用来提醒自己休息、喝水或处理任务。
import time
from datetime import datetime
def set_reminder(message, target_time_str):
    """
    在指定时间显示提醒消息。
    :param message: 提醒内容
    :param target_time_str: 目标时间,格式 "HH:MM"
    """
    try:
        # 解析目标时间
        target_time = datetime.strptime(target_time_str, "%H:%M").time()
        now = datetime.now().time()
        # 如果目标时间已经过了,则设置为明天
        if target_time < now:
            print(f"目标时间 {target_time_str} 已过,将在明天提醒。")
            # 计算到明天同一秒的秒数
            now_dt = datetime.now()
            target_dt = datetime.combine(now_dt.date(), target_time)
            if target_dt < now_dt:
                target_dt = datetime.combine(now_dt.date() + timedelta(days=1), target_time)
            seconds_to_wait = (target_dt - now_dt).total_seconds()
        else:
            # 计算等待的秒数
            now_dt = datetime.now()
            target_dt = datetime.combine(now_dt.date(), target_time)
            seconds_to_wait = (target_dt - now_dt).total_seconds()
        print(f"提醒已设置,将在 {target_time_str} ({seconds_to_wait:.0f}秒后) 提醒您。")
        time.sleep(seconds_to_wait)
        print("\n" + "="*20)
        print(f"!!! 提醒 !!!")
        print(message)
        print("="*20 + "\n")
    except ValueError:
        print("错误:时间格式不正确,请使用 'HH:MM' 格式。")
    except Exception as e:
        print(f"发生错误: {e}")
# --- 使用示例 ---
# from datetime import timedelta # 需要导入这个库来处理天数
# set_reminder("起来活动一下,看看远处!", "15:30")
# set_reminder("喝水时间到!", "16:00")
数据处理与分析脚本
使用 pandas 库可以轻松处理表格数据。
CSV 文件简单处理
这个脚本可以读取一个 CSV 文件,进行简单的筛选和计算,并将结果保存到新的 CSV 文件中。
import pandas as pd
def process_csv(input_file, output_file, column_name, threshold):
    """
    读取CSV文件,筛选出某列大于阈值的行,并计算平均值。
    """
    try:
        # 读取CSV文件
        df = pd.read_csv(input_file)
        print(f"成功读取文件: {input_file}")
        print("原始数据前5行:")
        print(df.head())
        # 筛选数据
        filtered_df = df[df[column_name] > threshold]
        print(f"\n筛选后数据 ('{column_name}' > {threshold}):")
        print(filtered_df)
        # 计算平均值
        if not filtered_df.empty:
            average = filtered_df[column_name].mean()
            print(f"\n'{column_name}' 列的平均值: {average:.2f}")
        else:
            print("\n没有符合条件的数据。")
        # 保存结果到新文件
        filtered_df.to_csv(output_file, index=False)
        print(f"\n筛选后的数据已保存到: {output_file}")
    except FileNotFoundError:
        print(f"错误:文件 '{input_file}' 未找到。")
    except KeyError:
        print(f"错误:列名 '{column_name}' 在文件中不存在。")
    except Exception as e:
        print(f"处理文件时发生错误: {e}")
# --- 使用示例 ---
# 假设有一个名为 'sales_data.csv' 的文件,包含 'product', 'sales', 'region' 列
# create_dummy_csv('sales_data.csv') # 你可以自己创建一个测试文件
# process_csv('sales_data.csv', 'high_sales_data.csv', 'sales', 100)
如何运行这些脚本
-
安装必要的库: 大部分脚本只需要 Python 自带的库,如果使用了第三方库(如
requests,BeautifulSoup,psutil,pandas),你需要先安装它们,打开终端或命令提示符,运行:pip install requests beautifulsoup4 psutil pandas
-
保存代码: 将上面的代码复制并粘贴到一个文本文件中,将其保存为
.py后缀的文件,rename_files.py。 -
修改路径: 在脚本中找到类似
"/path/to/your/files"的地方,替换成你自己的实际路径。 -
运行脚本: 打开终端或命令提示符,使用
cd命令进入到你保存脚本的目录,然后运行:python rename_files.py
这些脚本只是冰山一角,但它们展示了 Python 在自动化任务中的强大能力,你可以基于这些模板,根据自己的具体需求进行修改和扩展。