Of course! Let's dive into "Python KindEditor".

First, it's important to clarify what "Python KindEditor" means. KindEditor is a pure JavaScript WYSIWYG (What You See Is What You Get) HTML editor. It is not a Python library itself.
However, when people search for "Python KindEditor," they are almost always looking for a way to integrate KindEditor into a Python web application, most commonly a Flask or Django project.
This guide will walk you through exactly how to do that. We'll cover:
- What KindEditor is and why you'd use it.
- How to set it up in a basic Python Flask project.
- How to handle the file uploads that KindEditor requires.
- A brief look at how to do it in Django as well.
What is KindEditor?
KindEditor is an open-source WYSIWYG rich text editor that runs in the browser. It allows users to format text, insert images, upload files, and create complex HTML content without needing to know HTML.

Key Features:
- WYSIWYG Editing: Intuitive toolbar for formatting text (bold, italic, lists), inserting links, images, tables, and more.
- Cross-Browser: Works well in all major modern browsers.
- File Management: A built-in file manager for uploading and managing images and other files.
- Customizable: You can easily configure its appearance and functionality.
Use Cases: Blog post creation, comment sections, content management systems (CMS), any place where you need users to input rich text.
Integrating KindEditor with Python Flask
This is the most common scenario. We'll create a simple Flask app with a form that includes the KindEditor.
Step 1: Project Setup
First, let's set up our project directory and a virtual environment.
# Create a project folder
mkdir flask_kindeditor
cd flask_kindeditor
# Create a virtual environment
python -m venv venv
# Activate the virtual environment
# On Windows:
venv\Scripts\activate
# On macOS/Linux:
source venv/bin/activate
# Install Flask
pip install Flask
Step 2: Download KindEditor
Go to the official KindEditor website and download the latest version. You can find it on their GitHub releases page or the official site.
- Download Link: http://kindeditor.net/down.php
- Unzip the downloaded file and copy the
kindeditor-x.x.xfolder into your project. For simplicity, rename it tokindeditor.
Your project structure should now look like this:
/flask_kindeditor
|-- /venv
|-- /kindeditor <-- KindEditor files
| |-- /plugins
| |-- /themes
| |-- kindeditor-all.js
| |-- ...
|-- app.py
|-- /static
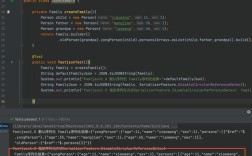
|-- /templatesStep 3: Create the Flask Application (app.py)
This file will contain our Python code. It will set up a simple web server with one page that contains our editor.
# app.py
from flask import Flask, render_template, request, jsonify
import os
from werkzeug.utils import secure_filename
app = Flask(__name__)
# Configuration for file uploads
UPLOAD_FOLDER = 'uploads'
ALLOWED_EXTENSIONS = {'png', 'jpg', 'jpeg', 'gif', 'txt', 'doc', 'docx'}
app.config['UPLOAD_FOLDER'] = UPLOAD_FOLDER
# Ensure the upload folder exists
os.makedirs(UPLOAD_FOLDER, exist_ok=True)
def allowed_file(filename):
    """Check if the file has an allowed extension."""
    return '.' in filename and \
           filename.rsplit('.', 1)[1].lower() in ALLOWED_EXTENSIONS
@app.route('/')
def index():
    """Renders the main page with the KindEditor."""
    return render_template('index.html')
@app.route('/upload_file', methods=['POST'])
def upload_file():
    """Handles file uploads from KindEditor."""
    # Check if the post request has the file part
    if 'file' not in request.files:
        return jsonify({"error": 1, "message": "No file part"}), 400
    file = request.files['file']
    # If user does not select file, browser submits an empty part without filename
    if file.filename == '':
        return jsonify({"error": 1, "message": "No selected file"}), 400
    if file and allowed_file(file.filename):
        filename = secure_filename(file.filename)
        # Save the file to the upload folder
        save_path = os.path.join(app.config['UPLOAD_FOLDER'], filename)
        file.save(save_path)
        # KindEditor expects a JSON response with a URL to the uploaded file
        # We use url_for to generate the URL for the file
        file_url = url_for('static', filename='uploads/' + filename)
        return jsonify({
            "error": 0,
            "url": file_url
        })
    else:
        return jsonify({"error": 1, "message": "File type not allowed"}), 400
if __name__ == '__main__':
    app.run(debug=True)
Explanation of app.py:
- We set up a Flask app.
- We define an
UPLOAD_FOLDERto store uploaded files and a list ofALLOWED_EXTENSIONS. - The
index()route simply renders our HTML template. - The
/upload_fileroute is the crucial part. It's the endpoint that KindEditor will call to upload files. It:- Checks if a file was sent.
- Validates the file extension.
- Saves the file securely using
secure_filename. - Returns a JSON response that KindEditor understands. This response must include the
urlof the uploaded file.
Step 4: Create the HTML Template (templates/index.html)
Now, let's create the HTML file that will contain the editor.
<!-- templates/index.html -->
<!DOCTYPE html>
<html lang="en">
<head>
    <meta charset="UTF-8">Python Flask + KindEditor Demo</title>
    <!-- Include KindEditor CSS -->
    <link rel="stylesheet" href="{{ url_for('static', filename='kindeditor/themes/default/default.css') }}">
    <style>
        body { font-family: sans-serif; padding: 20px; }
        textarea { width: 100%; height: 400px; font-size: 14px; line-height: 1.5; }
    </style>
</head>
<body>
    <h1>KindEditor in Flask</h1>
    <form action="/submit" method="post">
        <textarea name="content" id="editor_id"></textarea>
        <br><br>
        <input type="submit" value="Submit Content">
    </form>
    <!-- Include jQuery (KindEditor depends on it) -->
    <script src="{{ url_for('static', filename='kindeditor/kindeditor-all.js') }}"></script>
    <script>
        // Initialize KindEditor
        KindEditor.create('#editor_id', {
            // The URL where files will be uploaded
            uploadJson: '/upload_file',
            // Additional configuration options
            allowFileManager: true,  // Enable the file manager dialog
            width: '100%',
            height: '400px',
            // You can add more options here, see the KindEditor documentation
        });
    </script>
</body>
</html>
Explanation of index.html:
- We include the KindEditor CSS and JavaScript files using Flask's
url_forhelper, which is the best practice. - We create a standard
<textarea>. KindEditor will replace this element with its editor interface. - The JavaScript code
KindEditor.create('#editor_id', {...})initializes the editor.uploadJson: '/upload_file'is the most important setting. It tells KindEditor where to send files when the user clicks the "upload image" button.allowFileManager: trueenables the file manager, which lets users browse and manage previously uploaded files.
Step 5: Run the Application
Make sure your virtual environment is still active. Then, run the app from your terminal:
flask run
# or
python app.py
Open your browser and go to http://127.0.0.1:5000. You should see the KindEditor interface. You can type in it, and when you click the image icon, it will open a dialog that allows you to upload files to your uploads folder.
Handling Image and File Browsing
The allowFileManager: true option is great, but KindEditor needs a way to list the files already in your upload directory. You need to create another endpoint for this.
Add this function to your app.py:
# Add this to app.py
@app.route('/file_manager/json', methods=['GET'])
def file_manager():
    """Lists files in the upload directory for the KindEditor file manager."""
    path = request.args.get('path', '')
    # For security, it's best to restrict the path to the upload folder
    if path and '..' in path:
        return jsonify({"error": 1, "message": "Invalid path"}), 400
    full_path = os.path.join(app.config['UPLOAD_FOLDER'], path.lstrip('/'))
    items = []
    try:
        for name in os.listdir(full_path):
            full_item_path = os.path.join(full_path, name)
            is_dir = os.path.isdir(full_item_path)
            item = {
                "is_dir": is_dir,
                "has_file": True, # KindEditor expects this
                "filename": name,
                "filesize": 0,
                "datetime": ""
            }
            if not is_dir:
                stat = os.stat(full_item_path)
                item["filesize"] = stat.st_size
                item["datetime"] = datetime.datetime.fromtimestamp(stat.st_mtime).strftime('%Y-%m-%d %H:%M:%S')
            items.append(item)
    except FileNotFoundError:
        return jsonify({"error": 1, "message": "Directory not found"}), 400
    # Sort items: directories first, then files
    items.sort(key=lambda x: (not x['is_dir'], x['filename'].lower()))
    return jsonify({
        "error": 0,
        "current_url": url_for('static', filename='uploads/' + path),
        "current_dir_path": path,
        "moveup_dir_path": os.path.dirname(path),
        "list": items
    })
Then, update your index.html to point to this new endpoint:
// In index.html, inside the KindEditor.create() call
KindEditor.create('#editor_id', {
    uploadJson: '/upload_file',
    fileManagerJson: '/file_manager/json', // <--- ADD THIS LINE
    allowFileManager: true,
    width: '100%',
    height: '400px',
});
Now, when you open the file manager in KindEditor, it will correctly list the files from your uploads directory.
A Note on Django
The integration in Django is very similar in concept but uses Django's specific conventions.
- Static Files: Place the
kindeditorfolder in your project'sstaticdirectory (e.g.,myproject/static/kindeditor/). - Templates: In your Django template (
your_template.html), include the JS/CSS the same way as in Flask. - Views:
- Create a view function (e.g., in
views.py) that handles the upload. It will userequest.FILESanddjango.core.files.storage.default_storageto save the file. - Create another view to list files for the file manager, using
os.listdiron your media file directory.
- Create a view function (e.g., in
- URLs:
- Add URL patterns in
urls.pythat point to your upload and file manager views (e.g.,path('upload/', views.upload_file, name='upload_file')).
- Add URL patterns in
- Settings:
- Make sure
django.contrib.staticfilesanddjango.core.files.storageare configured. - Set
MEDIA_URLandMEDIA_ROOTin yoursettings.pyif you are serving user-uploaded media.
- Make sure
The core logic is identical: provide a URL for KindEditor to POST files to, and return a JSON response with the file's URL.
Conclusion
You can't "install" KindEditor like a Python library. Instead, you integrate it into your Python web framework by:
- Downloading the KindEditor JavaScript/CSS files.
- Including them in your HTML templates.
- Creating a server-side endpoint (a Flask route or Django view) to handle file uploads.
- Configuring KindEditor with the URL of that endpoint.
This setup gives you a powerful, feature-rich rich text editor in your Python application.