Of course! Here is a comprehensive guide to setting up and using Java on Windows, tailored for everyone from complete beginners to experienced developers.

We'll cover:
- What is Java? (A quick refresher)
- Step 1: Downloading and Installing Java
- Step 2: Verifying the Installation
- Step 3: Setting Up Your Development Environment (The "Hello, World!" Project)
- Step 4: Compiling and Running Your Code from the Command Line
- Using an IDE (Integrated Development Environment)
- Managing Multiple Java Versions (Advanced)
- Troubleshooting Common Issues
What is Java?
Java is a popular, class-based, object-oriented programming language designed to have as few implementation dependencies as possible. It's known for its "write once, run anywhere" (WORA) philosophy, thanks to the Java Virtual Machine (JVM).
- JDK (Java Development Kit): This is what you need to develop Java applications. It includes the Java compiler (
javac), the Java runtime environment (JRE), and other tools. - JRE (Java Runtime Environment): This is what you need only to run Java applications. It includes the JVM and core libraries. You don't need this if you install the JDK.
- JVM (Java Virtual Machine): This is the engine that actually runs your Java code. It translates compiled Java bytecode into machine code that your computer can execute.
For our purposes, we will download and install the JDK.
Step 1: Downloading and Installing Java
The most common and recommended version for new projects is LTS (Long-Term Support). As of late 2025/early 2025, the latest LTS versions are Java 21 and Java 17.

A. Download the JDK
-
Go to the official Oracle Java SE Development Kit download page: https://www.oracle.com/java/technologies/downloads/
-
You will see a list of Java versions. Click on the download link for the latest LTS version (e.g., Java 21 or Java 17).
-
You will be asked to accept the Oracle Technology Network License Agreement. Check the box and click "Download".
-
The page will show you different installation packages. For Windows, you want the .msi installer. It will be labeled something like:
 (图片来源网络,侵删)
Windows x64 Installer(for 64-bit systems)Windows x86 Installer(for 32-bit systems, less common today)
How to check if your system is 64-bit:
- Press the Windows Key, type
This PC, and press Enter. - Right-click on
This PCand selectProperties. - Look for "System type". It will say "64-bit Operating System" or "32-bit Operating System".
-
Click the download link for the correct
.msifile. Your browser will prompt you to save the file.
B. Install the JDK
-
Find the downloaded
.msifile (e.g.,jdk-21_windows-x64.msi) in yourDownloadsfolder and double-click it to run the installer. -
The Windows Installer will guide you through the process.
- Click Next.
- You can change the installation directory if you wish, but the default is fine for most users.
- Click Next, then Install.
-
The installer will run for a minute or two. When it's done, click Close.
Step 2: Verifying the Installation
Now, let's make sure Windows can find Java. This is done by checking the system's PATH environment variable.
A. Check the PATH Variable
-
Press the Windows Key, type
env, and select "Edit the system environment variables". -
In the System Properties window, click the "Environment Variables..." button.
-
In the new window, look at the "System variables" section at the bottom.
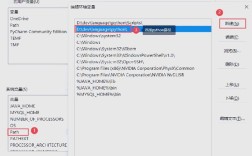
- Find the variable named
Pathand select it, then click "Edit...".
- Find the variable named
-
You should see a list of paths. The Java installer usually adds the JDK's
bindirectory for you. Look for entries that include:C:\Program Files\Java\jdk-21\bin(or a similar path with your version number)
If you see these paths, you're good to go! If not, you need to add them.
- Click "New".
- Paste the path to your JDK's
bindirectory. For example:C:\Program Files\Java\jdk-21\bin. - Click OK on all the windows to save your changes.
B. Verify from the Command Line
-
Open a new Command Prompt or PowerShell. (Closing and reopening is important, as it loads the new environment variables).
-
Type the following commands and press Enter after each:
java -version
This should print the Java version you installed.
java version "21.0.1" 2025-10-17
Java(TM) SE Runtime Environment (build 21.0.1+12-LTS-29)
Java HotSpot(TM) 64-Bit Server VM (build 21.0.1+12-LTS-29, mixed mode, sharing)
javac -version
This should print the compiler version. It should match the Java version.
javac 21.0.1
If both commands work, your Java installation is successful!
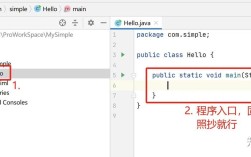
Step 3: Setting Up Your First Project ("Hello, World!")
Let's create a simple project to see everything in action.
-
Create a Project Folder: Open File Explorer and create a main folder for your projects, for example,
C:\java_projects. Inside it, create a new folder for this project, e.g.,hello-world. -
Create the Java File:
- Navigate to your
C:\java_projects\hello-worldfolder. - Right-click in an empty space, select New > Text Document.
- Rename the file to
HelloWorld.java. Important: Make sure the.txtextension is gone. If you don't see extensions, enable them in File Explorer's "View" tab.
- Navigate to your
-
Write the Code:
- Right-click
HelloWorld.javaand choose Edit or Open with > Notepad (or a better code editor like VS Code). - Paste the following code into the file:
// HelloWorld.java
public class HelloWorld {
    public static void main(String[] args) {
        System.out.println("Hello, World!");
    }
}
Save the file and close the editor.
- Right-click
Step 4: Compiling and Running from the Command Line
This is the fundamental process of building and running a Java program.
-
Open Command Prompt in Your Project Folder:
- Press the Windows Key, type
cmd, and open Command Prompt. - You need to tell the command prompt to work inside your project folder. Use the
cd(change directory) command:cd C:\java_projects\hello-world
(If your username is in the path, you might need to use quotes:
cd "C:\Users\YourName\java_projects\hello-world")
- Press the Windows Key, type
-
Compile the Code:
- The Java compiler (
javac) reads your.javasource file and produces a.classfile (bytecode). - In the command prompt, type:
javac HelloWorld.java
- If it works, you won't see any messages, but a new file named
HelloWorld.classwill appear in your folder.
- The Java compiler (
-
Run the Program:
- The Java runtime (
java) reads the.classfile and executes it. - In the command prompt, type:
java HelloWorld
- Important Note: Notice you do not include the
.classextension when running the program. You are telling thejavacommand which class to run, not which file to execute.
You should see the output:
Hello, World! - The Java runtime (
Using an IDE (Integrated Development Environment)
While the command line is great for learning, professional developers use an IDE. An IDE provides a graphical interface with a code editor, debugger, and build tools all in one place.
Highly Recommended IDEs for Java on Windows:
- Visual Studio Code (Free): A lightweight, powerful, and popular editor. You'll need to install the "Extension Pack for Java" from Microsoft.
- IntelliJ IDEA (Free & Paid): Considered the gold standard for Java development. The "Community Edition" is free and more than enough for most projects.
- Eclipse IDE (Free): A long-standing, open-source favorite, especially in enterprise environments.
Using an IDE simplifies the process immensely. You typically just create a "New Project," select "Java Application," and the IDE handles creating the folder structure, compiling, and running for you with a single click.
Managing Multiple Java Versions (Advanced)
Sometimes you need to work on projects that require different Java versions (e.g., Java 8 for an old project and Java 21 for a new one). The best tool for this is SDKMAN!.
-
Install SDKMAN!: Open a new Command Prompt and run:
curl -s "https://get.sdkman.io" | bash
Follow the on-screen instructions. It will ask you to open a new terminal window.
-
Install Java Versions: In your new terminal, you can now easily install and switch between versions.
# Install Java 17 (LTS)
sdk install java 17.0.9-tem
# Install Java 21 (LTS)
sdk install java 21.0.1-tem
# List installed Java versions
sdk list java
# Switch the default Java version for the current terminal session
sdk use java 17.0.9-tem
# Set Java 17 as the default for all new terminals
sdk default java 17.0.9-tem
This gives you incredible flexibility without manually changing system environment variables.
Troubleshooting Common Issues
-
'javac' is not recognized as an internal or external command...- Cause: The JDK's
bindirectory is not in your system'sPATHvariable. - Solution: Go back to Step 3A and carefully add the
bindirectory path to yourPATHvariable. Remember to close and reopen your Command Prompt after making changes.
- Cause: The JDK's
-
Error: Could not find or load main class HelloWorld- Cause 1: You are in the wrong directory in the command prompt. Make sure you are in
C:\java_projects\hello-world. - Cause 2: You typed
java HelloWorld.classby mistake. Remember to omit the.class. - Cause 3: Your class is part of a package. For this simple example, this is not the case.
- Cause 1: You are in the wrong directory in the command prompt. Make sure you are in
-
I see an error about a file being in use during installation.
- Cause: Another application (like another command prompt or a virus scanner) is using a file that the installer needs to update.
- Solution: Close all other applications and try the installation again. Disable your antivirus temporarily as a last resort.