- 环境准备: 安装必要的软件(Python, Jenkins, Git)。
- 项目结构: 创建一个标准的 Python 测试项目。
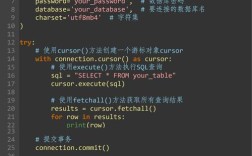
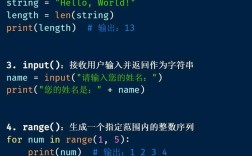
- 编写测试: 使用
pytest框架编写测试用例。 - 配置 Jenkins: 创建 Jenkins 任务,配置代码检出、虚拟环境、测试执行和报告生成。
- 运行与验证: 触发构建,查看结果。
第 1 步:环境准备
在开始之前,确保你的机器上安装了以下软件:
- Python: 推荐使用 Python 3.6+。
- Git: 用于从代码仓库(如 GitHub, GitLab)拉取代码。
- Jenkins: 下载并安装 Jenkins,安装完成后,访问
http://localhost:8080,根据提示完成初始设置。 - Jenkins 插件: 在 Jenkins 管理界面(
Manage Jenkins->Manage Plugins)中,确保已安装以下插件:- Git Plugin: 用于从 Git 仓库拉取代码。
- Pipeline Plugin: 用于编写 Jenkinsfile(推荐方式)。
- HTML Publisher Plugin: 用于发布测试报告。
第 2 步:创建 Python 测试项目
我们创建一个简单的 Python 项目来演示,这个项目包含一个简单的计算模块和对应的测试。
项目结构
/my-python-project
├── src/
│   └── calculator.py
├── tests/
│   ├── __init__.py
│   └── test_calculator.py
├── requirements.txt
└── Jenkinsfile
src/calculator.py (被测试的代码)
# src/calculator.py
class Calculator:
    def add(self, a, b):
        return a + b
    def subtract(self, a, b):
        return a - b
    def multiply(self, a, b):
        return a * b
    def divide(self, a, b):
        if b == 0:
            raise ValueError("Cannot divide by zero")
        return a / b
tests/test_calculator.py (测试用例)
我们使用 pytest 框架,它简洁且功能强大。
# tests/test_calculator.py
import pytest
from src.calculator import Calculator
@pytest.fixture
def calculator():
    """Fixture to provide a Calculator instance for all tests."""
    return Calculator()
def test_add(calculator):
    assert calculator.add(1, 2) == 3
    assert calculator.add(-1, 5) == 4
def test_subtract(calculator):
    assert calculator.subtract(5, 3) == 2
    assert calculator.subtract(0, 1) == -1
def test_multiply(calculator):
    assert calculator.multiply(3, 4) == 12
    assert calculator.multiply(-2, 5) == -10
def test_divide(calculator):
    assert calculator.divide(10, 2) == 5
    assert calculator.divide(9, 3) == 3
def test_divide_by_zero(calculator):
    """Test that division by zero raises a ValueError."""
    with pytest.raises(ValueError):
        calculator.divide(5, 0)
requirements.txt (项目依赖)
# requirements.txt
pytest
pytest-html  # 用于生成 HTML 测试报告
将代码推送到 Git 仓库
将整个 my-python-project 目录推送到你的 GitHub 或 GitLab 仓库,创建一个 my-python-repo 仓库。
第 3 步:配置 Jenkins Pipeline
这是核心步骤,我们将使用 Jenkinsfile 来定义整个 CI/CD 流程,这种方式可以版本化你的 CI/CD 配置。
Jenkinsfile
在你的项目根目录创建 Jenkinsfile如下:
// Jenkinsfile
pipeline {
    agent any // 可以在任意可用的 Jenkins agent 上运行
    // 定义环境变量,方便复用
    environment {
        // Python 版本,如果你的 Jenkins 有多个 Python,可以这样指定
        // PYTHON = 'python3.9'
        PYTHON = 'python'
        // 虚拟环境路径
        VENV = 'venv'
    }
    stages {
        stage('Checkout') {
            steps {
                // 从 SCM (Source Control Management) 检出代码
                // 'your-repo-url' 替换成你的 Git 仓库地址
                // 'your-branch-name' 替换成你的分支,'main' 或 'master'
                checkout scm
            }
        }
        stage('Setup Virtual Environment') {
            steps {
                sh '''
                    # 创建虚拟环境
                    ${PYTHON} -m venv ${VENV}
                    # 激活虚拟环境
                    source ${VENV}/bin/activate
                    # 升级 pip
                    pip install --upgrade pip
                    # 安装项目依赖
                    pip install -r requirements.txt
                '''
            }
        }
        stage('Run Tests') {
            steps {
                sh '''
                    # 确保虚拟环境已激活
                    source ${VENV}/bin/activate
                    # 使用 pytest 运行测试,并生成 HTML 报告
                    # --junitxml 是为了和 JUnit 插件集成,--html 是为了生成可读的报告
                    pytest --junitxml=reports/junit.xml --html=reports/report.html --self-contained-html
                '''
            }
        }
    }
    post {
        // 无论成功还是失败都执行
        always {
            // 发布 HTML 测试报告
            publishHTML([
                allowMissing: false, // 如果报告文件不存在,是否允许构建成功
                alwaysLinkToLastBuild: true, // 是否总是链接到最新的构建
                keepAll: true, // 是否保留所有报告
                reportDir: 'reports', // 报告所在的目录
                reportFiles: 'report.html', // 报告文件名
                reportName: 'Pytest HTML Report' // 在 Jenkins UI 中显示的报告名称
            ])
        }
        // 成功时执行
        success {
            echo 'Pipeline succeeded! All tests passed.'
        }
        // 失败时执行
        failure {
            echo 'Pipeline failed! Some tests did not pass.'
        }
        // 清理工作空间
        cleanup {
            echo 'Cleaning up workspace...'
            // deleteDir() 会删除整个工作目录,谨慎使用
            // sh 'rm -rf venv'  // 也可以选择只删除虚拟环境
        }
    }
}
第 4 步:在 Jenkins 中创建任务
-
创建新任务:
- 登录 Jenkins,点击 "New Item"。
- 输入任务名称(
python-test-pipeline)。 - 选择 "Pipeline" 类型,然后点击 "OK"。
-
配置任务:
- General Tab:
- Project Repository: 勾选 "GitHub" 或 "Git"。
- Repository URL: 输入你的 Git 仓库地址。
- Credentials: 添加你的 Git 凭据(如果需要)。
- Branch Specifier: 选择你想要构建的分支,
*/main。
- Build Triggers Tab:
可以选择 "Poll SCM" 定期检查代码更新,或者 "GitHub hook trigger for GITScm polling" 在代码推送时触发构建。
- Pipeline Tab:
- Definition: 选择 "Pipeline script from SCM"。
- SCM: 选择 "Git"。
- Repository URL: 再次填写你的 Git 仓库地址。
- Script Path: 确认是
Jenkinsfile(这是默认值)。 - Branch Specifier: 再次选择你的分支。
- General Tab:
-
保存: 点击 "Save" 保存配置。
第 5 步:运行与验证
-
手动触发构建:
在你的任务页面,点击 "Build Now"。
-
查看控制台输出:
- 构建开始后,点击左侧的 "Console Output"。
- 你会看到 Jenkins 一步步执行
Jenkinsfile中的命令:Checkout: 从 Git 拉取代码。Setup Virtual Environment: 创建并激活 Python 虚拟环境,安装依赖。Run Tests: 运行pytest,你会看到每个测试用例的执行结果。post阶段的步骤:发布报告、打印成功/失败信息。
-
查看测试报告:
- 构建完成后,回到任务主页。
- 在左侧导航栏,你会看到一个名为 "Pytest HTML Report" 的新链接。
- 点击它,你就可以看到一个漂亮的、交互式的 HTML 测试报告,其中详细列出了每个测试用例的通过/失败状态、耗时和错误信息。
高级与优化
- 代码质量检查: 你可以在
Run Tests阶段加入flake8或black等工具来检查代码风格和质量。// 在 requirements.txt 中添加 flake8 // 在 Run Tests 阶段添加 sh 'flake8 src/ tests/'
- 构建 Docker 镜像: 为了确保环境一致性,你可以将整个项目打包成一个 Docker 镜像,然后在 Jenkins Pipeline 中运行这个容器。
agent { docker 'python:3.9-slim' }可以实现这一点。 - 参数化构建: 你可以让用户在触发构建时选择 Python 版本或分支。
- 通知集成: 使用 Jenkins 的 Email 插件或 Slack/Teams 集成,在构建成功或失败时发送通知。
通过以上步骤,你就已经成功搭建了一个完整的 Jenkins 流程,用于自动化 Python 项目的测试,这个流程可以轻松地扩展到更复杂的项目和更多的自动化步骤中。